
Automotive tools and jack
The locations of the tools and the jack are shown in the figure.
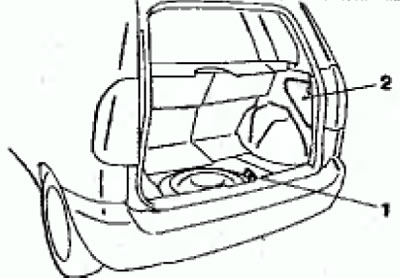
1. Onboard tool kit; 2. Car jack
Onboard tool kit
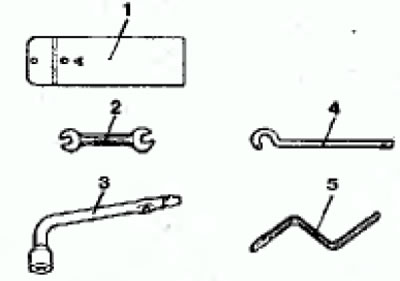
1. Tool bag; 2. open end wrench; 3. Wheel wrench; 4. Extension cord; 5 Emergency sunroof key
Car jack
1. Removing the jack
Open the lid of the instrument storage box.
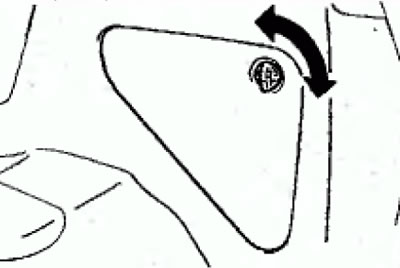
Turning the wing nut, fold the jack a little and remove it from the holder (A)
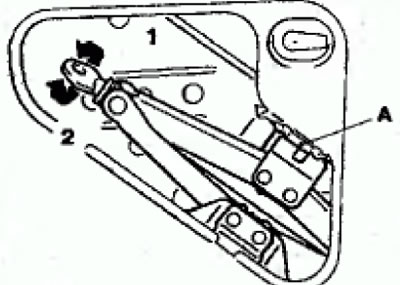
2. Laying the jack
Place the jack in the holder and, turning the wing nut, open the jack a little, as a result of which it should be securely fixed in the holder
Vehicle lifting
1. Stop the vehicle in a safe place on a firm and level surface.
2. Turn on the hazard warning lights and turn the key in the ignition switch to the LOCK position.
3. Apply the parking brake and place the shift lever in neutral.
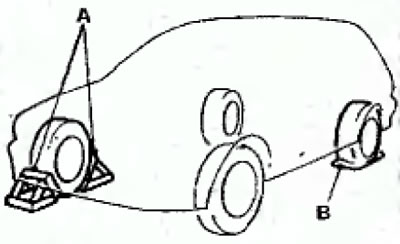
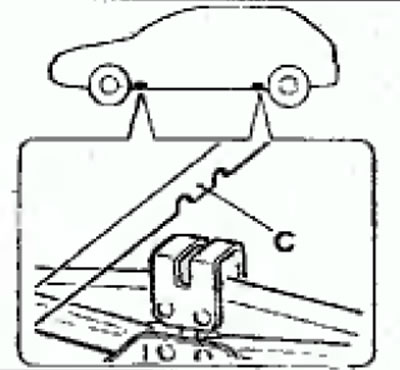
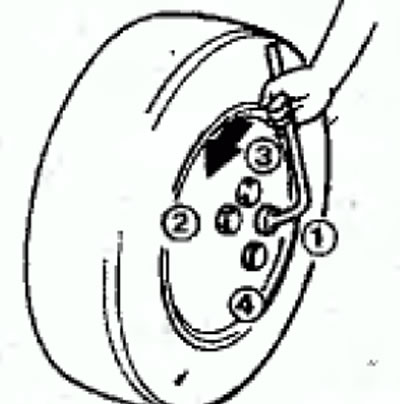
4. Stops (IN) block the wheel of the vehicle diagonally opposite the wheel to be changed (A), in a certain sequence, loosen the wheel nuts by unscrewing each of them by one turn.
5. Put the jack in place (WITH), designed for jacking as close as possible to the wheel to be replaced.
Warning. Install the jack only in the place designated for it. Never use another place as a support for the jack.
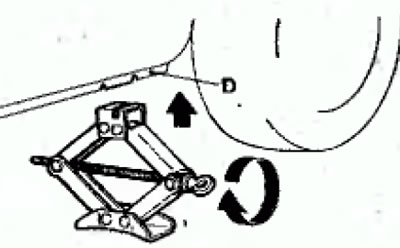
6. Rotate the jack handle by hand until the top platform of the jack touches the sill flanging (D) car.
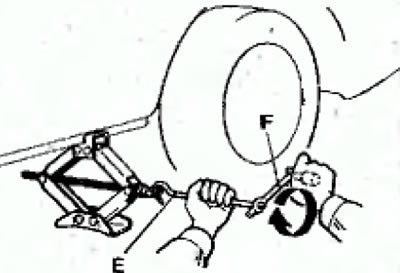
7. Insert the jack handle (E) into the jack and turn it clockwise, thus raising the car until there is a gap of about 30 mm between the tire and the ground. Before completely loosening the wheel nuts, make sure that the vehicle is stable and that it cannot be stalled or moved.
Warnings
(1) To reduce the risk of injury when changing a wheel, do not climb under the vehicle. When the vehicle is jacked up, do not start the engine. The jack is designed to lift the vehicle only when changing a wheel.
(2) Do not jack up the vehicle on sloping or slippery surfaces.
Spare wheel
The spare wheel is located under the floor mat in the luggage compartment.
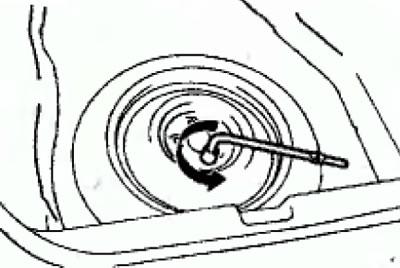
Loosen the wheel bolt and remove the spare wheel.
Compact spare wheel
The car is equipped with a compact spare wheel, which takes up less space. Since the compact spare tire is lighter than the standard wheel, it is easier to install in place of a damaged wheel.
Warning
(1) After installing the spare wheel, check the air pressure in the wheel tire, which should be 4.2 bar.
(2) After installing the compact spare wheel, you can drive at a maximum speed of 60 km/h.
(3) This compact spare tire is designed to be fitted to your vehicle only and should not be fitted to other vehicles.
Hub cap
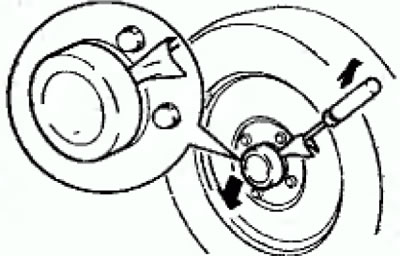
Using a flat blade screwdriver wrapped in cloth, remove the cap from the wheel hub.
When installing the cap, attach it to the hub and fix it in the hub with a blow of your hand.
Decorative wheel cap
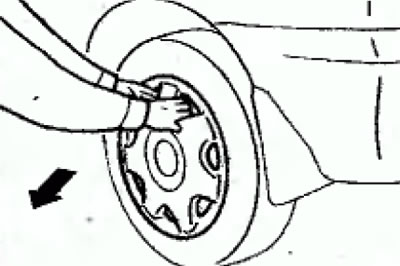
Grasp one spoke of the hubcap with both hands and pull sharply to remove it from the wheel.
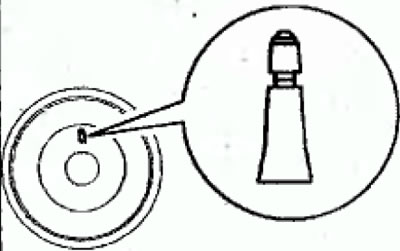
When installing the cap, align the hole in the cap with the nipple, attach it to the wheel disk and, tapping the cap perimeter with your hand, fasten it to the disk.
Replacing a wheel with a puncture
If the tire is damaged while driving, do not use the hard braking mode, but gradually reduce the speed. Hold the steering wheel firmly and stop the vehicle in a safe place on a firm and level surface.
- (1) Turn on the hazard warning lights. Make sure all passengers have left the car and moved to a safe place.
- (2) Apply the parking brake. stops (IN) block the wheel of the vehicle diagonally opposite the wheel to be changed (A).
- (3) Get your spare tire, car jack and wheel wrench ready
Note. Place the spare wheel under the vehicle near the car jack. This reduces the chance of injury and damage to the vehicle if it suddenly slips off the jack.
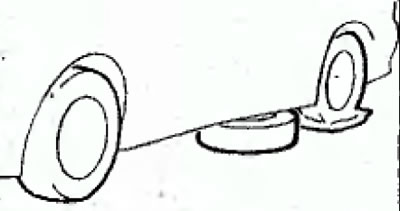
- (4) Remove the wheel trim in a certain sequence, loosen the wheel nuts by unscrewing each of them one turn.
- (5) Set the jack in place (WITH), designed for jacking as close as possible to the wheel to be replaced. Insert jack handle (E) into the jack and turn it clockwise, thus raising the car until there is a gap of about 30 mm between the tire and the ground.
- (6) Loosen the nuts and remove the wheel.
- (7) Install the spare wheel on the studs and tighten the wheel nuts by hand. Install the nuts with the tapered edge facing inward. Do not tighten the nuts to the required torque until the vehicle is lowered onto its wheels.
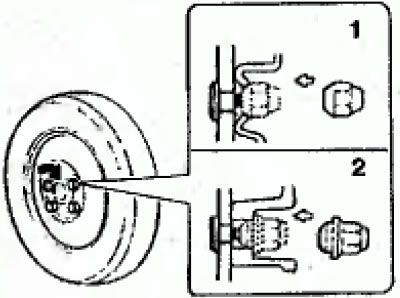
Warning. Do not lubricate wheel nuts.
- (8) Slowly lower the car and tighten the wheel nuts in a certain sequence in 2-3 passes to a torque of 100-115 Nm.
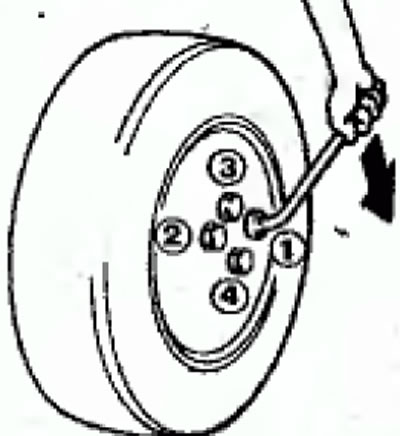
- (9) Lower the car jack. Return the jack and tools to their storage location. Secure the flat tire in place of the spare tire.
- (10) Check and adjust tire pressure.