
English Русский
Български
Беларускі
Український
Српски
Hrvatski
Română
Polski
Slovenský
Magyar
Articles Bookmark Contacts Sitemap   
Company Audi Company Ford Company Hyundai Company Kia Company Mazda Company Mercedes-Benz Company Nissan
MitsubishiMan.ru


Home Colt Lancer Galant L200 Outlander Pajero Others
Galant 6 and 7 (1987-1998) Galant 5 (1983-1989, petrol)

Parking brake — adjustment (Mitsubishi Galant 5)

  • Home
  • Galant
  • 5 (1983-1989, petrol)
  • Chassis and running gear
  • Brake system
  • Parking brake — adjustment
0
1. Pull the parking brake lever up as far as it will go, counting the clicks as you pull the lever. The lever should move five to seven clicks. If the lever can be pulled up any further, the parking brake may not hold the vehicle on an incline. If the lever travel is less than the specification, the automatic rear brake adjusters may be faulty. If the lever travel is more than five to seven clicks, adjust the parking brake as described below.

2. Remove the center panel (see Chapter 11).

3. Turn the equalizer adjusting nut(s) until the desired stroke is obtained. Tighten the nut(s) evenly to avoid overtightening one cable and slackening the other.
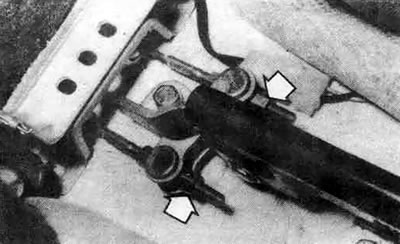


13.3a. On some models the parking brake adjusting nuts are located under the center console, when making adjustments turn each nut (shown by arrows) the same amount to obtain the required stroke (Precis model shown)
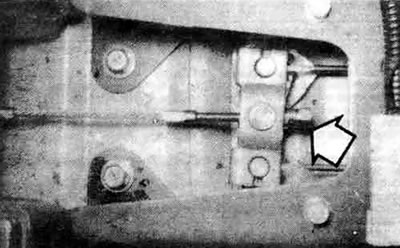


13.3b. On other models, the parking brake cables are adjusted with a single nut. Turn the nut to obtain the desired play (Galant model shown)


4. If necessary, adjust the parking brake indicator switch so that the indicator lamp goes out when the parking brake is fully released. To adjust the switch, loosen the switch mounting screw (just in front of the toothed sector of the lever), then move the switch up or down, bending the tab if necessary. After completing the adjustment, tighten the screw securely.
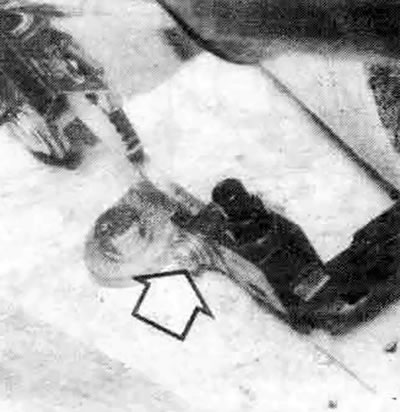


13.4a. On some models, to adjust the parking brake light switch, loosen the mounting screw (arrow), then with the lever released, move the switch so that it is off, tighten the mounting screw (Precis model shown)


(The source of the article is available at: «MITSUBISHIMAN.ru»)
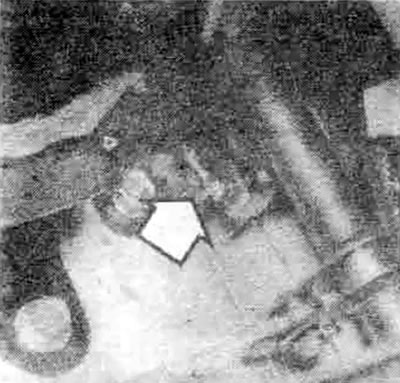


13.4b. On other models, to adjust the parking brake light switch, bend the tab on the switch (arrow) (Galant model shown)


5. Raise the rear of the vehicle and turn the wheels to ensure that the brakes do not bind when driving.
This article is available at: russian, bulgarian, belarusian, ukrainian, serbian, croatian, romanian, polish, slovak, hungarian
This article was reviewed by: Vladimir Glazunov
Share with friends:
◀ Previous
Galant 5: Brake system
Next ▶

Brake booster — inspection, removal and installation
Hydraulic brake system — bleeding
Brake Hoses and Tubes — Inspection and Replacement
Brake force regulator — removal and installation
Master Brake Cylinder — Removal, Overhaul and Installation
Parking Brake Cables — Replacement
Similar materials for other Mitsubishi models

➤ Parking brake — adjustment Mitsubishi Colt 4 and 5 (1991-2003)
➤ Parking brake lever Mitsubishi Lancer 9 (2000-2007, petrol)
➤ Parking (hand) brake Mitsubishi L200 4 (2005-2014, diesel)
➤ Parking brake specifications Mitsubishi Outlander 1 (2003-2008)
➤ Parking brake Mitsubishi Pajero 1 and 2 (1982-1999)
➤ Checking the Parking Brake Indicator Light Switch Mitsubishi Carisma (1995-2004)
Link in different formats to this article
Comments and feedback from visitors
No comments yet


Add up two numbers 28 + 27


Galant 6 and 7 (1987-1998) 
  • General information
  • Introduction to guide
  • User manual
  • Driving and operation
  • Maintenance
  • Power unit
  • Dismantling the engine
  • Engine overhaul
  • Cooling and heating
  • Power and exhaust systems
  • Engine electrical equipment
  • Engine management systems
  • Transmission
  • Mechanical gearbox
  • Automatic gearbox
  • Clutch
  • Drive shafts and transfer case
  • Chassis and running gear
  • Brake system
  • Car suspension
  • Steering
  • Body and interior
  • Exterior (external elements)
  • Interior (internal elements)
  • Doors, locks and windows
  • Electrical equipment
  • Equipment and devices
  • Wiring diagrams Galant
  • Wiring diagrams Mirage
  • Wiring diagrams Diamante
Galant 5 (1983-1989, petrol) 
  • General information
  • Troubleshooting
  • Maintenance
  • Power unit
  • Engine repair
  • Engine overhaul
  • Cooling and heating
  • Fuel and exhaust system
  • Engine electrical equipment
  • Reducing exhaust toxicity
  • Transmission
  • Manual gearbox
  • Automatic gearbox
  • Clutch and drive shafts
  • Chassis and running gear
  • Brake system
  • Car suspension
  • Steering
  • Body and interior
  • Exterior (external elements)
  • Interior (internal elements)
  • Doors, locks and windows
  • Electrical equipment
  • Equipment and devices
  • Electrical diagrams
MitsubishiMan.ru © 2018–2026 • Mobile version • Articles about Mitsubishi • Contacts • Sitemap: EN BG BY UA RS HR RO PL SK HU • Site search • Bookmark
Colt 2 and 3 (1983-1993) · Colt 4 and 5 (1991-2003) · Colt 5 (1995-2003) · Lancer 3 and 5 (1984-1992) · Lancer 9 (2000-2007) · Galant 5 (1983-1989) · Galant 6 and 7 (1987-1998) · L200 4 (2005-2014) · Outlander 1 (2003-2008) · Pajero 1 and 2 (1982-1999) · Pajero 4 (2006-2021) · Carisma (1995-2004) · Space Star (1998-2005) ·
This resource sets cookies 🍪 to avoid bothering you with repeated data entry.