



Contents: Removal ⤓ Installation ⤓
Removal
Loosen the wheel nuts on both front wheels while they are on the ground.
Mark the position of the wheel disk on the wheel hub with paint. This ensures that the balanced wheel can be reinstalled in its original position.
Raise the front of the car, see item 29.
Remove the wheel.
Support the front suspension wishbone so that the drive shaft does not sag after the front strut is removed. To do this, place a suitable stand or hydraulic jack under the wishbone. Additionally, connect the steering knuckle to the body with wire to prevent the brake hose or wheel speed sensor cable from being pulled by the weight of the steering knuckle.
Disconnect the front brake pipe bracket.
Caution: Do not open the pipe, otherwise you will have to bleed the air from the brake system after installation.
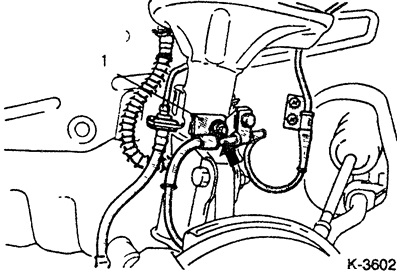
1 - Front wheel speed sensor mounting bracket
If present, disconnect the front wheel speed sensor clamps. Do not pull on the cable.
Loosen the nuts of the lower front strut mount and remove the bolts.
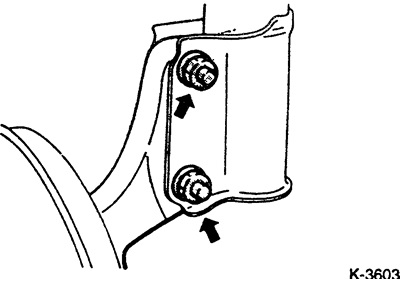
Caution: Do not allow the wishbone and steering knuckle to fall.
Cars produced from 9.88 to 3.92
Loosen both mounting nuts at the top of the front pillar and pull out the front pillar as a set. When doing this, pay attention to the fact that the rubber cuffs of the drive shaft are not damaged by the removed front pillar. If necessary, wrap the cuffs with a rag for protection.
Caution: Do not loosen the middle nut of the front strut under any circumstances, as the spring is heavily compressed!
Cars produced from 1.84 to 8.88
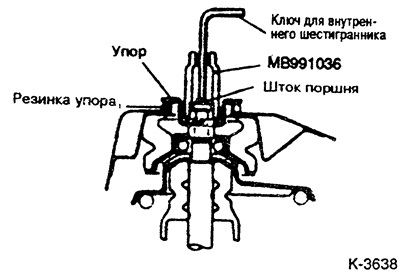
Loosen the upper nut of the front strut with a bent open-end wrench, while holding the piston rod with an Allen key.
Remove the upper stop and the stop rubber.
Installation
Insert the front strut from below, aligning it with the steering knuckle.
Insert the stop rubber and the front pillar stop, screw on the fastening nut without tightening.
Cars produced from 9.88 to 3.92
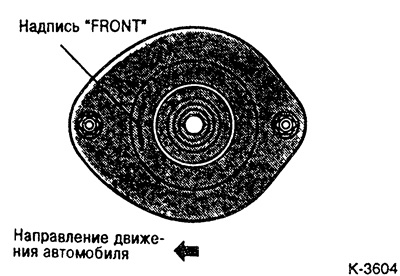
Insert the front pillar from below so that it is in the middle of the niche. Pay attention to the fact that the inscription "FRONT" is facing the direction of the car, otherwise the value of the longitudinal inclination angle of the front wheel kingpin will be lost.
Screw two nuts onto the stud at the top of the front pillar. Tighten the nuts with a torque wrench to 45 Nm.
Attach the front strut to the steering knuckle with new nuts.
Caution: Insert both bolts from back to front, first tighten the nuts slightly by hand, then tighten to a torque of (for cars produced from September 1988 to March 1992) 130 Nm. On cars produced from January 1984 to August 1988, tighten the nuts to a torque of 90 Nm. Then tighten the upper nut to a torque of 60 Nm.
Attach the brake hose bracket and, if applicable, the sensor cable.
Install the wheel, observing the markings made relative to the hub. Lower the vehicle and tighten the wheel nuts crosswise. For tightening force, see section 19.4.
Check the front wheel alignment angles as soon as possible and adjust the camber if necessary, see item 17.