
Vehicles from 9.88 to 3.92
(Special instructions for vehicles from 1.84 to 8.88 are at the end of the section)Removing
Remove front strut.
Remove cap.
The helical spring is compressed. To release the shock absorber, the spring must be compressed even more so that the spring cups are unloaded. Compress the spring with a suitable spring compressor.
Attention: The shock absorber nut can only be unscrewed when the spring is compressed.
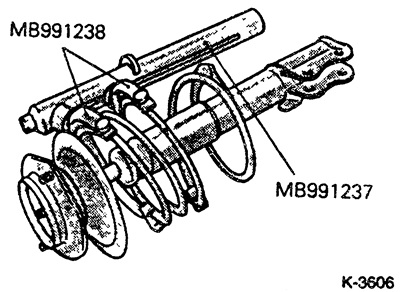
Place the front strut in a vise and compress the spring with a suitable spring compressor. At MITSUBISHI service stations, a special tool is used for this. Compress the spring about 10 mm.
Attention: If the hooks of the fixture are inserted into the coils of the spring, make sure that the hooks are firmly engaged and that the hooks cannot come off the spring. Be sure to compress the spring from two opposite sides. The spring force is high, so use only a strong tool. Never tighten the spring with wire. Danger of accident!
Loosen the retaining nut with a socket wrench or a socket wrench while holding the upper spring cup with a MITSUBISHI tool or other suitable tool.
Attention: Only loosen the nut, do not unscrew it.
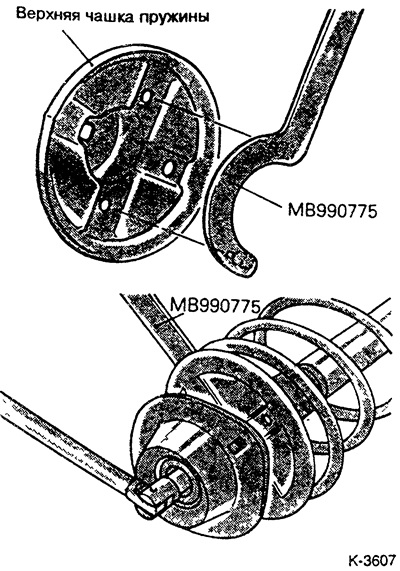
Consistently dismantle the parts of the front pillar.
Caution: If you need to replace the spring, release it slowly. If only the shock absorber needs to be replaced, the spring remains compressed. Check shock absorber, see next section.
Examination
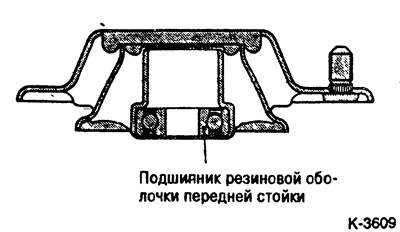
Check the front strut bearing for wear and corrosion.
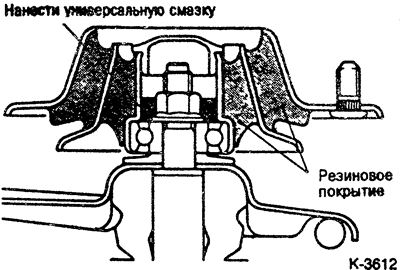
Check all rubber parts for wear, damage and porosity.
Check the coil spring for wear, damage and deformation.
Check shock absorber for deformation.
Installation
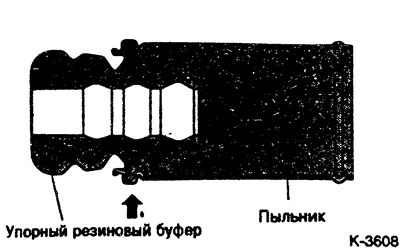
Snap the stop rubber buffer into the boot and slide it onto the shock absorber piston rod.
Place the compressed helical spring on the lower spring cup. Make sure that the helical spring is in contact with the lugs of the lower spring cup.
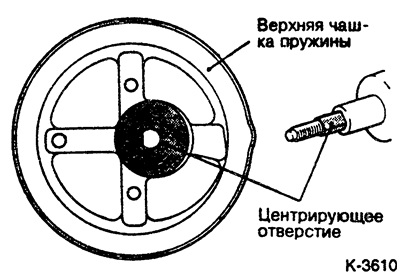
Place the upper spring cup ring so that the piston rod fits into the appropriately shaped hole in the spring cup.
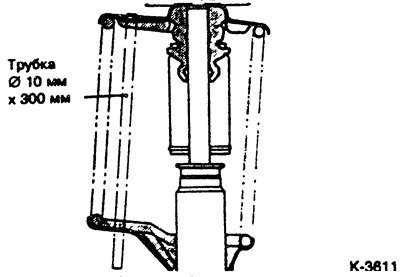
Align the holes in the top spring cup with the corresponding holes in the bottom cup. To do this, use a tube 0 10 mm long 300 mm.
Put on the upper bearing of the front strut and pre-tighten with a new self-locking nut.
Install both ends of the spring in the grooves of the spring cup.
Slowly release the coil spring.
Tighten the self-locking nut to 70 Nm.
Install the front strut see point 14.1.
Release cars from 1.84 to 8.88
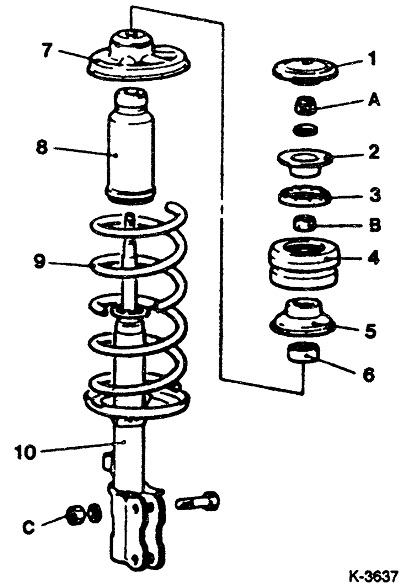
1 - boot cover,
2 - emphasis,
3 - rubber buffer,
4 - rubber damper,
5 - support,
6 - bearing,
7 - spring cup,
8 - rubber buffer,
9 - helical spring,
10 - front pillar
Torque:
- A - 60 Nm,
- B - 50 Nm,
- C - 90 Nm.
Attention: The nut -6- can only be loosened when the spring -9- is securely tightened. Danger of accident!
Coil springs are color coded. When installing new springs, make sure that springs with the same color marking are installed.
Insert the front strut bearing with the black bearing cap facing the mount.
Make sure that both ends of the spring are in the recesses of the spring cups.