



Contents: Removal ⤓ Adjusting the drive gear ⤓ Checking the pull-in winding of the…⤓ Checking the holding winding of the…⤓ Checking the starter in idle mode ⤓ Checking the return stroke of the…⤓
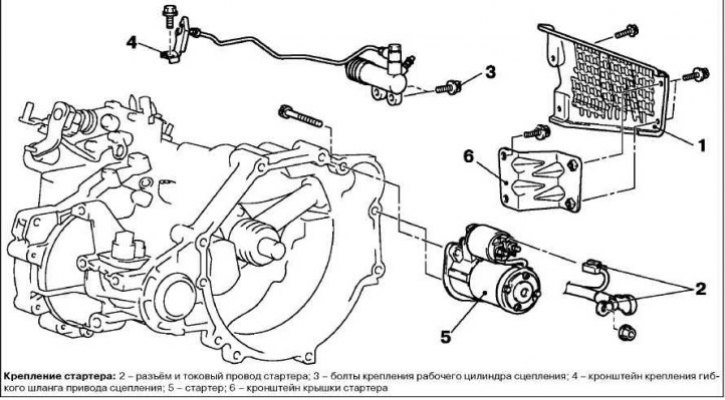
Removal
The starter is removed and pulled upward.
Operations to be performed before removing and after installing the starter
Remove (install) the air filter.
Remove (install) the protective cover
Adjusting the drive gear
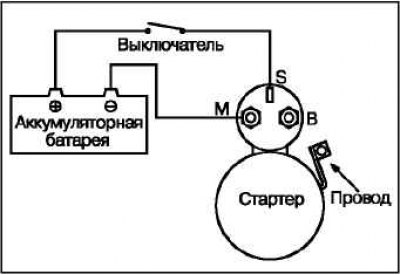
Disconnect the starter excitation winding from the "M" terminal of the traction relay.
Connect a 12V battery between the "S" and "M" terminals of the starter.
Attention! This test should be performed as quickly as possible (no more than 10 sec) to eliminate the possibility of overheating the traction relay winding.
Turn on the switch. This will cause the drive lever to move the drive gear.
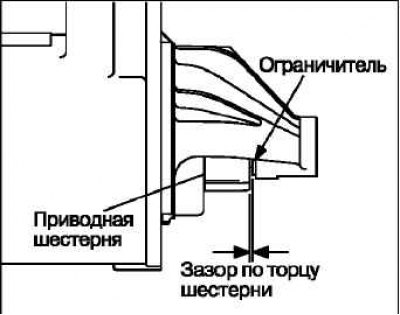
Use a feeler gauge to measure the gap between the end of the gear and the travel limiter.
Nominal value: 0.5–2.0 mm.
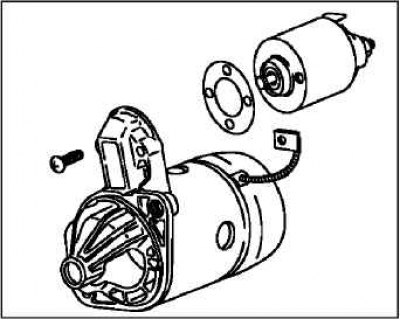
If the gap differs from the given values, it should be adjusted. The adjustment is carried out by removing or installing additional gaskets between the traction relay and the front bracket.
Checking the pull-in winding of the traction relay
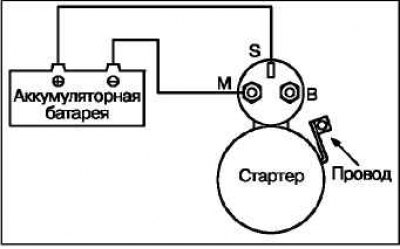
Disconnect the starter excitation winding from the "M" terminal of the traction relay.
Attention! This test should be performed as quickly as possible (no more than 10 sec) to eliminate the possibility of overheating the traction relay winding.
Connect a 12V battery between the "S" and "M" terminals of the starter.
If the drive pinion extends from the housing, the pull-in winding is in good condition. If the pinion does not extend, the traction relay should be replaced.
Checking the holding winding of the traction relay
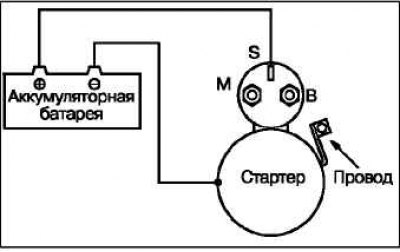
Disconnect the starter excitation winding from the "M" terminal of the traction relay.
Attention! This test should be performed as quickly as possible (no more than 10 sec) to eliminate the possibility of overheating the traction relay winding.
Connect a 12V battery between the "S" terminal and the starter housing.
Manually move the gear until it stops.
If the pinion remains in the extended position, the holding winding is OK. If the drive pinion spontaneously retracts into the housing, the holding winding is faulty. Replace the traction relay.
Checking the starter in idle mode
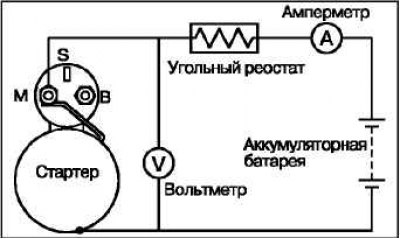
Clamp the starter in a device (in a vice) equipped with soft jaws, connect a fully charged battery to the starter terminals.
Connect an ammeter (with a measurement limit of 100 A) and a carbon rheostat in series in the circuit between the positive terminal of the battery and the starter clamp.
Connect a voltmeter with a measurement range of 15 V to the starter terminals.
Set the rheostat to the maximum resistance position.
Connect the wire from the negative terminal of the battery to the starter housing.
Turn down the rheostat until the voltmeter shows 11V.
(The original material is here: mitsubishiman.ru)
Make sure that the current is within the specified range and that the starter armature rotates without any extraneous sounds.
Permissible current: no more than 90 A.
Checking the return stroke of the traction relay
Disconnect the starter excitation winding from the "M" terminal of the traction relay.
Attention! This test should be performed as quickly as possible (no more than 10 sec) to eliminate the possibility of overheating the traction relay winding.
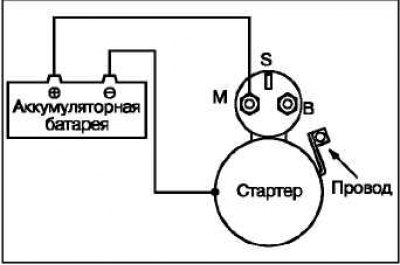
Connect a 12V battery between terminal "M" and the starter housing.
Caution: Be careful when pulling out the drive gear.
Manually pull out the drive pinion and release it. If the pinion quickly returns to its place, the traction relay is in good condition. If the pinion does not return to its place, the traction relay should be replaced.