
English Русский
Български
Беларускі
Український
Српски
Hrvatski
Română
Polski
Slovenský
Magyar
Articles Bookmark Contacts Sitemap   
Company Audi Company Ford Company Hyundai Company Kia Company Mazda Company Mercedes-Benz Company Nissan
MitsubishiMan.ru


Home Colt Lancer Galant L200 Outlander Pajero Others
Pajero 4 (2006-2021) Pajero 1 and 2 (1982-1999)

Front panel and instrument panel — removal and installation (Mitsubishi Pajero 1)

  • Home
  • Pajero
  • 1 (1982-1999)
  • Body and interior
  • Interior (internal elements)
  • Front panel and instrument panel — removal and installation
0
Contents: Front panel (1992-98) ⤓ Cars 1983-86. ⤓ Cars 1987-91. ⤓ Cars 1992-98. ⤓
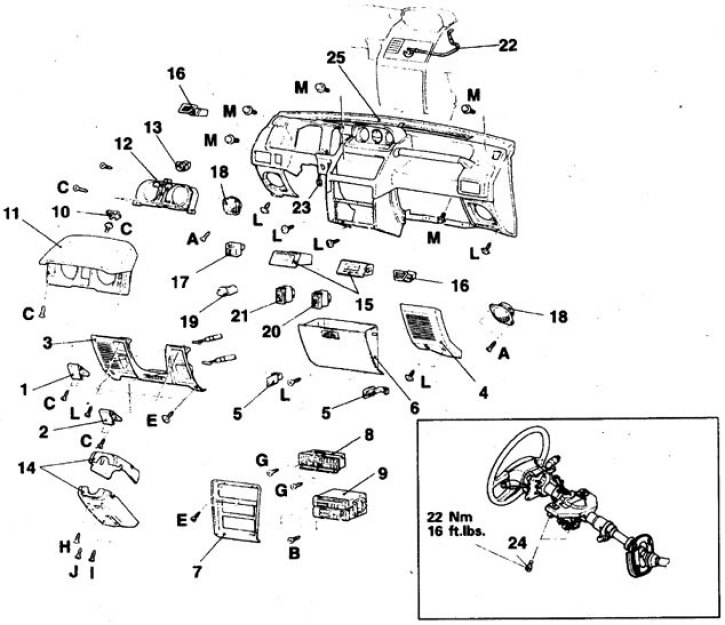
Front panel (1992-98)


1. Hood lock drive handle; 2. Tank door lock actuator button; 3. Lower section; 4. Sidebar; 5. Small items drawer latch; 6. Box for small items; 7. Central section; 8. Control Panel; 9. Radio; 10. Instrument panel plug; 11. Instrument panel trim; 12. Instrument panel; 13. Speedometer torso adapter (before 1993); 14. Steering column covers; 15. Clock or plug; 16. Side nozzle cover; 17. Mirror switch; 18. Front speaker; 19. Rheostat; 20. Rear wiper and washer switch; 21. Door lock switch; 22. Ventilation control cable. damper; 23. Tourniquet; 24. Steering column bolts; 25. Front panel


Removing the front panel is a labor-intensive operation; work should only be performed if absolutely necessary, after first reading the description and detailing of the panel (this is especially true for fastening elements). When removing the panel, mark all wires and cables.

Cars 1983-86.


1. Disconnect the battery from ground.

2. Remove the steering wheel.

3. Remove the center section of the front panel.


4. Remove the instrument panel.

5. Carefully disconnect the wires and speedometer cable.

6. Remove the heater control panel, marking the cables.

7. Remove the fuse box cover, unscrew the screws and push the box into the panel.

8. Disconnect the connectors from the speakers.

9. Remove the plug in the center of the front panel, take out the side nozzles, remove the drawer for small items.

10. Disconnect the wires from the heater.

11. Loosen the nuts and bolts and remove the panel.

12. Installation is carried out in reverse order.

Cars 1987-91.


Caution! Before performing work, take measures to prevent the airbag from deploying (see subsection 13.10).


1. Disconnect the battery from ground.

2. Remove the lower air ducts located under the panel.

3. Disconnect the hood lock handle bracket.

4. Remove the windshield defroster vents and storage compartment.
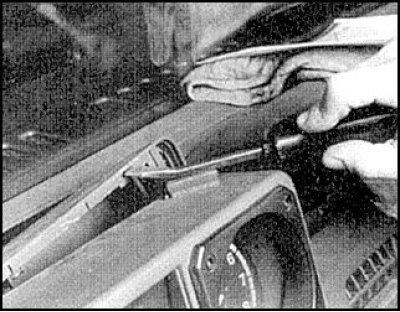


5. Pry up and remove the rear cover of the instrument panel.
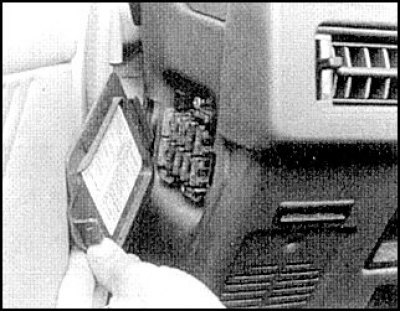


6. Remove the fuse box cover and the box itself.
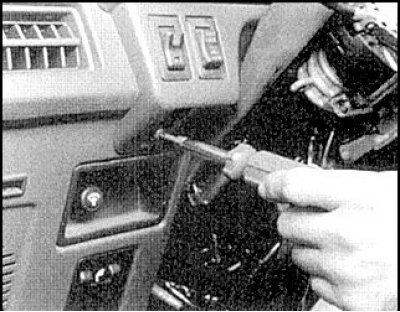


7. Unscrew the instrument panel mounting screw.

8. Remove the instrument cluster, identifying and disconnecting all wires and the speedometer cable.
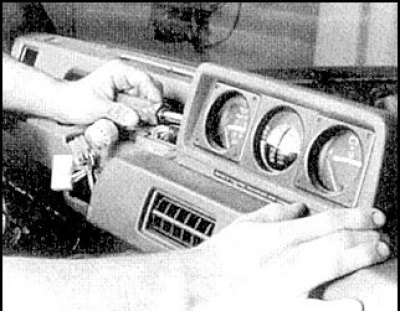


9. Remove the multimeter cover by unscrewing the side screws.

10. Unscrew the 4 screws at the base of the multimeter and carefully remove it, disconnecting the wires (be careful not to damage the inclinometer, which may fail if hit).
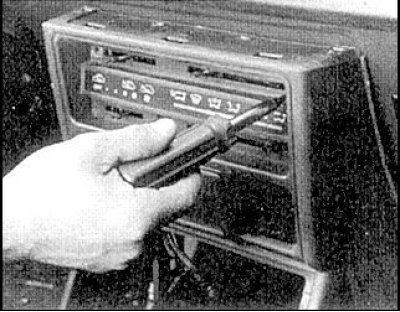


11. Remove the center section of the front panel (or a central floor section).
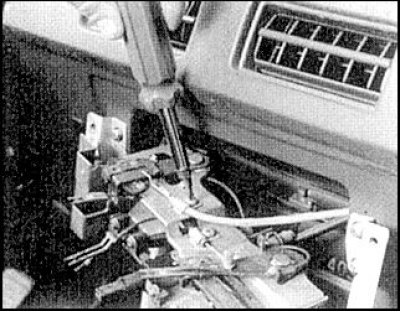


12. Mark and disconnect the 3 heater control cables.
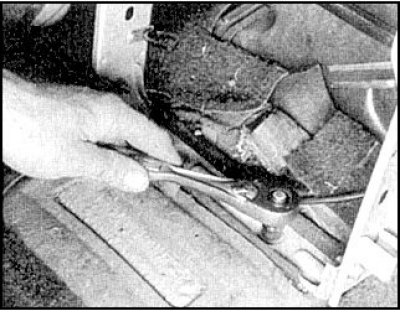


13. Remove the central frame assembly with the chassis and radio.

14. Remove the steering wheel.

15. Remove the fuse box.
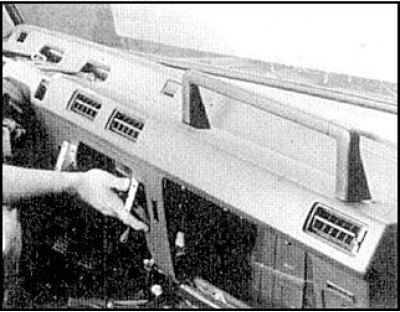


16. Loosen the nuts and bolts and remove the front panel.

17. Installation is carried out in reverse order.

Cars 1992-98.


Caution! Before performing work, take measures to prevent the airbag from deploying (see subsection 13.10).


1. Disconnect the battery from ground.

2. Remove the floor section.

3. Remove the hood lock and fuel filler door handles.

4. Loosen the screws and remove the lower center trim and side trim panels.

5. Remove the storage box.

6. Remove the center panel A.

7. Remove the heater control panel.

8. Remove the radio.

9. Remove the instrument panel trim by removing the plugs and unscrewing the screws.

10. Loosen the screws and remove the instrument panel.

11. Disconnect the speedometer cable.

12. Remove both steering column covers.

13. Remove the side glass defroster nozzle, door mirror switch, front speaker, rheostat, rear washer and wiper switches and door lock switch.

14. Disconnect the ventilation flap control cable (to do this, remove the bracket) and wiring harness.

15. Unscrew the steering column mounting bolts and all the screws of the front panel, remove the panel.

16. Installation is carried out in reverse order.
This article is available at: russian, bulgarian, belarusian, ukrainian, serbian, croatian, romanian, polish, slovak, hungarian
This article was reviewed by: Arseny Pavlov
Share with friends:
◀ Previous
Pajero 1 and 2: Interior (internal elements)
Next ▶

Upholstery and carpets
Vinyl finish
Auxiliary instrument and equipment panels, floor sections
Interior trim panels
Headlining — Removal and Installation
Interior rear view mirror
Front seats — removal and installation
Similar materials for other Mitsubishi models

➤ Scheme 6. Heater, air conditioner, instrument panel Mitsubishi Colt 4 and 5 (1991-2003)
➤ Removal and installation the instrument panel / instrument… Mitsubishi Lancer 3 and 5 (1984-1992)
➤ Removal and installation the instrument panel Mitsubishi Galant 6 and 7 (1987-1998)
➤ Instrument panel elements diagram Mitsubishi L200 4 (2005-2014, diesel)
➤ Instrument panel indicators Mitsubishi Outlander 1 (2003-2008)
➤ Instrument panel — removal and installation Mitsubishi Carisma (1995-2004)
Link in different formats to this article
Comments and feedback from visitors
No comments yet


Add up two numbers 35 + 50


Pajero 4 (2006-2021) 
  • General information
  • User manual
  • Troubleshooting
  • Maintenance
  • Technical specifications
  • Power unit
  • Engine repair
  • Cooling system
  • Lubrication system
  • Fuel system
  • Engine management system
  • Intake and exhaust system
  • Engine electrical equipment
  • Transmission
  • Clutch
  • Manual gearbox
  • Automatic gearbox
  • Drive shafts
  • Chassis and running gear
  • Front suspension
  • Rear suspension
  • Brake system
  • Steering
  • Body and interior
  • Exterior (external elements)
  • Interior (internal elements)
  • Doors, locks and windows
  • Body dimensions
  • Electrical equipment
  • Safety system (SRS)
  • Air conditioner
  • Equipment and devices
  • Electrical diagrams
Pajero 1 and 2 (1982-1999) 
  • General information
  • User manual
  • Seats and seat belts
  • Instruments and controls
  • Driving and operation
  • Maintenance
  • Power unit
  • Gasoline engines
  • Diesel engines
  • Ignition system
  • Engine electrical equipment
  • Cooling and lubrication system
  • Power and exhaust system
  • Fuel system (gasoline)
  • Fuel system (diesel)
  • Transmission
  • Clutch
  • Mechanical gearbox
  • Automatic gearbox
  • Drive shafts and axles
  • Chassis and running gear
  • Front suspension
  • Rear suspension
  • Steering
  • Brake system
  • Body and interior
  • Exterior (external elements)
  • Interior (internal elements)
  • Doors, locks and windows
  • Electrical equipment
  • Equipment and devices
  • Heater and air conditioner
  • Cruise control
  • Headlights and lighting
  • Electrical circuits
MitsubishiMan.ru © 2018–2026 • Mobile version • Articles about Mitsubishi • Contacts • Sitemap: EN BG BY UA RS HR RO PL SK HU • Site search • Bookmark
Colt 2 and 3 (1983-1993) · Colt 4 and 5 (1991-2003) · Colt 5 (1995-2003) · Lancer 3 and 5 (1984-1992) · Lancer 9 (2000-2007) · Galant 5 (1983-1989) · Galant 6 and 7 (1987-1998) · L200 4 (2005-2014) · Outlander 1 (2003-2008) · Pajero 1 and 2 (1982-1999) · Pajero 4 (2006-2021) · Carisma (1995-2004) · Space Star (1998-2005) ·
This resource sets cookies 🍪 to avoid bothering you with repeated data entry.