



Contents: Removal the shock absorber ⤓ Installing the shock absorber ⤓ Disassembling the shock absorber ⤓ Shock absorber assembly ⤓
Removal the shock absorber
1. Remove the upper control arm assembly.
2. Remove the battery and battery tray.
3. Remove the air filter assembly.
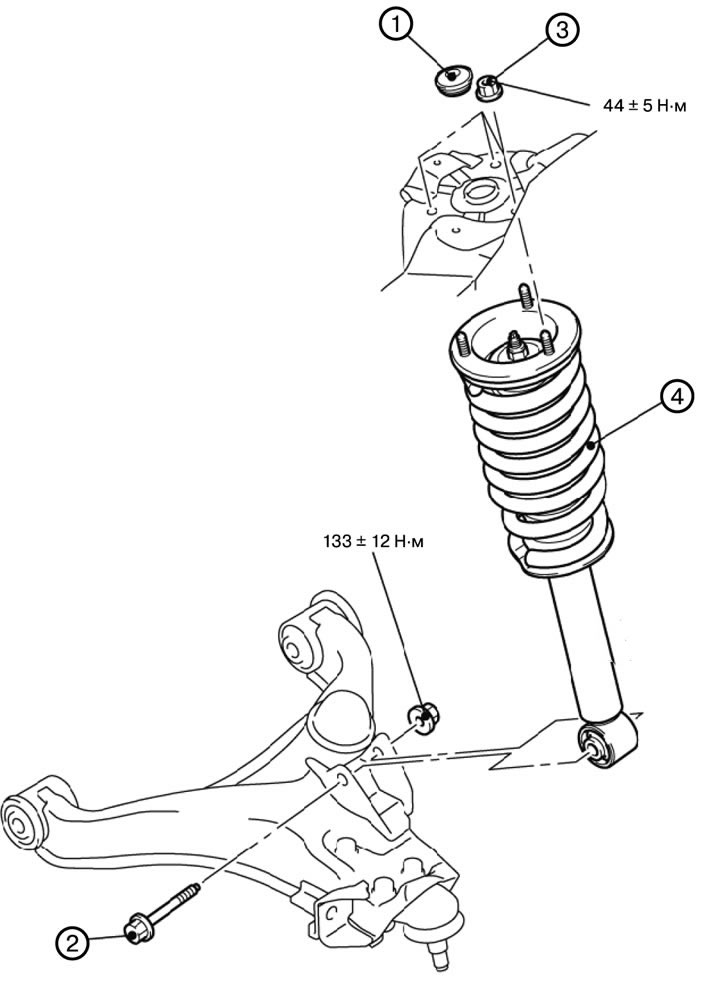
4. Remove the cover (1).
5. Unscrew the bolt (2).
6. Unscrew the shock absorber mounting nut (3).
7. Remove the shock absorber assembly (4).
Installing the shock absorber
1. Install the shock absorber assembly (4).
2. Tighten the shock absorber mounting nut (3).
3. Tighten the bolt (2).
4. Install the cover (1).
5. Install the air filter assembly.
6. Install the battery and battery tray.
7. Install the upper control arm assembly.
8. Check and adjust the front wheel alignment angles.
Disassembling the shock absorber
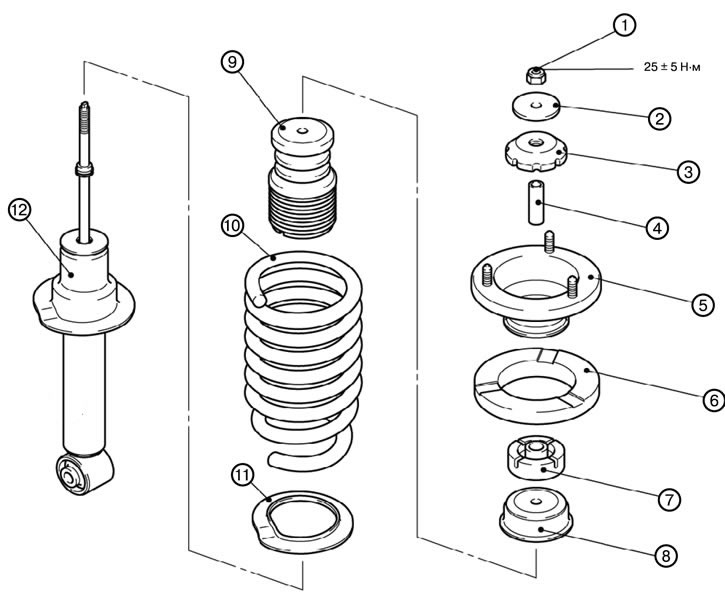
1. Use special tools to compress the shock absorber spring.
Caution: Install the spring compressor symmetrically and so that the maximum length does not exceed the installation limits. Do not use an impact wrench when tightening the special tool bolt.
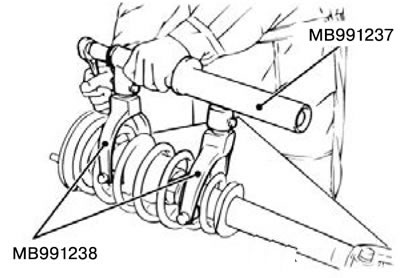
2. While holding the shock absorber rod, unscrew the self-locking nut (1).
Caution: Do not use an impact wrench to loosen the self-locking nut.
3. Remove the plate (2).
4. Remove the bushing (3).
5. Remove the grip (4).
6. Remove the spring bracket assembly (5).
7. Remove the upper spring cup (6).
8. Remove the lower bushing (7).
9. Remove the upper bushing (8).
10. Remove the cover assembly (9).
11. Remove the auxiliary rubber band (10).
12. Remove the coil spring (11).
13. Remove the lower spring cushion (12).
14. Remove the shock absorber (13).
Shock absorber assembly
1. Install the special tool in the same way as when removing and compress the spring to install it on the shock absorber.
Caution: Do not use an impact wrench to tighten the special tool bolt.
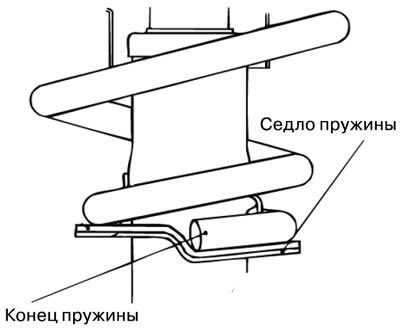
2. Align the upper part of the spring with the stepped part of the upper spring cushion and, accordingly, the lower part of the spring with the stepped part of the spring seat.
3. Install the shock absorber (13).
4. Install the lower spring cushion (12).
5. Install the coil spring (11).
6. Install the auxiliary rubber band (10).
7. Install the cover assembly (9).
8. Install the upper bushing (8).
9. Install the lower bushing (7).
10. Install the upper spring cup (6).
11. Install the spring bracket assembly (5).
12. Install the grip (4).
13. Install the sleeve (3).
14. Install the plate (2).
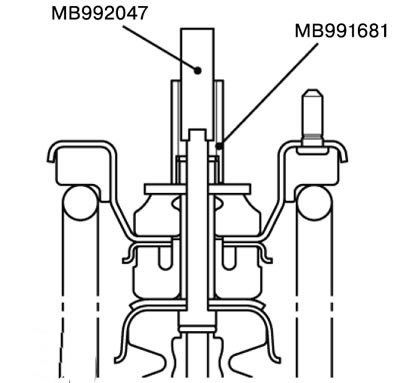
15. Temporarily tighten the self-locking nut.
16. Remove special tools (MB991681, MB992047), and tighten the self-locking nut (1) to the specified torque.
Caution: Do not use an impact wrench.