



Contents: Removal ⤓ Installation ⤓
Removal
To remove the hatch, perform the following operations.
1. Disconnect the cable from the negative terminal of the battery.
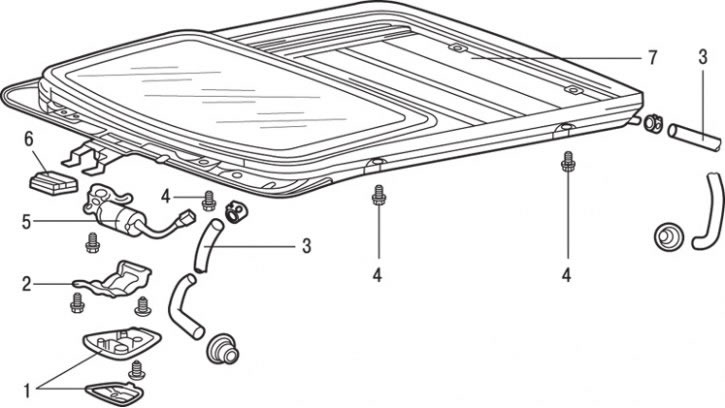
Fig. 17.34. Hatch: 1 – sunroof drive switch and interior light; 2 – Interior light bracket; 3 – drainage hose; 4 – screw (5 Nm); 5 – sunroof drive electric motor; 6 – electronic sunroof control unit; 7 – hatch assembly
2. Remove the sunroof drive switch and interior light assembly 1 (Fig. 17.34).
3. Remove the headlining.
4. Close the sunroof glass completely.
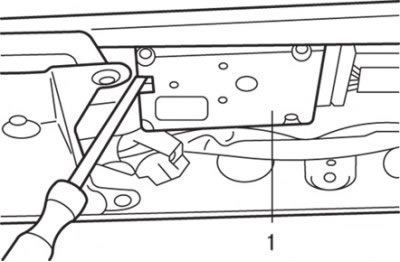
Fig. 17.35. Using a screwdriver to remove the electronic unit (1) for controlling the sunroof
5. Insert a flat-blade screwdriver into the latch area as shown in Fig. 17.35 and move it to the right.
6. Lower the sunroof electronic control unit and slide the unit to the left. Disconnect the electrical connector and remove the sunroof electronic control unit.
7. Remove bracket 2 (see Fig. 17.34) of the interior light.
8. Remove the sunroof drive electric motor 5.
9. Remove the front fender liner.
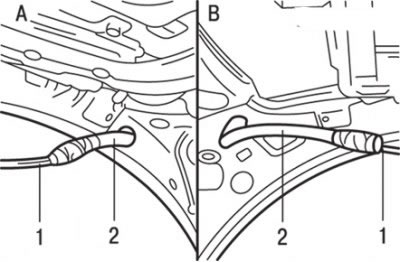
Fig. 17.36. Removing the drain hose: A - front part; B - back; 1 – cord; 2 – drainage hose
10. Disconnect the drain hose from the sunroof. Remove the gasket. Tie a cord to the end of the drain hose and wrap the connection with insulating tape (Fig. 17.36). Then pull the drain hose out of the car.
11. Loosen the bolts and remove hatch 7 (see Fig. 17.34) as an assembly.
Installation
Installation is carried out in the reverse order of removal, taking into account the following.
1. Tie a cord to the end of the drain hose and wrap the connection with electrical tape so that there are no uneven spots at the joint.
2. Pull the cord through and then pull the drain hose through.
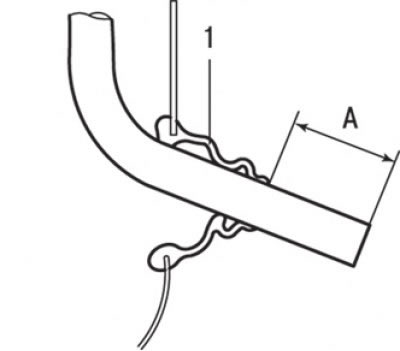
Rice. 17.37. Installing the drain hose: A = 20–30 mm; 1 – sealing gasket
3. Pull the drain hose out of the sealing gasket to the distance shown in Fig. 17.37.
4. Close the sunroof glass completely.
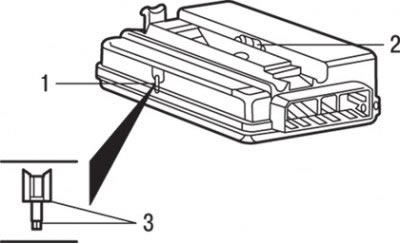
Fig. 17.38. Installing the electronic sunroof control unit: 1 – control hole of installation marks; 2 – locking device; 3 – position of the installation marks
5. Move the locking device of the electronic control unit of the sunroof so that the installation marks are aligned (Fig. 17.38).
6. Insert a flat-head screwdriver into the latch area and press it to the right, being careful not to damage the wiring (see Fig. 17.35).
7. Check the tightness of the hatch by directing a stream of water at it.
8. Adjust the hatch installation as follows:
- close the sunroof glass completely;
- open the sunroof curtain completely;
- remove the upholstery;
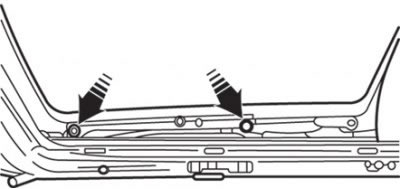
Fig. 17.39. Location of screws (arrows) for adjusting the hatch installation
- loosen the screws and adjust the position of the sunroof glass so that its surface is flush with the roof surface (Fig. 17.39).