



Contents: Removal ⤓ Installation ⤓
Removal
To remove the rear door, follow these steps.
1. Disconnect the cable from the negative terminal of the battery.
2. Remove the rear door trim.
3. Remove the rear fog light.
4. Remove the rear door lock.
5. Remove the license plate light.
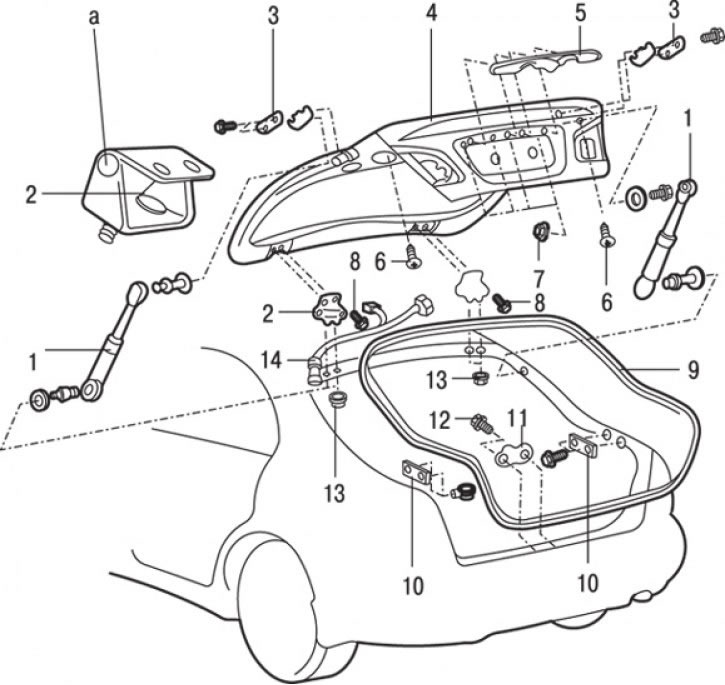
Fig. 17.23. Rear door of hatchback cars: a - lubrication points; 1 – gas-filled strut; 2 – rear door hinge; 3 – upper damper; 4 – rear door assembly; 5 – rear license plate cover; 6 – buffer; 7 – nut (8.4 Nm); 8 – bolt (12 Nm); 9 – rear door seal; 10 – lower damper; 11 – Rear door lock retainer; 12 – bolt (8 Nm); 13 – bolt (14 Nm);14 – connector
6. Unscrew the four nuts and remove cover 5 (Fig. 17.23) of the rear license plate (cars produced since 1999).
7. Disconnect electrical connector 14.
8. Unscrew the hinges and remove the gas-filled strut 1.
Warning! Do not attempt to disassemble the gas strut or burn it.
Attention! Before sending the gas-filled strut for disposal, drill a hole in it to release the gas.
9. Unscrew two bolts on each hinge (assistants support the door at this time) and remove the rear door 4 as an assembly.
10. Remove the rear roof rail trim.
11. Unscrew the two nuts securing each hinge and remove the 2 rear door hinges.
12. Unscrew and remove buffer 6.
13. Unscrew two bolts and remove the upper dampers 3.
14. Unscrew two bolts and remove the lower dampers 10.
15. Remove the rear shelf.
16. Unscrew the two bolts and remove the retainer 11 of the rear door lock.
17. Remove the rear door seal 9.
Installation
Installation is carried out in the reverse order of removal, taking into account the following.
1. Install the rear door seal so that the marking is in the center of the body opening.
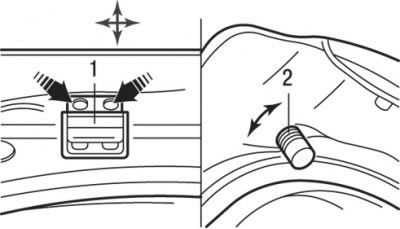
Fig. 17.24. Adjusting the gap around the perimeter of the rear door: 1 – rear door hinge; 2 – rubber buffer
2. Install the door, close it and check its position relative to the adjacent surfaces. Adjust the position of the rear door so that when the door is closed, the gap around the perimeter is the same on all sides. To adjust, loosen the hinge mounting bolts and, by moving the doors, adjust their position (Fig. 17.24).
To adjust the height of the rear part of the door, you need to screw in or unscrew the rubber buffers.
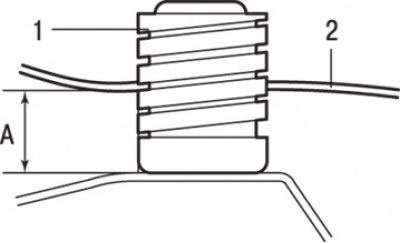
Fig. 17.25. Correct installation of the rear door buffer: A = 18 mm; 1 – rubber buffer; 2 – rear door panel
The original material is here [www.mitsubishiman.ru]
3. Install the buffer so that the distance A (Fig. 17.25) to the rear door panel is 18 mm.
4. Install and adjust the position of the rear door latch.