
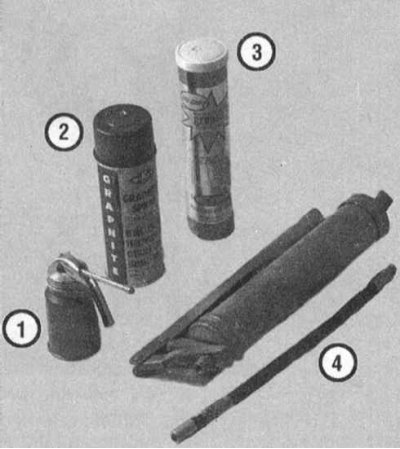
List of materials needed to lubricate chassis components
1 - Liquid motor oil - used to lubricate door hinges
2 - Graphite aerosol - used to lubricate lock cylinders
3 - Lubrication - there is a wide range of lubricants of various types and viscosities on the market, designed to be pumped with a grease gun
4 - Grease gun - designed to stuff components with grease, used in a set with various nozzles and adapter hoses
1. Prepare the required supply of lubricant of the required grade (see Specifications) and a grease gun for stuffing hollow components.
Note. Some units may have plugs installed instead of grease fittings - make sure you also have a fitting kit on hand - threaded fittings are available in various shapes to provide adequate access to almost any component.
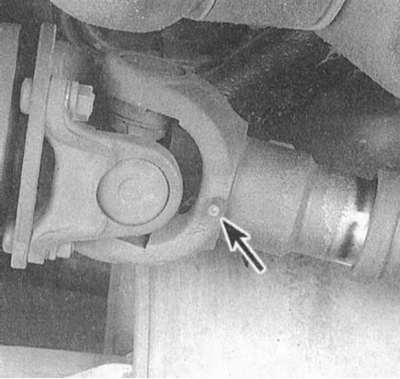
2. Looking under the vehicle, locate the grease fittings for the steering, suspension and transmission line components. Typically, fittings are included in the standard equipment of such assemblies as tie rod ends and cardan joints. If plugs are installed instead of fittings, prepared fitting nozzles should be screwed in instead.
3. Jack up the car and place it on jack stands under the frame, or drive it on a lift.
Note. If you intend to rotate the wheels at this stage, be sure to loosen the mounting nuts before they are off the ground.
4. Squeeze out some lubricant to clean the gun nozzle from dirt. Wipe the nozzle with a clean cloth.
5. Prepare a supply of rags and proceed to stuffing the components with grease.
6. Wipe the grease fitting and the component around it with a clean rag, attach a gun tip to the fitting and proceed with packing. Continue pumping lubricant until it begins to seep through the joints of the component's seating surfaces.
Note. If grease begins to ooze through the nozzle of the gun, it should be cleaned and special attention should be paid to the tightness of the pressure. Replace fitting if necessary.
7. Wipe excess grease off the surface of the component with a rag and proceed to packing the next assembly.
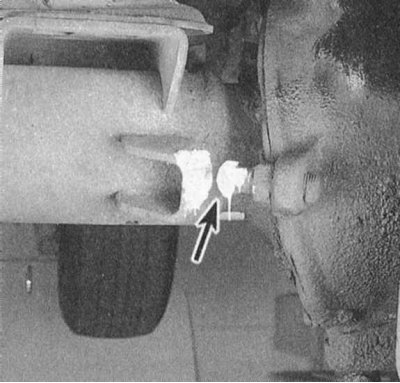
8. Packing the sliding collar of the universal joint of the propeller shaft, continue until the lubricant begins to ooze the gland of the assembly.
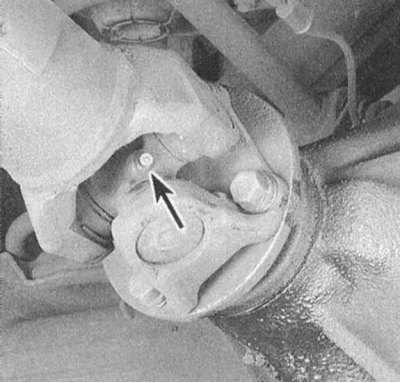
9. When stuffing conventional type universal joints, grease should begin to seep through the joints of the assembly components.
10. Without getting out from under the car, wipe the parking brake cables and lubricate their guides and actuating levers with your fingers.
11. With the appropriate vehicle equipment, apply lithium-based grease to the contact surfaces of the thrust brackets and adjusting bolts of the steering knuckle assemblies.
12. Open the hood and pour some chassis grease into the lock latch mechanism. Have an assistant pull the hood release lever under the instrument panel all the way out and lubricate all exposed surfaces of the drive cable.
13. Lubricate the hinges of all doors and the hood with liquid engine oil.
14. To lubricate the lock cylinders, it is most convenient to use graphite grease supplied in aerosol cans - ask in car accessories stores.
15. Lubricate the door seals with silicone grease to protect them from premature wear.