



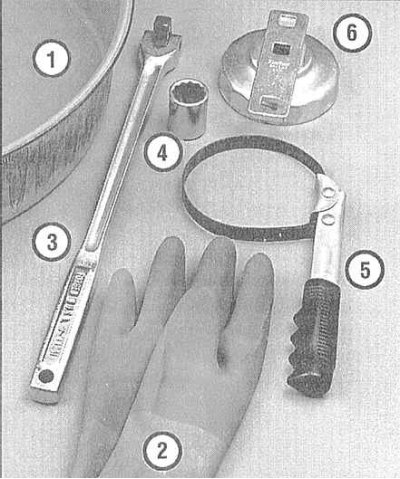
1 - Drain pan - should be shallow and wide enough to minimize the chance of oil spilling on the ground
2 — Rubber gloves - will help protect your hands from burns when oil inevitably gets on them while unscrewing the oil pan drain plug
3 - Gate - sometimes the drain plug is tightened quite tightly, which requires considerable force when unscrewing it
4 - Replaceable socket head - used in conjunction with a wrench or ratchet drive when unscrewing a drain plug, must match the size of the latter
5 — Strap wrench - allows you to unscrew the full-flow oil filter in conditions of limited access to it
6 — Special open-end wrench - is placed on the end of the filter and can then be rotated using a gate or ratchet drive, must match the size of the filter housing
Note: When operating the vehicle in high stress conditions (see Section Schedule of current maintenance of Mitsubishi Galant/Mirage/Diamante cars) the engine oil/oil filter should be replaced every 5000 km.
1. Regular and frequent replacement of engine oil is one of the basic procedures of preventive maintenance of the car, lying within the skill level of the average amateur mechanic. Over time, engine oil is subject to aging, which is manifested in its gradual dilution and contamination, leading to premature wear of the internal components of the engine. Although some sources recommend replacing the oil filter only with every second change of engine oil, the authors of this Guide believe that, given the relative insignificance of the cost of the replacement component and the importance of the influence of its condition on the proper functioning of the engine/efficiency of its output, it makes sense to change the filter every time the oil is changed.
2. Make sure you have all the materials and tools needed to change the oil and oil filter on hand. Also have plenty of rags and old newspapers to collect any spilled oil.
3. To ensure free access to the oil pan and oil filter, lift the vehicle with a winch, drive it onto an overpass, or jack it up and place it on supports.
Attention! Never perform any work under a vehicle supported only by the bumper or held in a raised position only by a jack!
4. Get under the vehicle and familiarize yourself with the location of the oil pan drain plug and oil filter. Remember that the powertrain and exhaust system components will remain quite hot during the entire procedure - think of a safe hand manipulation scheme to avoid accidental contact with hot surfaces.
5. Make sure the vehicle is level on supports/lift. Warm up the engine to normal operating temperature - hot oil is more fluid and washes out sludge and sediment better. Use the forced downtime to lay out all the necessary tools and materials in a convenient order. Turn off the engine and remove the cap from the engine oil filler neck.
6. Make sure that the vehicle is securely fixed in the raised position.
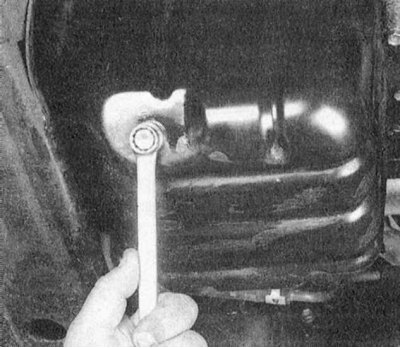
7. Carefully climb under the car and place a drain pan under the oil pan, so that at first the stream will flow out through the hole with a decent pressure. Trying not to touch the heated surfaces of the power unit and exhaust system components, unscrew the drain plug from the bottom of the oil pan. Depending on the oil temperature, at the final stage of unscrewing the plug, you can use rubber gloves or do not use them.
8. Allow the oil to flow freely into the container, adjusting the position of the container as the flow weakens. Check the drained oil for metal filings.
9. After the oil stops flowing out of the engine crankcase, carefully wipe the drain plug with a clean rag - small metal filings may stick to it, which will immediately lead to contamination of the fresh oil.
10. Wipe the surface of the pan around the drain hole, screw the plug back into place and tighten it securely with a wrench (if possible, a torque wrench to avoid stripping the threads).
11. Move the drain pan under the oil filter.
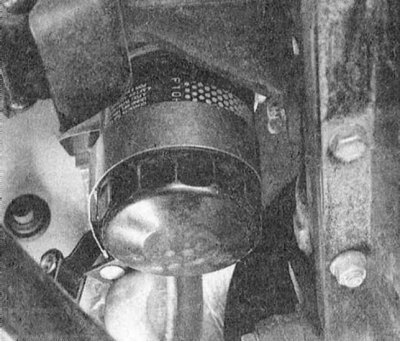
12. Using one of the special wrenches, loosen the filter. The filter housing may be damaged during the process of unscrewing, which is not of particular importance since it must be replaced (the old filter can be simply pierced with a large screwdriver to unscrew it - be prepared to collect the spilled oil). Manually separate the filter completely from the block - remember that some oil still remains in it, which should be released into a drain container. Make sure that the rubber sealing gasket has come off together with the filter, if not, carefully separate it from the surface of the engine block.
The original was published on the website: MITSUBISHIMAN.ru
13. Using a clean rag, carefully wipe the filter seating surface on the block. Once again, make sure that the old gasket has not stuck to the block wall; if necessary, use a scraper.
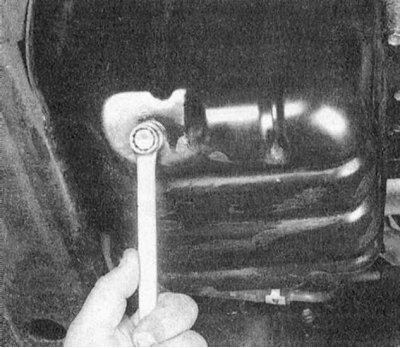
14. Make sure that the new filter matches the size of the one removed from the vehicle. Lubricate the rubber sealing gasket of the new filter with a thin layer of clean engine oil and screw the new filter into place, adhering to the direction of rotation indicated by the arrow on its housing. To avoid damaging the gasket, do not use any wrenches to tighten the oil filter. After the filter is pressed by the gasket to the surface of the block, tighten it another 3/4 of a turn.
15. Remove all tools and materials from under the vehicle - try not to tip over the drain pan. Lower the vehicle to the ground.
16. Pour fresh oil into the engine intake pipe - use a funnel to minimize losses. After pouring about 3 liters, wait a few minutes to allow the oil to drain into the pan, then check its level using the dipstick (see Section Checking fluid levels). If the level is above the lower mark, start the engine, ensuring circulation of fresh oil.
17. After letting the engine run for about a minute, turn it off again and immediately look underneath the vehicle to check for leaks at the drain plug and full-flow filter. If necessary, tighten the leaking component slightly.
18. During the oil circulation in the engine (about 1 minute), the new oil filter is filled. Now it is necessary to check the oil level again and, if necessary, add some more, bringing the level to the upper mark on the dipstick blade (check a few minutes after turning off the engine - the oil should have time to completely drain into the oil pan).
19. During the first few trips after changing the engine oil, try to check its level as often as possible.
20. Used oil drained from the engine cannot be reused and must be handed over to a special collection point. Never pour used oil onto the ground or into the sewer - pour it into a hermetically sealed container and hand it over at the first opportunity.