
English Русский
Български
Беларускі
Український
Српски
Hrvatski
Română
Polski
Slovenský
Magyar
Articles Bookmark Contacts Sitemap   
Company Audi Company Ford Company Hyundai Company Kia Company Mazda Company Mercedes-Benz Company Nissan
MitsubishiMan.ru


Home Colt Lancer Galant L200 Outlander Pajero Others
Galant 6 and 7 (1987-1998) Galant 5 (1983-1989, petrol)

Checking and replacing the PCV valve (Mitsubishi Galant 6)

  • Home
  • Galant
  • 6 (1987-1998)
  • General information
  • Maintenance
  • Checking and replacing the PCV valve
0
* The authors of this Manual recommend checking the condition of the PCV valve every 24,000 km!

The operating principle of the PCV system is described in detail in Chapter Engine management systems.

1. The PCV system ensures the removal of crankcase gases through a special valve via a hose back into the intake manifold, from where they enter the combustion chambers and are burned during normal engine operation. In addition to the valve, the system includes a hose leading from the cylinder head cover to the intake manifold and a hose for supplying fresh air from the air cleaner under the valve mechanism cover. The PCV valve with a hose connected to it is seated in the cylinder head cover.
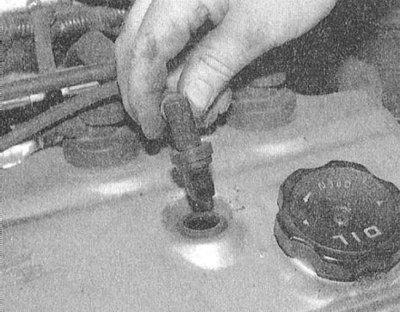


2. With the engine idling and warmed up to normal operating temperature, pull the valve up and remove it together with the connected hose from its seat in the cylinder head cover.

3. Press your finger against the hole in the PCV valve - you should feel a vacuum, otherwise make sure the hose, the fitting on the intake manifold and the valve itself are clear. Replace defective components.

4. Turn off the engine and shake the valve - if it is in good condition, a slight crackling sound should be heard inside the valve. If no sounds are heard, replace the valve.
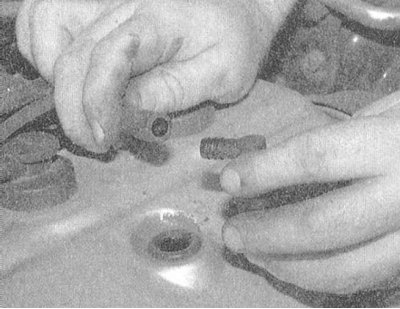


5. To replace the valve, disconnect it from the hose - try to remember how the connection was organized.

6. When purchasing a new valve, make sure that it matches the size of your car's engine. The best way is to directly compare the new valve with the old one removed from the engine.

7. Connect the new valve to the hose.
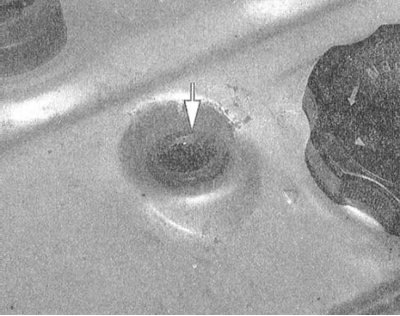


8. Check the condition of the rubber hose and bushing. Replace any defective components.

9. Firmly seat the valve in its original place in the cylinder head cover.
This article is available at: russian, bulgarian, belarusian, ukrainian, serbian, croatian, romanian, polish, slovak, hungarian
This article was reviewed by: Dmitry Vasiliev
Share with friends:
◀ Previous
Galant 6 and 7: Maintenance
Next ▶

Replacing the fuel filter
Cooling system maintenance
Replacing the air cleaner filter element
Checking and adjusting valve clearances — Mirage only
Checking the condition of the protective covers of the drive shafts
Checking the condition and replacing spark plugs
Checking the condition, adjusting the tension force and replacing the drive belts
Checking the condition of the exhaust system components
Replacing manual transmission oil
Transfer Case Lubricant Replacement — Galant 4WD Only
Similar materials for other Mitsubishi models

➤ Valve guides — checking and replacing Mitsubishi Colt 4 and 5 (1991-2003)
➤ Checking and replacing the fuel shut-off valve Mitsubishi Lancer 3 and 5 (1984-1992)
➤ Checking and replacing the air filter element Mitsubishi L200 4 (2005-2014, diesel)
➤ Checking the opening pressure of the radiator cap valve Mitsubishi Outlander 1 (2003-2008)
➤ Wheels — Checking and replacing Mitsubishi Pajero 1 and 2 (1982-1999)
➤ Checking and adjusting valve clearances (SOHC) Mitsubishi Carisma (1995-2004)
Link in different formats to this article
Comments and feedback from visitors
No comments yet


Add up two numbers 41 + 13


Galant 6 and 7 (1987-1998) 
  • General information
  • Introduction to guide
  • User manual
  • Driving and operation
  • Maintenance
  • Power unit
  • Dismantling the engine
  • Engine overhaul
  • Cooling and heating
  • Power and exhaust systems
  • Engine electrical equipment
  • Engine management systems
  • Transmission
  • Mechanical gearbox
  • Automatic gearbox
  • Clutch
  • Drive shafts and transfer case
  • Chassis and running gear
  • Brake system
  • Car suspension
  • Steering
  • Body and interior
  • Exterior (external elements)
  • Interior (internal elements)
  • Doors, locks and windows
  • Electrical equipment
  • Equipment and devices
  • Wiring diagrams Galant
  • Wiring diagrams Mirage
  • Wiring diagrams Diamante
Galant 5 (1983-1989, petrol) 
  • General information
  • Troubleshooting
  • Maintenance
  • Power unit
  • Engine repair
  • Engine overhaul
  • Cooling and heating
  • Fuel and exhaust system
  • Engine electrical equipment
  • Reducing exhaust toxicity
  • Transmission
  • Manual gearbox
  • Automatic gearbox
  • Clutch and drive shafts
  • Chassis and running gear
  • Brake system
  • Car suspension
  • Steering
  • Body and interior
  • Exterior (external elements)
  • Interior (internal elements)
  • Doors, locks and windows
  • Electrical equipment
  • Equipment and devices
  • Electrical diagrams
MitsubishiMan.ru © 2018–2026 • Mobile version • Articles about Mitsubishi • Contacts • Sitemap: EN BG BY UA RS HR RO PL SK HU • Site search • Bookmark
Colt 2 and 3 (1983-1993) · Colt 4 and 5 (1991-2003) · Colt 5 (1995-2003) · Lancer 3 and 5 (1984-1992) · Lancer 9 (2000-2007) · Galant 5 (1983-1989) · Galant 6 and 7 (1987-1998) · L200 4 (2005-2014) · Outlander 1 (2003-2008) · Pajero 1 and 2 (1982-1999) · Pajero 4 (2006-2021) · Carisma (1995-2004) · Space Star (1998-2005) ·
This resource sets cookies 🍪 to avoid bothering you with repeated data entry.