



Note: The procedures for replacing the crankshaft oil seals (front and rear) for MPI engines are the same as those for GDI engines.
Replacing the camshaft seal
Before you begin removing parts, perform the following operations:
- a) Remove the air filter and air filter bracket.
- b) Remove the ignition coils.
- c) Drain the engine oil.
The parts are removed in the order of numbers shown in the figure "Replacing the camshaft oil seal".
When removing parts, pay attention to the following operations:
1. Removing the camshaft pulley with the timing belt assembly,
a) Turn the camshaft clockwise until the timing mark on the camshaft pulley aligns with the corresponding timing mark and set the piston of cylinder No.1 to TDC of the compression stroke.
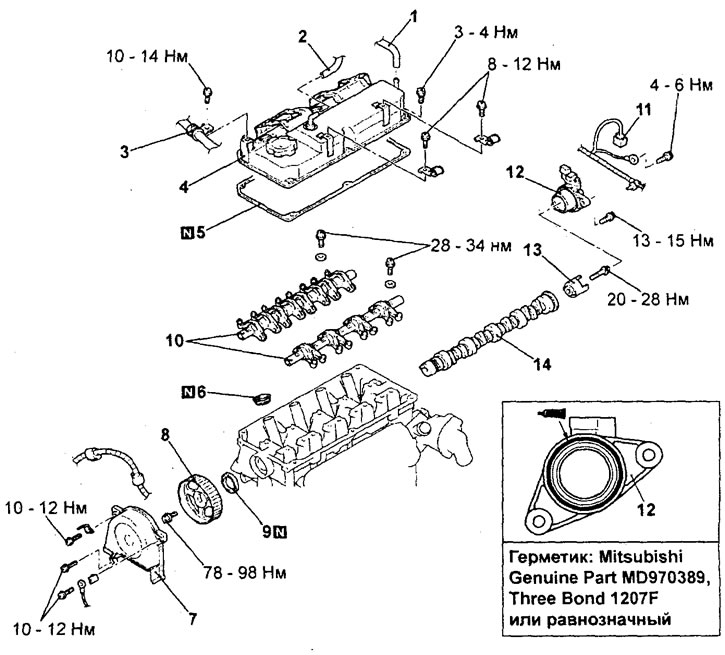
Replacing the camshaft oil seal (engine 4G15). 1 - ventilation hose connection, 2 - positive crankcase ventilation hose, 3 - power steering hydraulic system delivery hose retainer, 4 - cylinder head cover, 5 - cylinder head cover gasket, 6 - cylinder head cover seal (under spark plugs), 7 - front upper timing belt cover (adjust valve clearances during installation), 8 - camshaft pulley and timing belt assembly, 9 - camshaft oil seal, 10 - rocker arm shaft with rocker arms, 11 - camshaft position sensor connector, 12 - camshaft position sensor bracket, 13 - camshaft position sensor rotor, 14 - camshaft.
Caution: Always turn the crankshaft clockwise only.
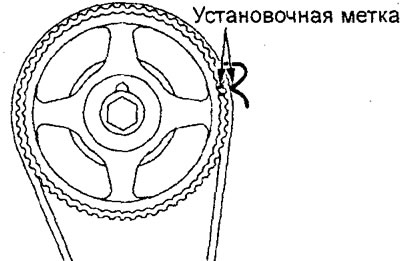
Engine 4G15.
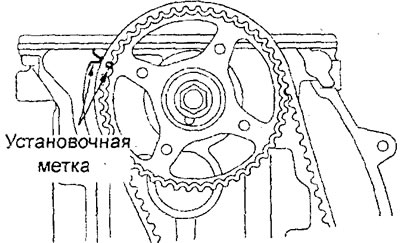
Engine 4G93.
b) Using a strap or wire, secure the timing belt to the camshaft pulley in the position shown in the figure.
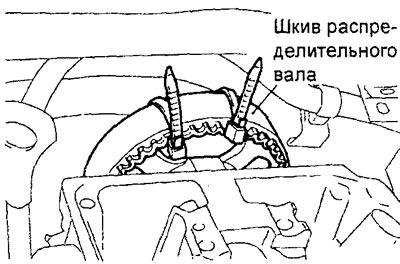
c) Secure the camshaft pulley from turning using a special fork holder and special bolts.
Caution: Be careful not to allow the camshaft to turn after removing the pulley.
2. Removing the camshaft oil seal.
a) Cut off part of the working edge of the camshaft oil seal.
b) Wrap the tip of the screwdriver in a cloth, insert it into the cut in the seal and remove the seal.
Caution: Be careful not to damage the camshaft, cylinder head and cylinder head cover.
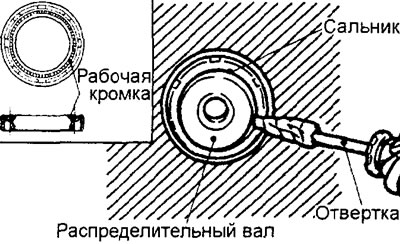
3. Removing the rocker arm axles together with the rocker arms.
Loosen the rocker arm shaft assembly mounting bolts with the rocker arms and remove the assembly.
Caution: Do not disassemble the rocker arm shaft assembly with the rocker arms unless absolutely necessary.
Installation is carried out in the reverse order of removal.
When installing parts, please pay attention to the following operations:
1. Installing the camshaft position sensor bracket.
a) Remove any remaining sealant from the camshaft position sensor bracket.
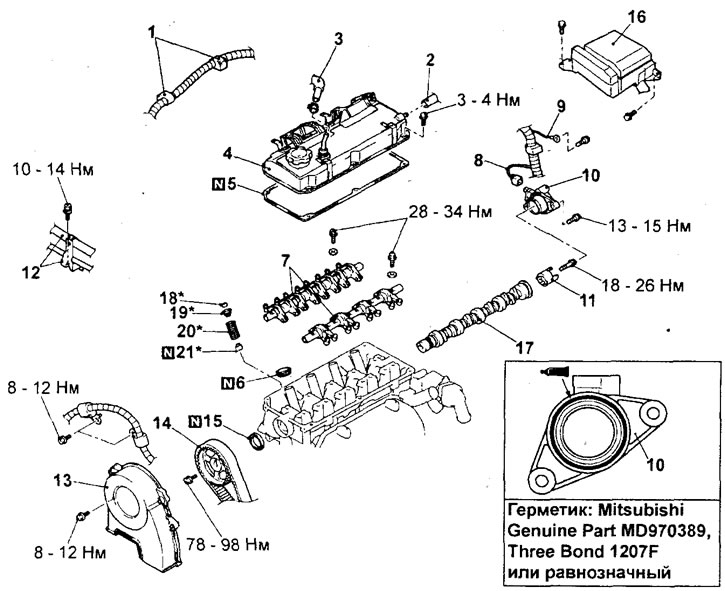
Replacing the camshaft oil seal (4G93 engine). 1 - engine management system wire harness retainer, 2 - ventilation hose connection, 3 - positive crankcase ventilation hose, 4 - cylinder head cover, 5 - cylinder head cover gasket, 6 - cylinder head cover seal (under spark plugs), 7 - rocker arm shaft with rocker arms, 8 - camshaft position sensor connector, 9 - ground wire, 10 - camshaft position sensor bracket, 11 - camshaft position sensor rotor, 12 - power steering hydraulic hose retainer, 13 - front upper timing belt cover, 14 - camshaft pulley and timing belt assembly, 15 - camshaft oil seal, 16 - engine compartment fuse and relay box, 17 - camshaft.
b) Apply the specified sealant to the mating surface of the sensor bracket and install it on the cylinder head.
Sealant - Mitsubishi Genuine Part MD970389, Three Bond 1207F or equivalent
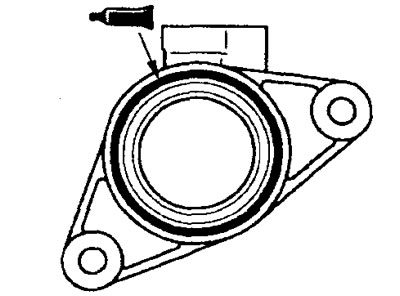
Engine 4G15.
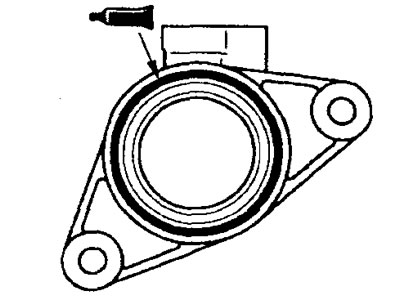
Engine 4G93.
c) Tighten the camshaft position sensor bracket mounting bolts to the specified torque.
Tightening torque: 14 ±1 Nm
2. Installing the rocker arm axle assembly with the rocker arms.
a) Remove the rocker arm axle spring.
b) Install and lightly tighten the intake rocker shaft bolts so that neither rocker on the intake side presses on the valves, c) Install the rocker shaft spring on top of the shaft so that it is at a right angle; to the spark plug guide.
Note: The rocker shaft springs must be installed before installing the rocker shaft with the exhaust rocker arms.
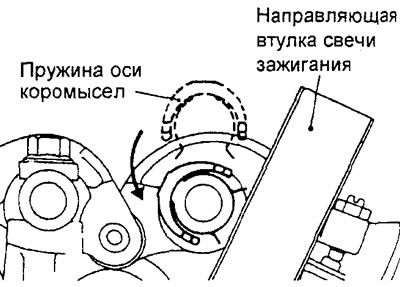
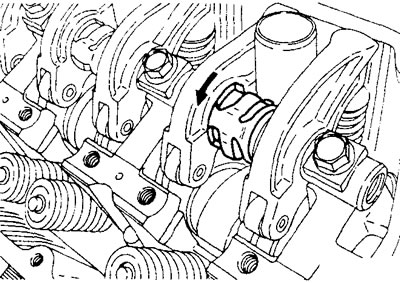
d) Tighten the intake valve rocker arm shaft mounting bolts together with the rocker arms to the specified torque.
Tightening torque: 31 ±3 Nm
d) Install the exhaust valve rocker shaft assembly with the rocker arms and tighten the shaft mounting bolts to the specified torque.
(The article is based on data from the website: MITSUBISHIMAN.ru)
Tightening torque: 31 ±3 Nm
g) Make sure that the chamfer of each rocker arm shaft is positioned as shown in the figure.
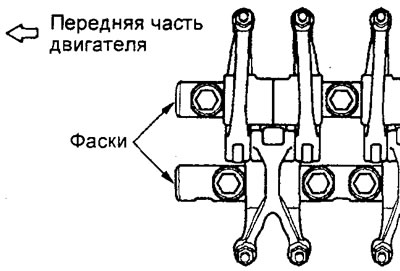
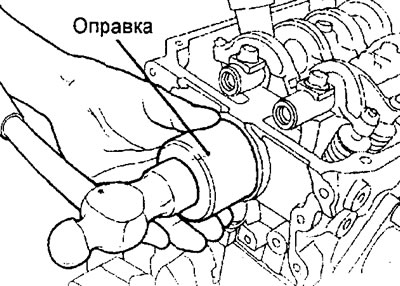
4. Installing the camshaft oil seal.
a) Apply a small amount of engine oil to the working lip of the oil seal around its entire circumference.
b) Using a special mandrel, press in the oil seal as shown in the figure.
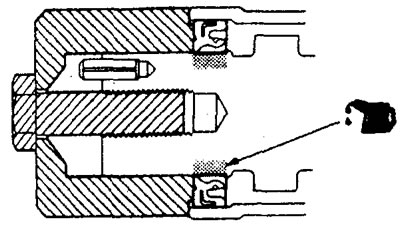
5. Installing the camshaft pulley with the timing belt assembly.
a) Install the camshaft pulley, aligning the timing marks, and secure it from turning using a special fork holder and special bolts. Then tighten the mounting bolt to the rated torque.
Tightening torque - 88 ±10 N·m
b) Remove the band clamp or wire securing the timing belt to the camshaft pulley.
After completing the installation of the parts, perform the following operations:
- a) Fill with engine oil.
- b) Install the ignition coils.
- c) Install the air filter bracket and air filter.