



Removal
Note:
- - The parts are removed in the order of numbers indicated in the corresponding figure "Removing and installing the front drive shaft".
- - (4WD models) Drain transmission oil before removal.
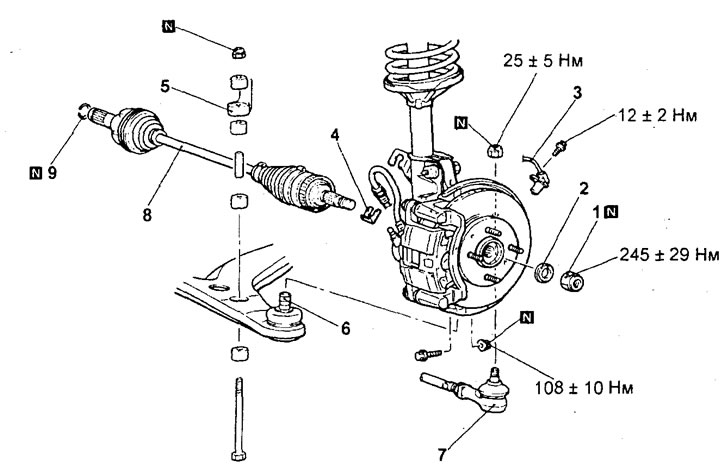
Removal and installation the front drive shaft (2WD models). 1 - drive shaft mounting nut, 2 - washer, 3 - wheel speed sensor, 4 - retainer, 5 - anti-roll bar connection, 6 - lower arm ball joint connection, 7 - steering rod end, 8 - drive shaft, 9 - retaining ring.
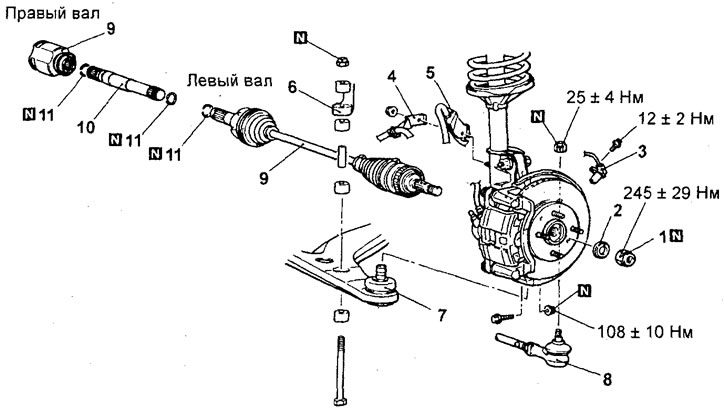
Removal and installation the front drive shaft (4WD models). 1 - drive shaft mounting nut, 2 - washer, 3 - wheel speed sensor, 4 - wheel speed sensor wire mounting bracket, 5 - brake hose mounting bracket, 6 - anti-roll bar connection, 7 - lower arm ball joint connection, 8 - tie rod end, 9 - drive shaft, 10 - inner shaft, 11 - retaining ring.
When removing parts, pay attention to the following operations.
1. Loosen the drive shaft mounting nuts.
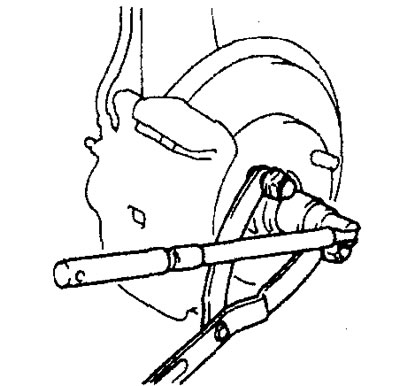
Caution: When loosening the drive shaft mounting nut, the hub bearing must not be loaded with the weight of the vehicle.
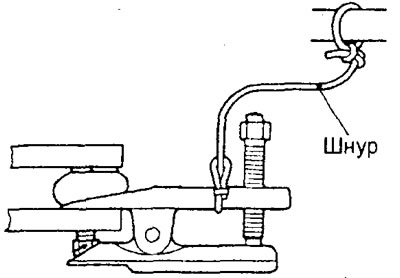
2. Disconnect the lower suspension arm ball joint from the steering knuckle.
Attention:
- To prevent the puller from bouncing off, it is necessary to first tie it with a cord to the suspension strut or other nearby part of the car.
- Loosen the mounting nut on the ball joint pin at the steering knuckle without unscrewing the nut completely.
3. Remove the drive shaft.
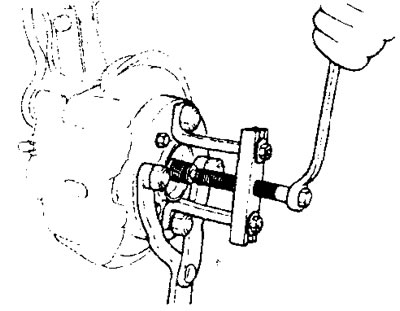
a) Using a special tool, disconnect the drive shaft from the hub.
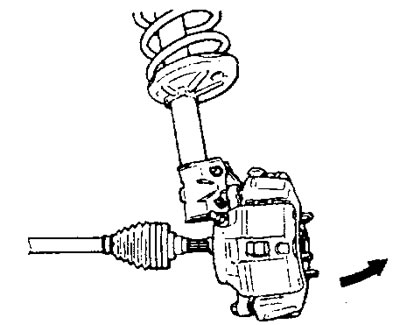
b) Pull the hub to the side as shown in the figure and disconnect the drive shaft.
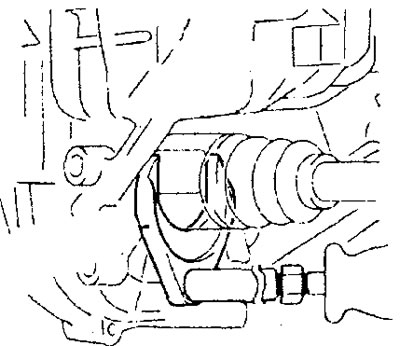
c) Install the special tool between the gearbox housing and the drive shaft, and then disconnect the wheel drive shaft from the gearbox.
Note:
- Always use a special tool; it is prohibited to pull out the wheel drive shaft without a special tool, since such an operation will lead to damage to the inner joint of the drive shaft.
- To avoid damaging the seal, do not install the special tool too deep.
- When loosening the drive shaft mounting nut, the hub bearing should not be loaded with the weight of the car. However, if it is necessary to move the car to another location (the bearing should be loaded with the weight of the car), then temporarily tighten the nut.
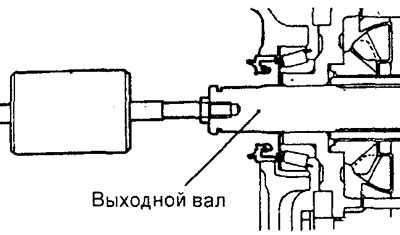
4. (4WD models) Using the special tool, remove the inner shaft from the transmission.
Note: Do not damage the oil seal.
Examination
1. Check the drive shaft inner joint protective boot for damage.
2. Check the ball joints for wear and play.
3. Check the splined portion of the drive shaft (and hub) for signs of excessive wear or damage.
Installation
Note:
- - Installation is performed in the reverse order of removal. When installing parts, pay attention to the following operations.
- - (4WD models) After installation, fill the gearbox with oil.
1. Install the drive shaft.
Caution: When installing the drive shaft, do not damage the oil seal.
2. Install the anti-roll bar mounting nuts.
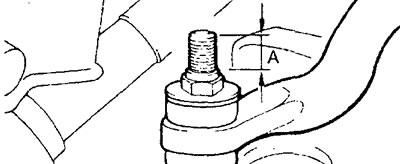
Tighten the nut so that the length (A) of the protruding part of the stabilizer mounting bolt corresponds to the nominal value.
Nominal value (A) - 22 ±1.5 mm
3. Install the drive shaft mounting nut.
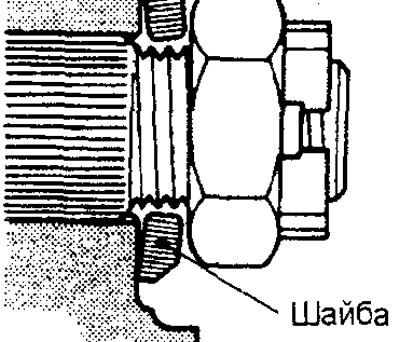
a) Make sure the drive shaft washer is installed correctly as shown in the figure.
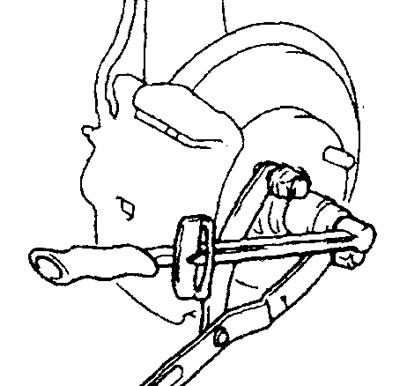
b) Using the special tool, tighten the drive shaft mounting nut.
Tightening torque - 245 + 29 N·m
Caution: The front wheel hub bearing must not be loaded with the weight of the vehicle before tightening the drive shaft mounting nut.
c) If the installation holes for the cotter pin do not match, additionally tighten the nut to a tightening torque not exceeding 260 N·m.
d) After the mounting holes are aligned, install the cotter pin in place and spread its antennae.