



Contents: Removal the rocker arm axles as an…⤓ Removal the camshaft ⤓ Checking the axial clearance of the…⤓ Measuring the oil clearance of the…⤓ Checking the camshaft cams ⤓ Height of cams (mm) ⤓ Height of cams (mm) ⤓ Checking the camshaft on the stand ⤓ Installing the camshaft oil seal ⤓
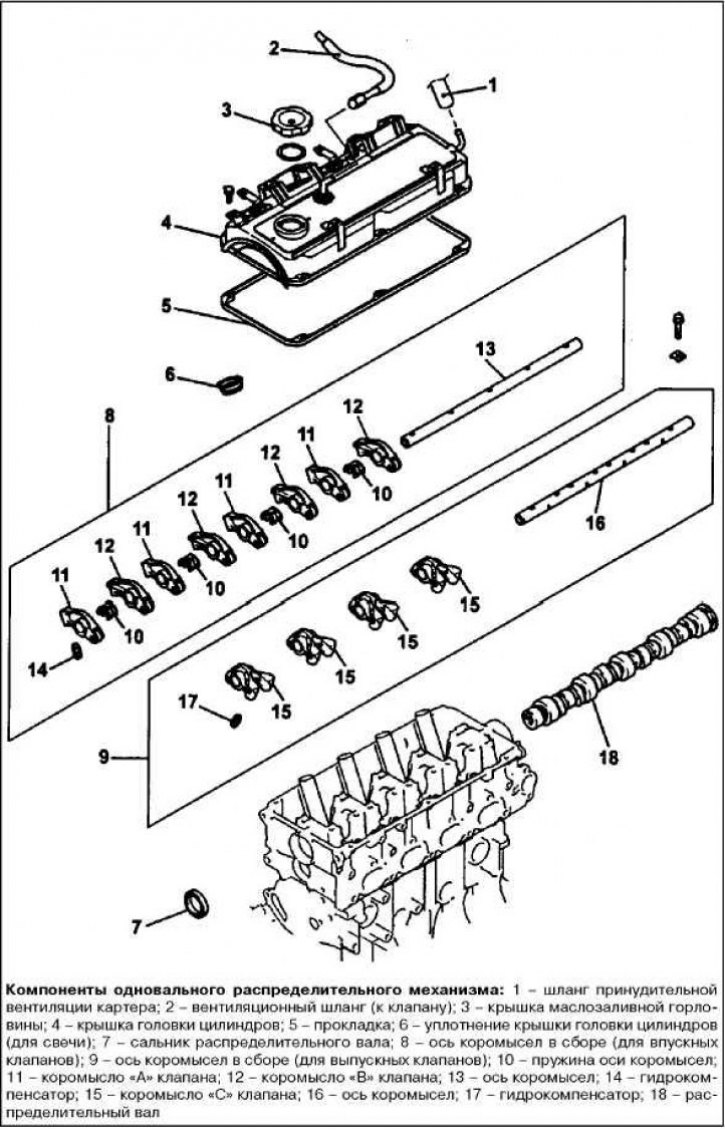
Removal the rocker arm axles as an assembly
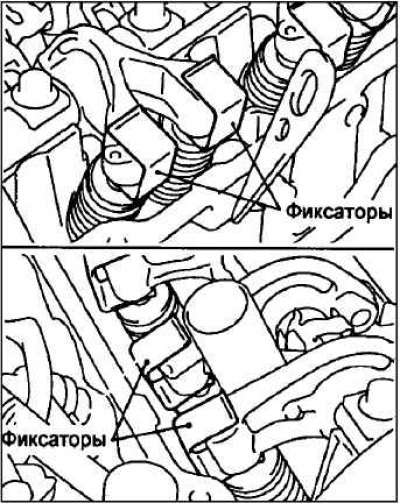
Before removing the axles together with the rocker arms, install the clamps to prevent the hydraulic compensators from falling out of the valve rocker arms.
Also, when disassembling the rocker arm shaft, arrange them according to cylinder number and intake or exhaust valves to avoid mixing up the parts during assembly.
Removal the camshaft
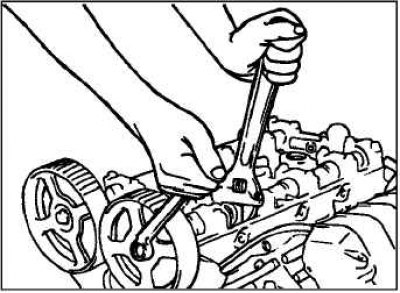
Loosen the camshaft bearing cap mounting bolts. Remove the bearing caps, camshafts (shaft), tappets and clearance compensators.
When removing the camshaft from the cylinder head, be careful and attentive, protecting it from accidental damage.
Attention! Loosen the bearing cap mounting bolts in several steps to avoid deformation of the camshaft.
Checking the axial clearance of the camshaft(s)
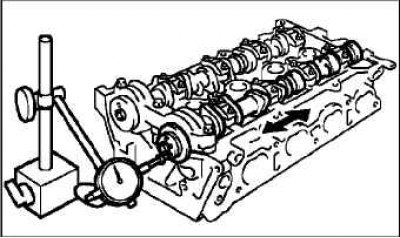
Install the camshafts or shaft into the cylinder head.
By moving it in the axial direction, use an indicator to measure the axial clearance.
Nominal axial clearance: 0.5–0.08 mm.
Maximum permissible axial clearance: 0.20 mm.
If the axial clearance exceeds the maximum permissible value, replace the cylinder head. If the camshaft bearing journals are damaged, replace the camshaft(s). Clean the oil passages in the cylinder head.
Check the diameter of the camshaft bearing journals. If the measured value does not correspond to the standard value, check the oil clearance between the journal and the camshaft bearing.
Standard value: 45.0 mm.
Measuring the oil clearance of the camshaft journals
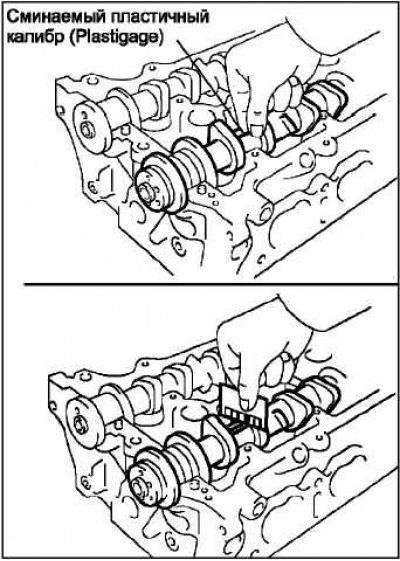
Clean the bearing caps and camshaft journals.
Install the camshafts into the cylinder head.
Place the crushable plastic gauges axially on all camshaft journals.
Install the camshaft bearing caps.
Note: Do not turn the camshafts.
Remove the bearing caps again.
Measure the crushable plastic gauges at their widest point.
- Nominal oil clearance: 0.05–0.09 mm.
- Maximum permissible oil gap: 0.12 mm.
Note: After measuring, completely remove any remaining crumple plastic gauge.
Note: If the oil clearance exceeds the maximum allowable value, replace the cylinder head or camshaft.
Checking the camshaft cams
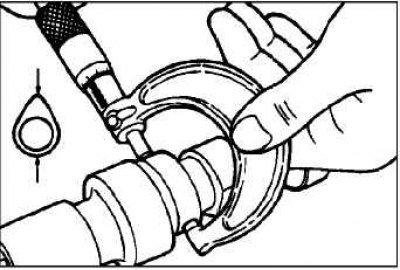 | 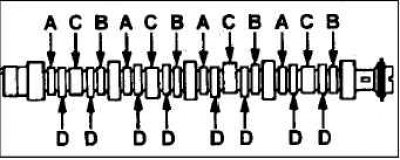 |
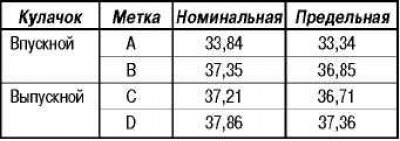
Measure the camshaft lobe height. If the measured value is less than the maximum permissible value, replace the camshaft.
Height of cams (mm)
Engine 4G64
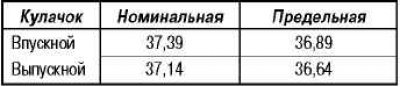
Height of cams (mm)
Engine 4G69
Checking the camshaft on the stand
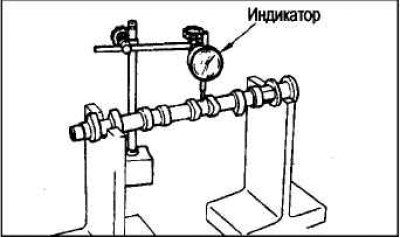
Mount the camshaft on a stand and measure the shaft runout at the middle journal. If the runout exceeds the maximum permissible value, replace the camshaft.
- Standard value: less than 0.02mm.
- Maximum permissible value: 0.10 mm.
Checking the rocker arms and their axles
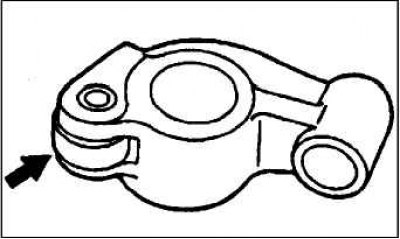
Check the surface of the valve rocker arm pressure roller and rocker arm tappet; if there is wear or damage, replace the rocker arm
Make sure the pressure roller rotates smoothly and replace the valve rocker arm if it is sticking or has excessive play.
Measure the inner diameter of the valve rocker arm bushing (under the axle). Replace the rocker arm if there is increased wear of the bushing.
Inspect the outer surface (circumference) of the rocker arm shaft on which the rocker arm is installed; if uneven or increased wear is noticed on it, replace the rocker arm shaft.
Inspect and clean the oil holes in the rocker arm shaft.
Check the clearance between the bushing and the rocker shaft. If the clearance exceeds the standard value, replace the rocker arms and the rocker shaft.
Standard gap: 0.02–0.05 mm.
Installing the camshaft oil seal
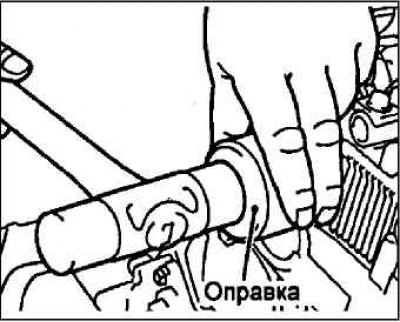
Apply a thin layer of engine oil to the working edge of the seal around its entire circumference.
Using a special mandrel, press the seal onto the shaft.