



Contents: Heater Blower Block (1983-89) ⤓ Heater Blower Block (1990-98) ⤓ Cars 1983-89. ⤓ Cars 1990-98. ⤓
Heater Blower Block (1983-89)
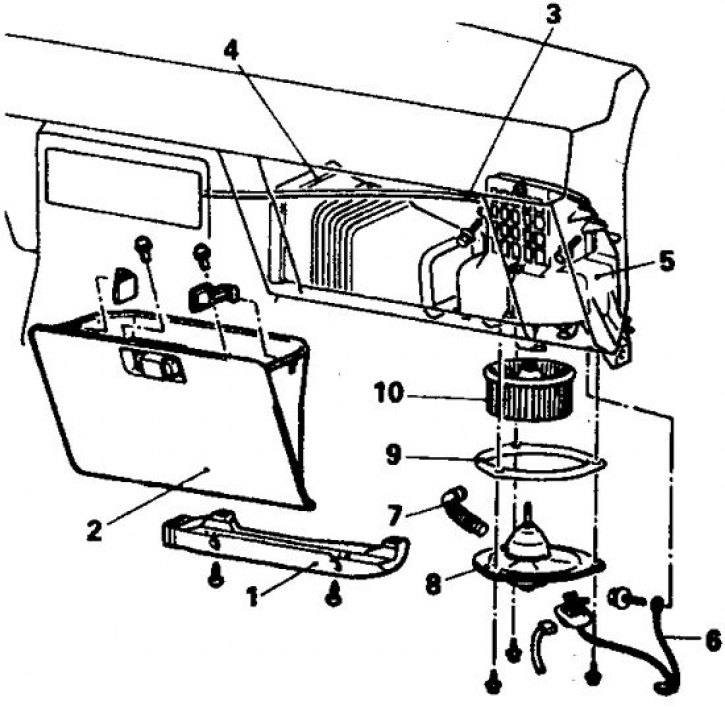
1. Lower air duct cover; 2. Box for small items; 3. Dividing flap cable; 4. Air duct; 5. Blowing block; 6. Resistor; 7. Hose; 8. Electric motor; 9. Compaction; 10. Fan
Heater Blower Block (1990-98)
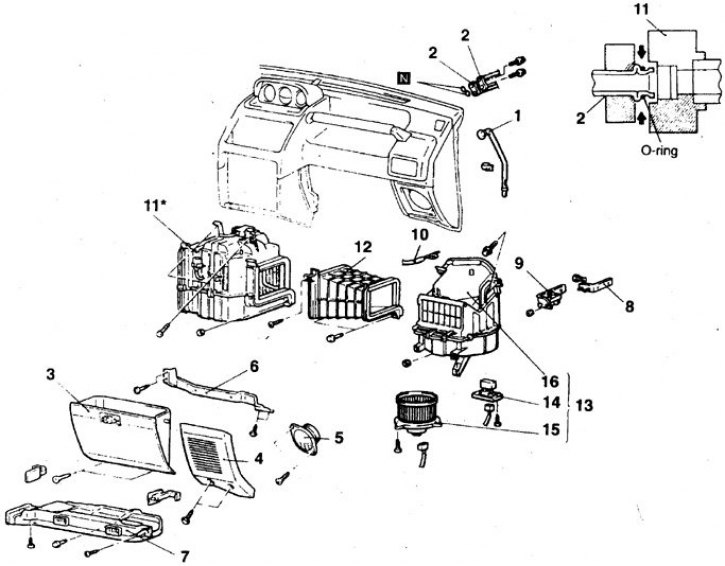
1. Drainage hose; 2. Connecting the tubes on the evaporator; 3. Box for small items; 4. Speaker grille; 5. Speaker; 6. Plank; 7. Channel for heating feet; 8. Relay block; 9. Bracket; 10. Dividing flap cable; 11. Evaporator; 12. Connecting section; 13. Assembled blower unit; 14. Resistor; 15. Electric motor; 16. Body
Cars 1983-89.
1. Remove the lower air duct cover from the right side of the front passenger compartment panel.
2. Remove the small item box by pressing the latches.
3. Disconnect the distribution box cable.
4. Remove the large center duct from the fan to the heater (except for cars of 1983-86.).
5. Disconnect the connector and small hose from the electric motor, unscrew the 3 bolts and remove the electric motor.
6. If necessary, remove the impeller and resistor.
7. Installation is carried out in reverse order.
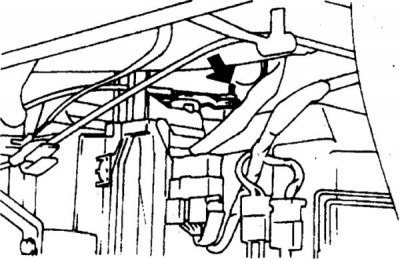
8. When installing the cable, move the divider lever to the RECIRC position, turn the throttle lever counterclockwise and put on the cable and secure it with the bracket.
Cars 1990-98.
Attention! On cars with air conditioning, to remove the blower unit, you will need to depressurize the air conditioner in a car service center and remove the evaporator.
1. On vehicles with air conditioning, disconnect the drain hose, refrigerant supply pipe and suction side pipe.
2. Remove the storage box.
3. Remove the decorative grille and speaker.
4. Unscrew 4 bolts and remove the bar.
5. Disconnect the relay connector and remove the connector bracket.
6. Disconnect the cable from the dividing flap lever.
7. Remove the passenger footwell heating duct.
8. Remove the evaporator (in a car with air conditioning) or connecting section (on a car without air conditioning).
9. Loosen the bolts and remove the blower unit.
10. Remove the fan and resistor.
11. Installation is carried out in reverse order.
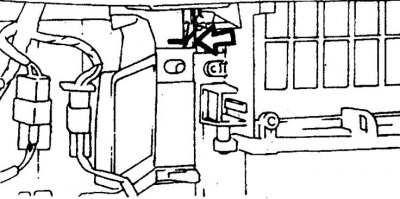
12. Connect the cable in the following order.
Move the divider flap lever to the recirculation position, press the divider flap lever in the direction of the arrow, put on the cable and secure the casing with a bracket.
13. Refill the air conditioner at a car service center.