



Contents: Interior Dashboard (1987-91) ⤓ Heater (1987-91) ⤓ Floor panel (1992-98) ⤓ Front panel of the salon (1992-98) ⤓ Heater (1992-98) ⤓ Cars 1983-86. ⤓ Cars 1987-91. ⤓ Cars 1992-98. ⤓
Interior Dashboard (1987-91)
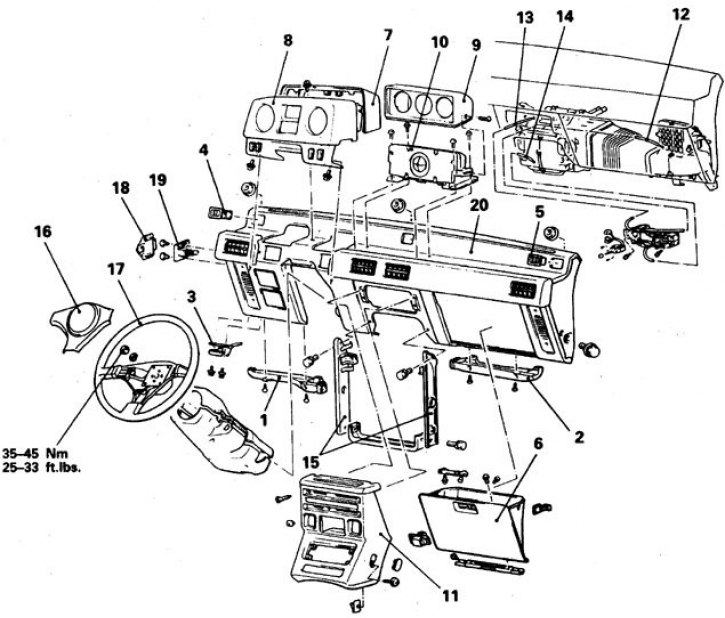
1. Lower cover of air duct B; 2. Lower cover of air duct C; 3. Bonnet lock cable bracket; 4, 5. Side ventilation windows; 6. Box for small items; 7. Instrument panel cover; 8, 9. Instrument cluster housing; 10. Instrument frame; 11. Central panel; 12. Air duct; 13. Ventilation mode switching cable; 14. Heater valve cable; 15. Central frame; 16. Sound signal button; 17. Steering wheel; 18, 19. Cover and fuse box; 20. Panel
Heater (1987-91)
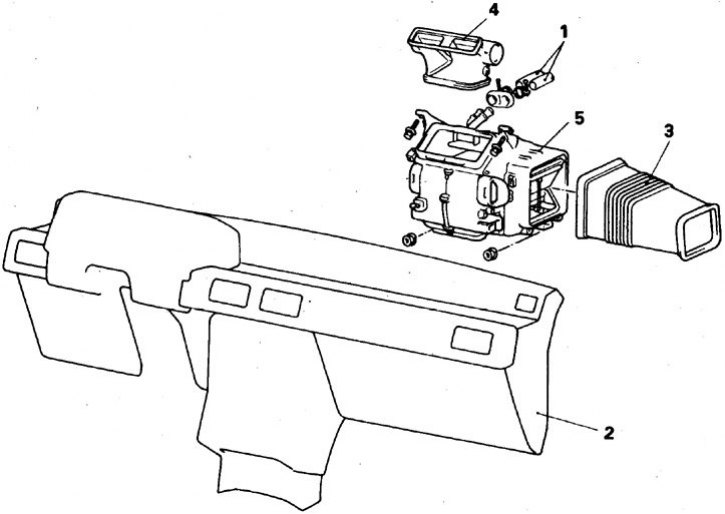
1. Hoses; 2. Panel; 3. Air duct; 4. Central air duct; 5. Heater
Floor panel (1992-98)
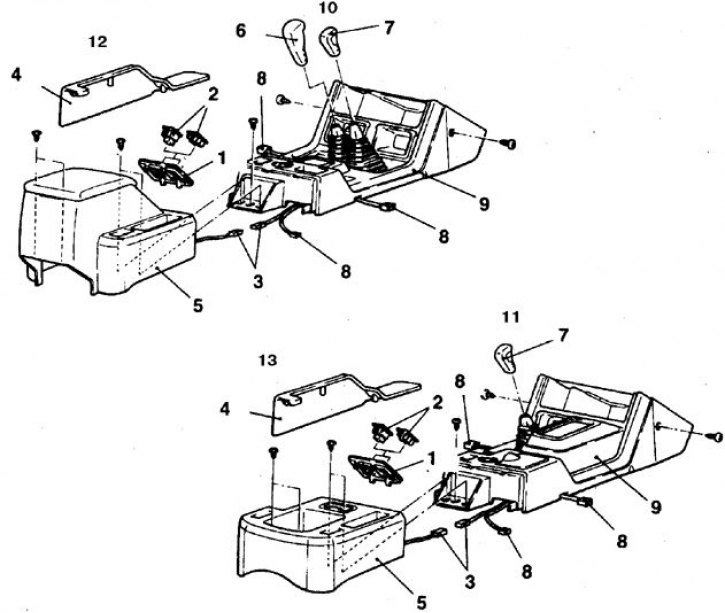
1. Panel with switches; 2. Suspension switch (or a plug); 3, 8. Connector; 4. Sidebar A; 5. Rear section; 6. Gear shift knob; 7. Transfer case lever handle; 9. Front section; 10. For vehicles with manual transmission; 11. For cars with automatic transmission; 12. Box-type rear section; 13. Rear section of tray type
Front panel of the salon (1992-98)
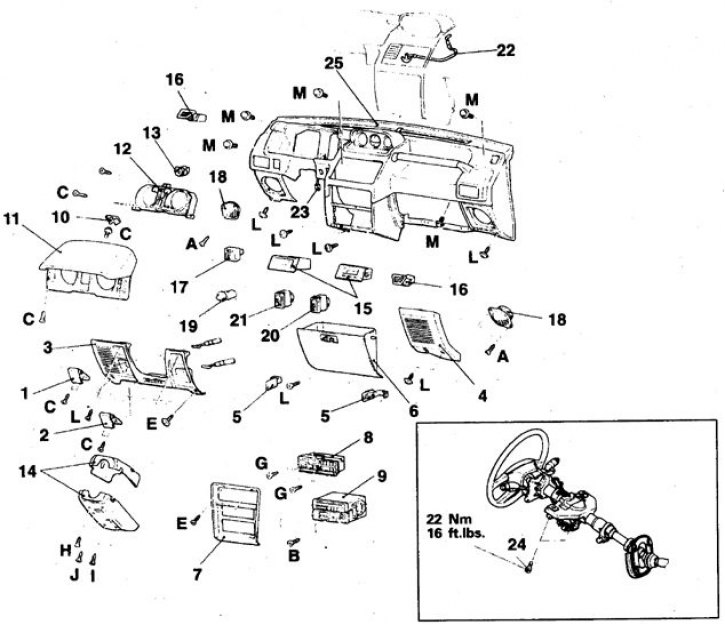
1. Hood lock drive handle; 2. Filler neck door drive handle; 3. Front panel bottom cover; 4. Front panel corner cover; 5. Small items drawer latch; 6. Box for small items; 7. Central panel A; 8. Heater control panel; 9. Radio; 10. Instrument panel trim plug; 11. Instrument panel trim; 12. Instrument panel; 13. Speedometer cable adapter; 14. Steering column cover; 15. Clock; 16. Side nozzle; 17. Mirror switch; 18. Speaker; 19. Rheostat; 20. Rear window wiper and washer switch; 21. Door lock switch; 22. Air intake flap drive cable; 23. Connector; 24. Steering column bolts; 25. Front interior trim panel
Heater (1992-98)
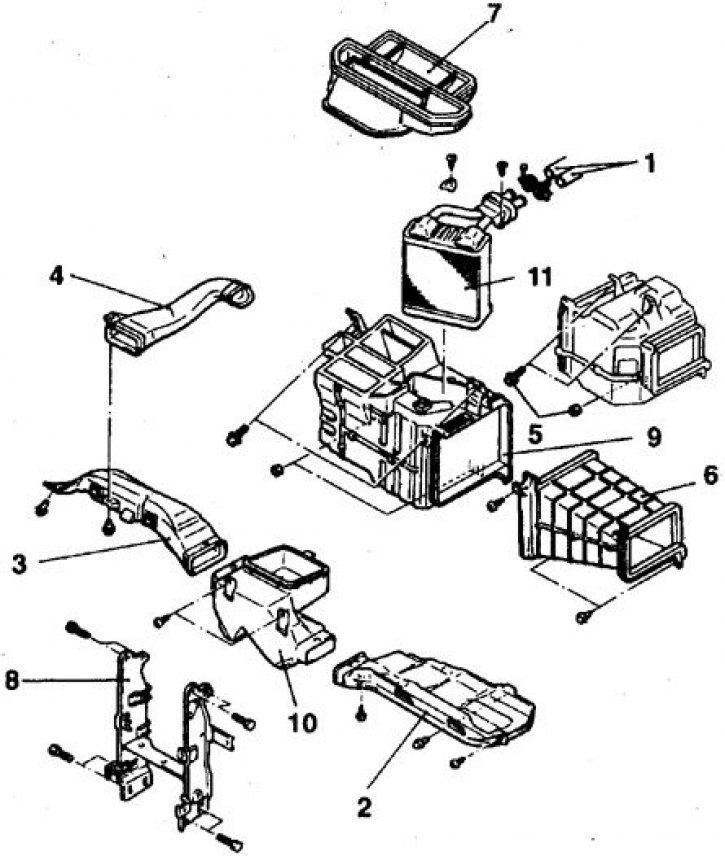
1. Hoses; 2, 3. Air ducts for footwells; 4. Air duct A; 5. Evaporator bolt and nut; 6. Connecting section; 7. Central air duct; 8. Frame; 9. Heater; 10. Distribution box; 11. Radiator
Cars 1983-86.
1. Drain the fluid from the cooling system by moving the heater valve lever to the fully open position.
2. Disconnect the hoses from the heater.
3. Disconnect the battery from ground.
4. Remove the steering wheel, the central section of the front panel, the instrument panel, carefully disconnect the speedometer cable and wires.
5. Remove the instrument cluster.
6. Remove the lower duct covers under the dash panel and the cable bracket.
7. Remove the heater control panel, marking the cables when disconnecting from the valve and flaps.
8. Remove the fuse box cover, unscrew the bolts and push the box under the front panel.
9. Disconnect the wires from the front speakers.
10. Remove the plug in the center of the front panel.
11. Carefully press the latches and remove the windshield defroster nozzles.
12. Remove the storage box.
13. Disconnect the wires from the heater relay.
14. Loosen the nuts and bolts and remove the front panel.
15. Remove the center air duct and windshield defroster duct.
16. Remove the rear window heating duct.
17. Unscrew the upper and lower nuts and remove the heater housing.
18. Remove the radiator, having previously removed all necessary parts (rod, lever and valve). Leave the insulation lining in place.
19. Installation is carried out in reverse order.
20. Secure the central air duct lever rod by turning the lever clockwise.
21. Connect the splitter flap rod by moving the flap to the windshield heating position and turning the lever counterclockwise.
22. Connect the tap rod with the radiator tap and air intake flap completely closed.
Cars 1987-91.
1. Drain the cooling system by moving the thermostat lever to the fully open position.
2. Mark and disconnect the hoses from the heater.
3. Disconnect the battery from ground.
4. Remove the lower air duct covers under the left and right parts of the front panel and the hood lock cable bracket.
5. Remove the storage box.
6. Remove the side ventilation nozzles by pressing the latches.
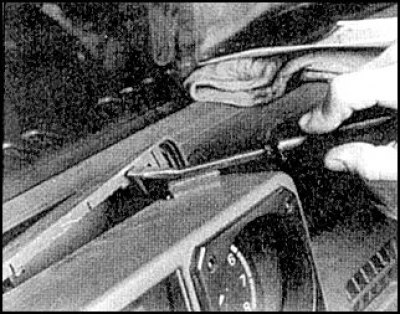
7. Pry and remove the rear cover of the center instrument cluster.
8. Remove the instrument panel, mark and disconnect the wires from the instruments and switches and the speedometer cable.
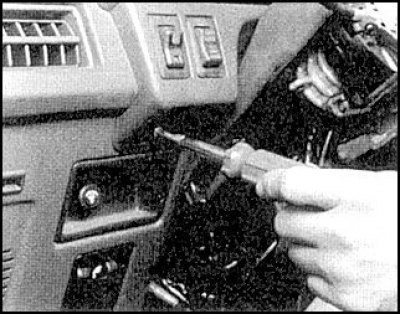
9. Loosen the side screws and remove the instrument cluster cover.
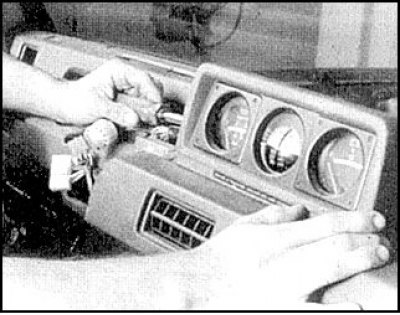
10. Unscrew the 4 screws in the base and remove the frame with the devices, disconnecting the wires.
Warning! The inclinometer can be damaged by light impacts or if it is dropped. Do not tilt the device so that the arrow goes beyond the edge of the scale.
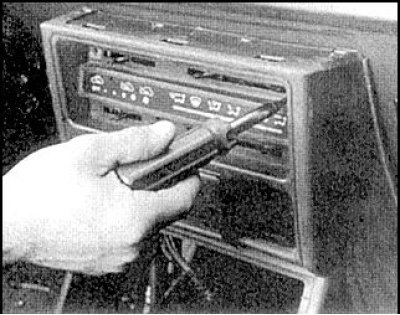
11. Remove the center section trim or lower panel.
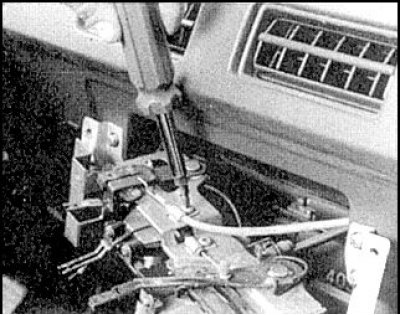
12. Mark and disconnect the 3 heater control cables.
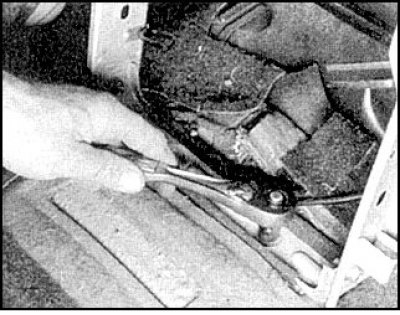
13. Remove the central frame together with the receiver, disconnecting the wires.
14. Remove the steering wheel.
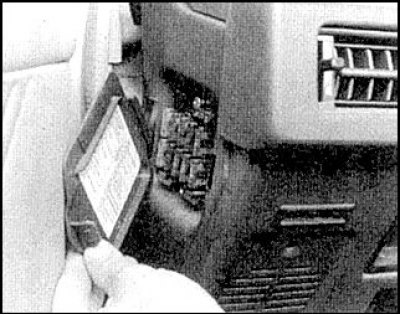
15. Remove the fuse box cover and take out the box.
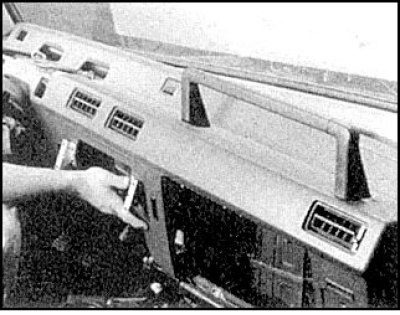
16. Loosen the nuts and bolts and remove the front interior trim panel.
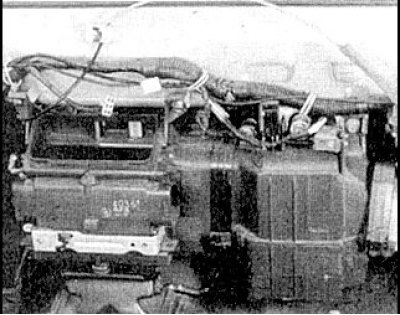
17. After removing the panel, access to the heater is provided.
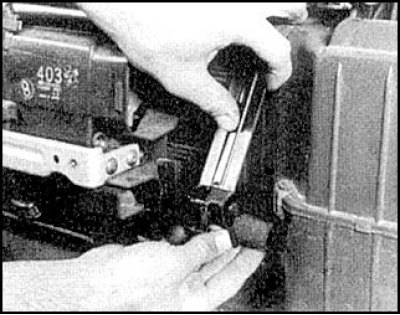
18. Remove the brackets securing the heater to the air ducts.
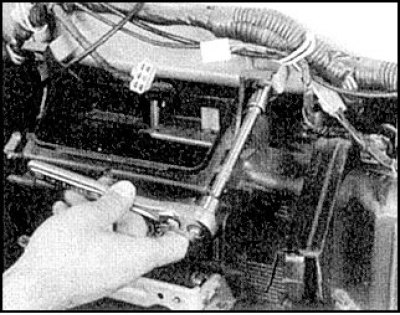
19. Unscrew the heater mounting bolts.
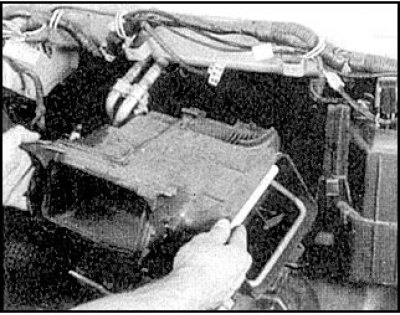
20. Remove the heater.
21. Remove the center air duct and the windshield heating duct.
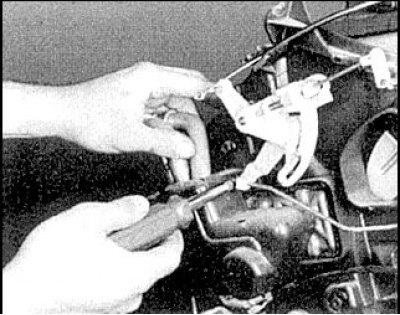
22. Unscrew the radiator cap screws.
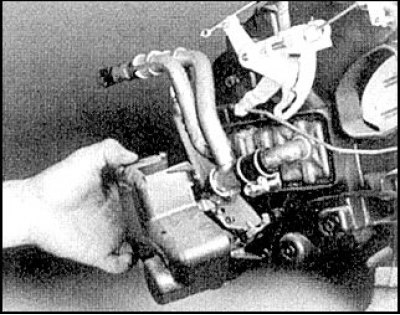
23. Remove the radiator cap.
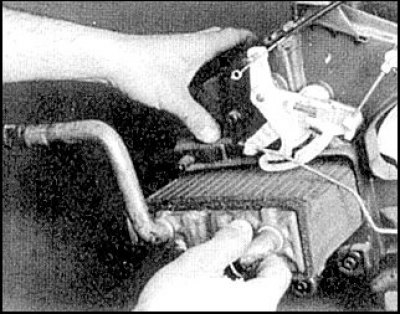
24. Remove the rear window heating duct, unscrew the upper and lower nuts and remove the heater radiator assembly with the casing.
25. Remove the lever and tap cover.
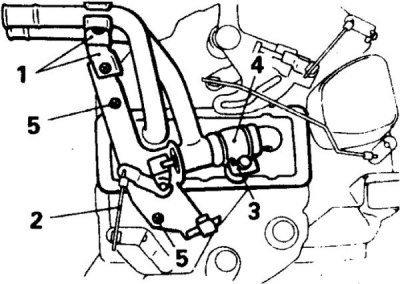
26. Remove the tap and branch pipe. To remove the heater tap, remove the bracket (1), rod (2), clamp (3), hose (4) and unscrew the screw (5).
27. Disconnect the rod and remove the dividing valve lever.
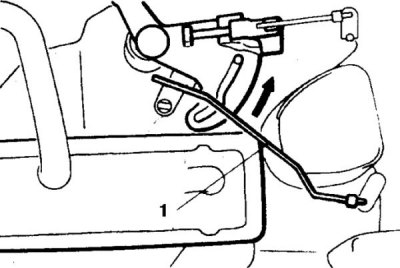
28. Remove the radiator. To get to the radiator, remove the rod (1) of the valve of the distribution box of the foot niche/glass flow. Leave the heat-insulating lining in place.
29. Installation is carried out in reverse order.
30. Connect all rods with the heater valves or tap completely closed; the air flow dividing flap lever to the foot well/to the windshield must be turned counterclockwise.
Cars 1992-98.
1. Drain the cooling system.
2. Disconnect the battery from ground.
3. Remove the floor section by following these steps:.
4. Remove the switch panel and suspension switch (or a plug).
5. Disconnect the connector from the back.
6. Remove side panel A.
7. Remove 4 screws and remove the rear section of the floor panel.
8. Unscrew the gearbox and transfer case lever handles.
9. Disconnect the wires from the floor panel.
10. Disconnect the wires from the floor panel.
Caution: When performing these operations, do not touch the airbag diagnostic unit.
11. Remove the front interior trim panel as follows.
12. Remove the hood lock and filler door handles.
13. Loosen the screws and remove the bottom and corner covers.
14. Remove the storage box.
15. Loosen the screws and remove the middle panel A.
16. Remove the heater.
17. Remove the radio.
18. Remove the instrument panel trim plug, unscrew the screws and remove the trim.
19. Loosen the screws and remove the instrument panel.
20. Remove the speedometer cable by first disconnecting it at the gearbox, then removing the adapter, pulling the cable towards you, and removing the retainer.
21. Unscrew 4 screws and remove the steering column cover.
22. Remove the watch (or a plug).
23. Remove the side nozzle, mirror switch, speaker, rear window wiper and washer switch and door lock switch.
24. Disconnect the air duct flap cable and wiring.
25. Loosen the screws and remove the front panel.
26. Disconnect the hoses from the heater.
27. Remove the lower air duct covers under the front panel.
28. Remove the cold air duct cover A.
29. On a car with air conditioning, unscrew the bolts and nut securing the evaporator; on a car without air conditioning, remove the transition section of the air duct.
30. Remove the central duct and two frames.
31. Remove the heater, distribution box for foot warmers.
32. Loosen the bolts and remove the heater radiator.
33. Installation is carried out in reverse order. Connect the air intake cable.
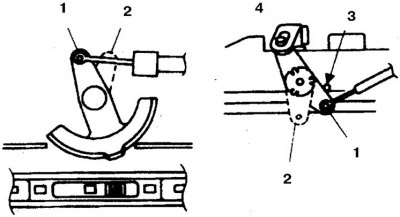
34. When installing the air intake cable, move the direct cold air supply sector and the lever on the heater to the "closed" position (1 – closed, 2 – open, 3 – limiter, 4 – on the heater side).