



Contents: Heater Control Panel (1983-91) ⤓ Heater Control Panel (1992-98) ⤓ Cars 1983-91. ⤓ Cars 1992-98. ⤓
Heater Control Panel (1983-91)
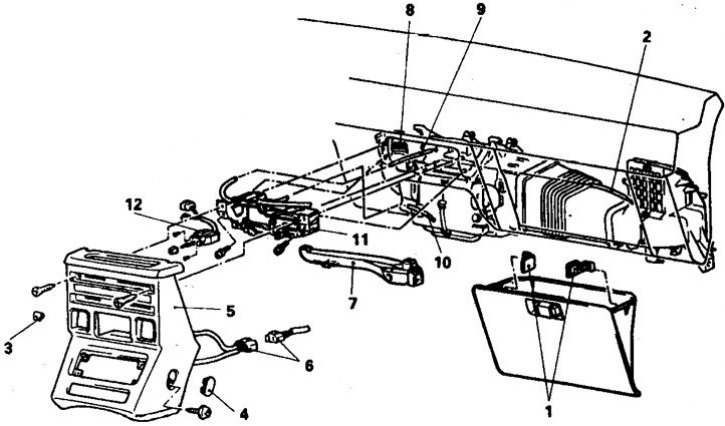
1. Small items drawer latches; 2. Distribution box flap drive cable; 3. Handles; 4. Plug; 5. Central section; 6. Connector; 7. Footwell air duct lower cover; 8. Windshield heating duct; 9. Dividing flap cable; 10. Crane drive cable; 11. Control Panel; 12. Blower unit switch
Heater Control Panel (1992-98)
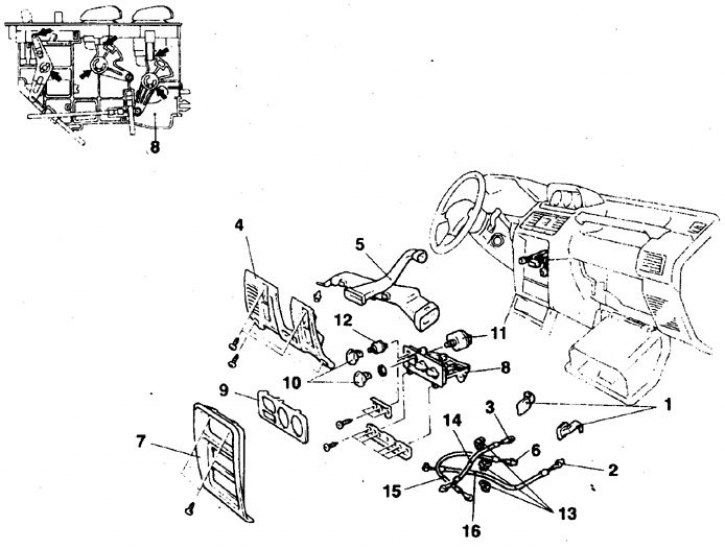
1. Fixators; 2, 16. Distribution box flap drive cable; 3, 14. Crane drive cable; 4. Bottom panel; 5. Air ducts; 6, 15. Dividing flap cable; 7. Central section; 8. Heater control panel; 9. Facing; 10. Handles; 11. Blower unit switch; 12. Air conditioner switch; 13. Spring clamps
(The original material is posted on the website: «mitsubishiman.ru»)
Cars 1983-91.
1. Remove the storage box.
2. Disconnect the distribution box flap cable by bending the spring clip.
3. Remove the handles from the control panel.
4. Remove the plugs, unscrew the screws and remove the center section of the front panel. When removing, disconnect the connector from the rear side.
5. Remove the lower air duct covers from the front panel.
6. Remove the windshield heating duct.
7. Disconnect the heater control cables.
8. Remove the heater assembly.
9. Disconnect the connector and remove the fan switch.
10. Installation is carried out in reverse order.
11. Before connecting the cables, move the corresponding damper and valve levers to the extreme positions and secure the cable sheaths with spring clamps.
12. After assembly, check the completeness and freedom of movement of the control levers.
Cars 1992-98.
1. Remove the storage box.
2. Bend back the spring clips and disconnect the cables of the distribution box flap and the thermostat flap.
3. Remove the handles from the control panel.
4. Remove the side covers, unscrew the screws and remove the center section of the front panel. When removing the panel, disconnect the connector from the back.
5. Remove the lower cover and the air ducts of the left side nozzle and footwell air vent.
6. Disconnect the splitter valve cable.
7. Loosen the bolts and remove the heater controls.
8. If necessary, remove the trim, handles and switches.
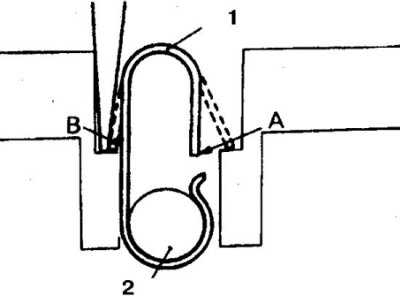
9. Remove the spring clips securing the cable sheaths by pressing them in directions A and B and remove the cables (1 – clip; 2 – cable).
10. Installation is carried out in reverse order.
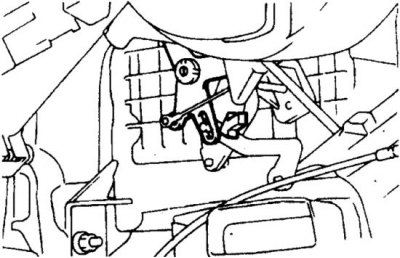
11. To connect the distribution box flap cable, press the lever all the way in the direction indicated by the arrow.
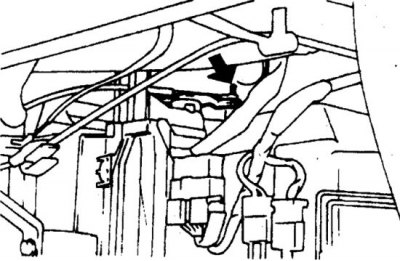
12. To connect the thermostat flap cable, press the lever all the way in the direction indicated by the arrow.
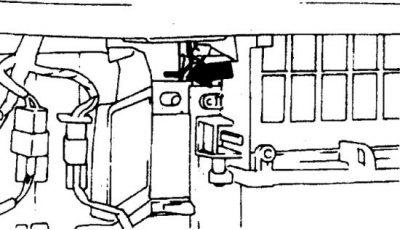
13. To connect the divider valve cable, press the lever all the way in the direction indicated by the arrow.
14. Secure the cable sheaths with spring clamps.
15. After assembly, check the completeness and freedom of movement of the control levers.