



Contents: Compressor mount on G63 (1), G55…⤓ Air conditioning compressor…⤓ Types of pipe connections on the…⤓ 1-stage air conditioner line for…⤓ 2-stage air conditioner line for…⤓ 2-stage air conditioner line for…⤓ Removal and installation ⤓
Compressor mount on G63 (1), G55 (2), D55 (3) engines
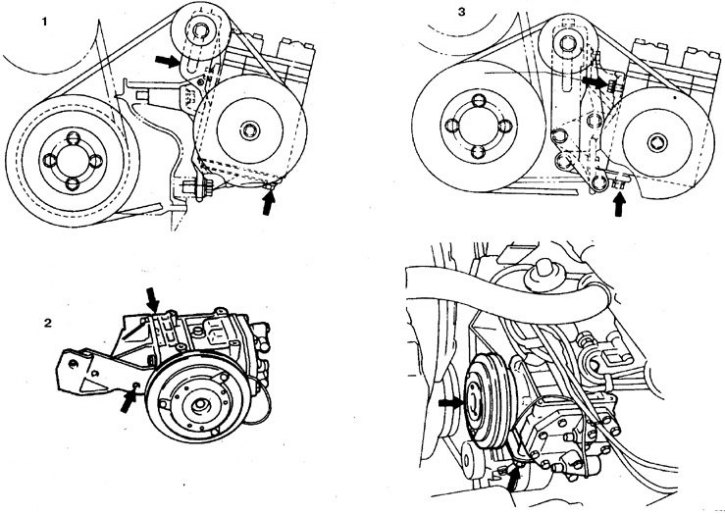
Air conditioning compressor (6-cylinder engines)
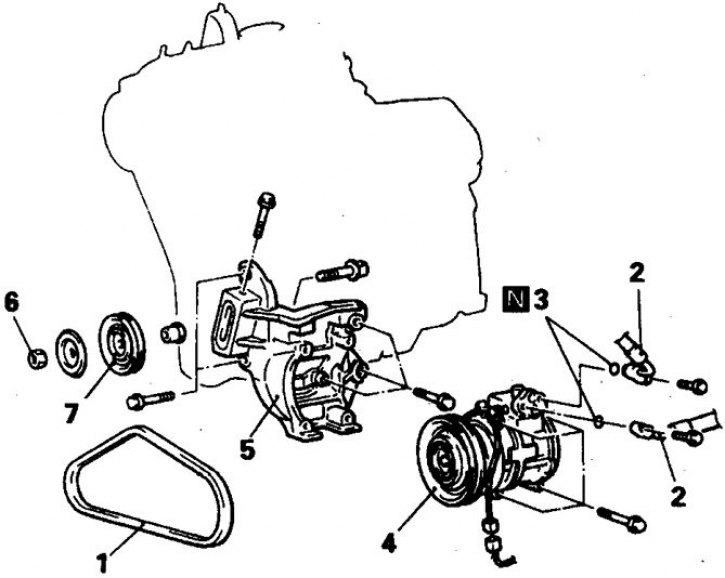
1. Belt; 2. Hose fittings; 3. Sealing rings; 4. Compressor; 5. Bracket; 6. Pulley nut; 7. Tensioner roller
Types of pipe connections on the condenser
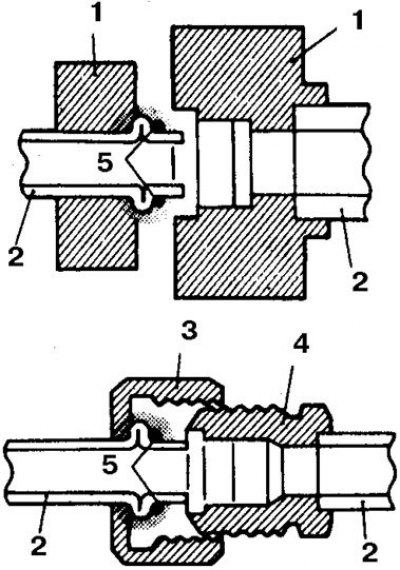
1. Flange; 2. Tube; 3. Nut; 4. Fitting; 5. Ring
1-stage air conditioner line for cars with 2.6 and 3.0 l engines (12-valve)
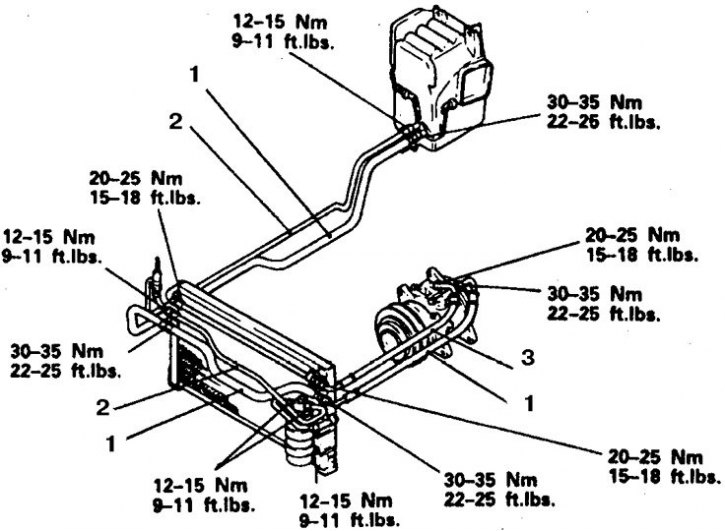
1. Suction line; 2. Line with liquid refrigerant; 3. Discharge line
2-stage air conditioner line for cars with 2.6 and 12-valve 3.0 l engines
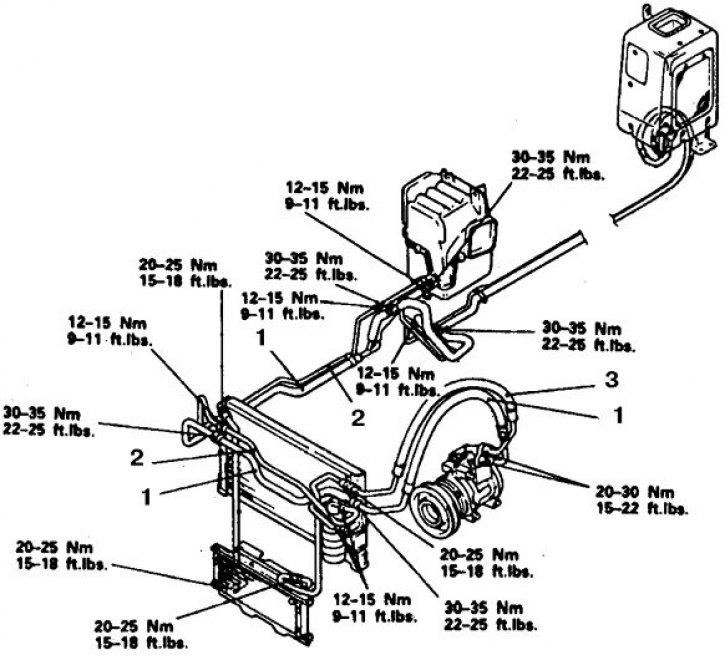
1. Suction line; 2. Line with liquid refrigerant; 3. Discharge line
2-stage air conditioner line for cars with 3.5 and 24-valve 3.0 l engines
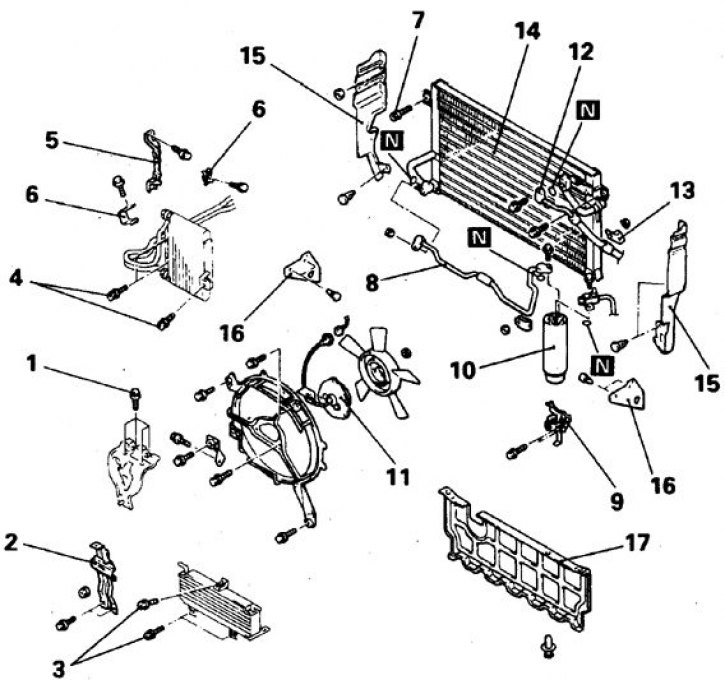
1. Hood lock bracket; 2. Rack; 3. Transmission fluid cooler bolt; 4. Oil cooler bolt; 5. Oil radiator bracket; 6, 13. Bracket; 7. Capacitor mounting bolt; 8. High pressure tube; 9. Receiver/moisture separator bracket; 10. Receiver; 11. Fan; 12. High pressure hose; 14. Capacitor; 15, 16, 17. Seal
Removal and installation
1. Depressurize the refrigerant line at a car service center.
2. Disconnect the battery from ground.
4-cylinder engines
3. Remove the distributor cap (2.0L) or coil (2.6L) and set aside.
4. Remove the drive belt.
5. Disconnect the wires from the compressor.
6. Disconnect the hoses from the compressor and immediately plug the openings.
7. Unscrew the upper compressor bolts, paying attention to their location.
8. While holding the compressor, loosen the bottom bolt and remove the compressor.
9. Installation is carried out in reverse order.
10. Tighten the compressor bolts in the order they were previously installed.
11. Replace the hose sealing rings.
6-cylinder engines
12. Remove the radiator shroud.
13. Remove the drive belt.
14. Disconnect the wires from the compressor.
15. Disconnect the wires from the compressor.
16. Disconnect the hoses from the compressor and immediately plug the openings.
17. Unscrew the upper compressor bolts, paying attention to their location.
18. While holding the compressor, loosen the bottom bolt and remove the compressor.
19. Installation is carried out in reverse order.
20. Tighten the compressor bolts in the order they were previously installed.
21. Replace the hose sealing rings.