



2. Drain the cooling system (see Chapter 1).
3. While working in the engine compartment or under the instrument panel, disconnect the heater hoses from the heater control valve.
4. Remove the instrument panel and center panel (if equipped).
5. Remove the heater controls (see section 12) and disconnect the heater hoses from the radiator tubes. Be prepared to collect any spilled fluid.
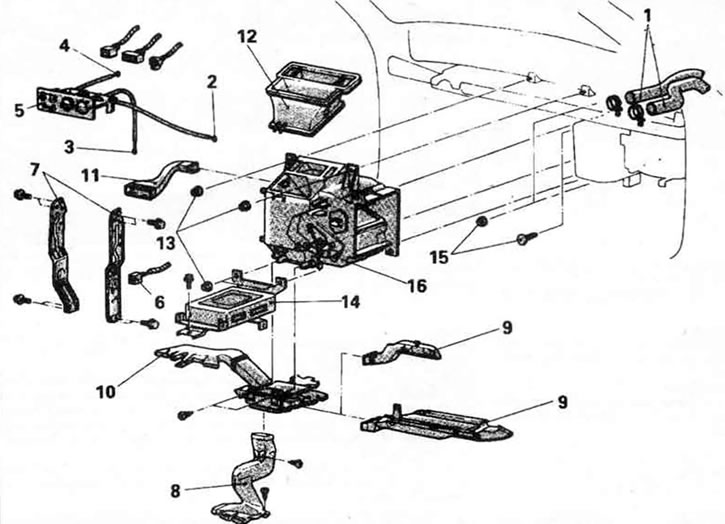
11.5 Typical heater parts. 1. Heater hoses, 2. Air flow control cable, 3. Temperature control cable, 4. Mode control cable, 5. Heater control unit, 6. Electrical connector, 7. Instrument cluster center support, 8. Rear heater duct A, 9. Air duct, 10. Air duct, 11. Air duct, 12. Center vent duct, 13. Heater mounting nuts, 14. Control unit, 15. Evaporator mountings, 16. Heater
6. Remove the radio, then unscrew the bolts securing the instrument panel center support.
7. Tag and disconnect any air boxes, wires, and controls still attached to the heater body.
8. Unscrew the heater and remove it from the vehicle.
9. Loosen the screws, remove the clamps and separate the radiator retaining plate from the housing.
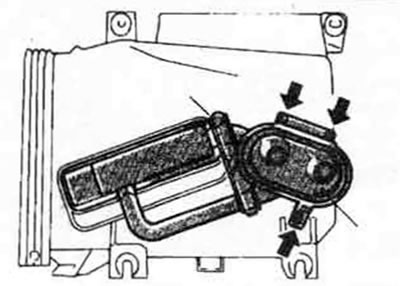
11.9 The fixing plate and clamp are located on the back of the heater
10. Remove the old heater core and install a new one.
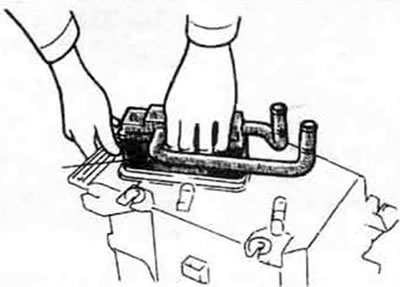
11.10 Carefully remove the radiator from the heater
11. Assemble the heater and check the operation of the air control flaps. If the mechanism is jammed, fix the problem before installation.
12. Install the remaining parts in reverse order.