



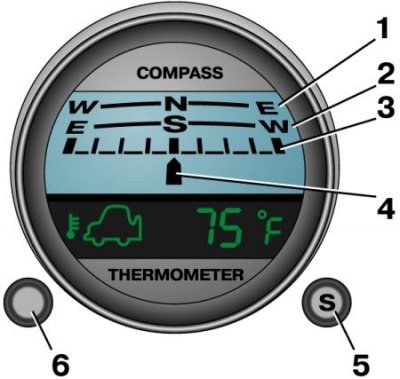
1. North indicator (N, W and E stand for north, west and east respectively)
2. South indicator (S, W and E stand for south, west and east respectively)
3. Scale (one division equals 22.5 degrees)
4. The arrow shows the direction of movement
5. Compass control button
6. Magnetic deviation adjustment button
The electronic compass shows the direction of travel of the vehicle when the ignition key is turned to the ACC or ON position.
The north indicator is illuminated when the vehicle is moving in the north direction, and the south indicator is illuminated when the vehicle is moving in the south direction.
How to read a compass
The car is moving in a northerly direction
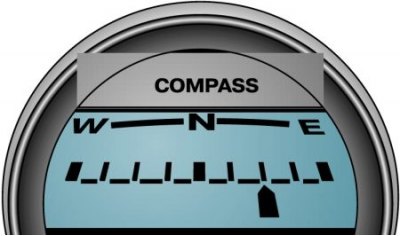
In this picture, the compass shows that the front of the car is facing northeast.
The car is moving in a southerly direction
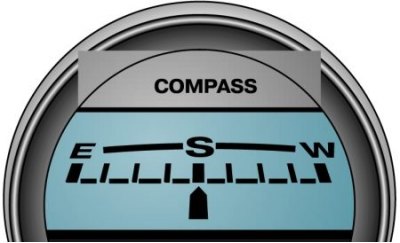
In this picture, the compass shows that the front of the car is facing due south.
Compass adjustment
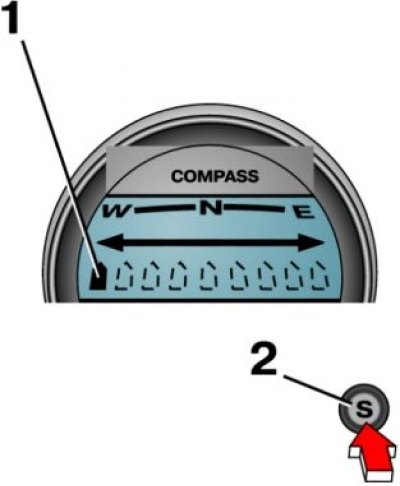
1. Pointer
2. Compass adjustment button
The compass has two adjustment buttons: a compass adjustment button and a magnetic deviation adjustment button.
Warning: Do not attempt to adjust the compass if the vehicle is in a geomagnetic storm.
Attention! After disconnecting the battery when performing repairs, inspections, etc., do not forget to adjust the compass and adjust the magnetic deviation.
Warning: If the compass malfunctions, stop the vehicle and turn off the engine. Then start the engine again and the compass will return to normal operation.
Attention! Do not install an antenna or other elements that are attached with a magnet on the vehicle. This may adversely affect the performance of the compass.
Caution: If the compass deviates from the correct direction again shortly after adjustment, have it checked by a specialist.
Warning: Do not attempt to adjust the compass or read its readings while driving. Make adjustments or take compass readings when the vehicle is stationary, or ask a front seat passenger to do the same.
The compass may not show the correct direction in the areas listed below, as the compass will be affected by geomagnetic anomalies there.
- 1. Tunnel
- 2. The area along the railway
- 3. Overpass
- 4. Near transformer stations
- 5. In areas where there are many office buildings
- 6. Area above the metro
The compass returns to normal operation when the vehicle enters an area with normal geomagnetism.
If the compass does not show the correct direction, adjust it.
Procedure
1. Press the compass adjustment button for 1-2 seconds, the compass pointer and scale will disappear, and the dot showing the direction of travel will begin to move slowly along the scale.
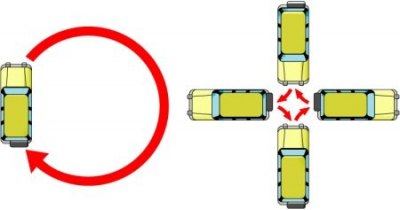
2. After this, slowly turn the car 360° in an open area with no other cars or buildings around it. This will automatically complete the compass adjustment and it will show the correct direction. If you cannot find a suitable place to turn your car, turn it 90° one way and then 90° the other way as shown in the picture, or vice versa.
Attention! The compass adjustment is carried out by turning the car either clockwise or counterclockwise.
Adjusting the magnetic deviation
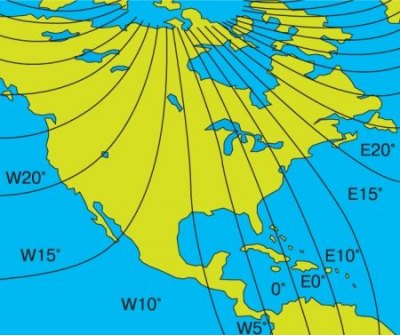
The angle of magnetic deviation varies in different places on the planet, but an approximate map is shown in the figure.
In some areas, the compass points north (magnetic north) will differ from the north direction on the map.
(The article is based on data from the website MITSUBISHIMAN)
This is due to the tilt of the Earth's axis of rotation. This deviation is called magnetic declination, and the 20° westward and 20° eastward deviation can be adjusted in 5° increments.
Example
If the magnetic deviation of the north direction shown by the compass (to magnetic north), from the north direction on the map is 5° to the west.
Procedure
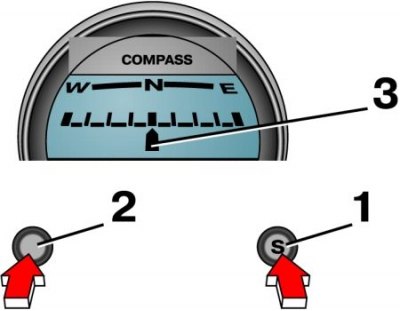
1. Press the compass adjustment button (1) and the magnetic deviation adjustment button (2) simultaneously for 1-2 seconds, the north indicator (W-N-E), scale and direction dot (3) will appear. Now the scale graduation has changed from 22.5 to 5° per division.
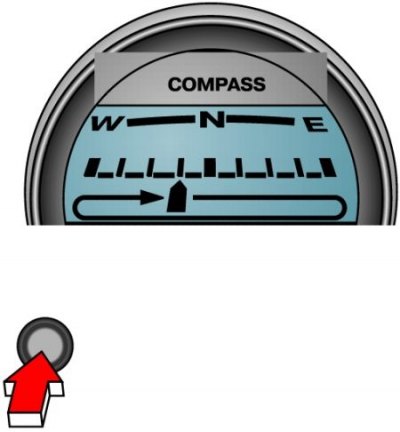
2. Each time you press the magnetic deviation adjustment button, the pointer moves clockwise by one scale division. If you hold down the magnetic deviation adjustment button for a long time, the pointer will start moving automatically. Release the button and the dot will stop.
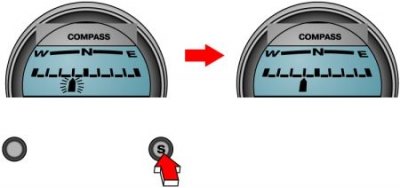
3. Press the compass adjustment button for 1-2 seconds, and the pointer will start flashing. When the dot stops flashing and remains lit, the adjustment is complete.