



Contents: Removal ⤓ Checking the mirror switch ⤓ Checking the continuity between the…⤓ Installation ⤓
Removal
- Disconnect the cable from the negative battery terminal.
- Using a screwdriver blade, lever off the inner delta cover (Fig. 17.82).
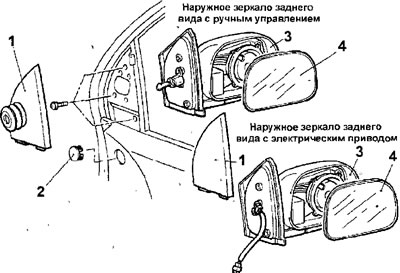
Fig. 17.82. Outside rearview mirror: 1 - internal deltoid cover; 2 - plug; 3 - housing of the external rearview mirror; 4 - mirror
- Remove the plug.
- Remove 3 screws and remove the outside rearview mirror.
- Turn the mirror by hand so that its reflective surface is facing up, insert the blade of a flat-head screwdriver wrapped with electrical tape into the recess as shown in Figure 17.83, pry the mirror up and remove it.
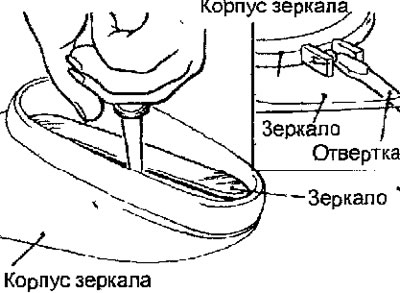
Fig. 17.83. Removing the outside rearview mirror
- If your vehicle has a power mirror, disconnect the electrical connector from the wiring harness.
Checking the mirror switch
- Remove the mirror switch from the instrument panel and disconnect the electrical connector from it (Fig. 17.84).
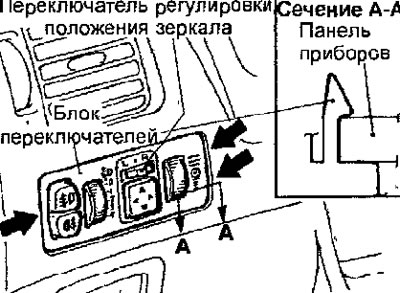
Fig. 17.84. Location of the mirror switch (arrows show the location of the locks)
- Using an ohmmeter, measure the resistance between the contacts of the mirror switch connector (Fig. 17.85).
Checking the continuity between the contacts of the outside rearview mirror switch
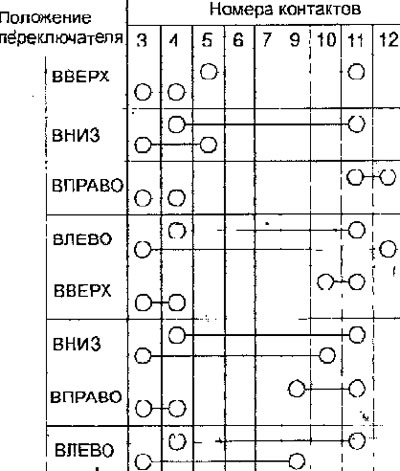
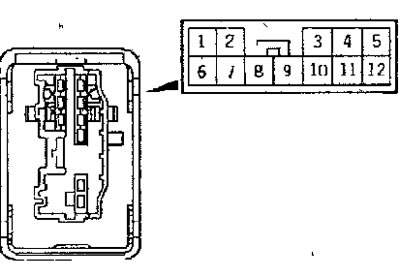
Fig. 17.85. Mirror switch connector pinout
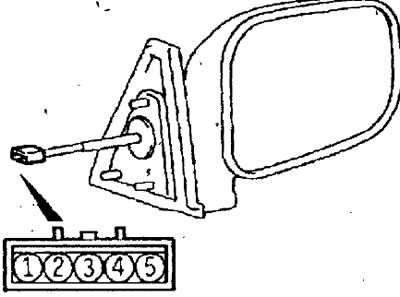
Fig. 17.86. Location of contacts of the outside mirror connector
Checking the functioning of the mirror
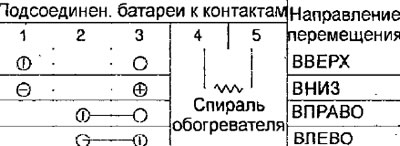
- Using additional wires, connect the battery terminals to the connector contacts and check the mirror operation (Fig. 17.85). Also check the conductivity between connector contacts 4 and 5.
Installation
- Installation is carried out in the reverse order of removal.
(The article is reprinted from a web resource: MitsubishiMan.ru)