English Русский
Български
Беларускі
Український
Српски
Hrvatski
Română
Polski
Slovenský
Magyar
Articles Bookmark Contacts Sitemap   
Company Audi Company Ford Company Hyundai Company Kia Company Mazda Company Mercedes-Benz Company Nissan
MitsubishiMan.ru


Home Colt Lancer Galant L200 Outlander Pajero Others
Galant 6 and 7 (1987-1998) Galant 5 (1983-1989, petrol)

Removal and installation the fuel pressure regulator (Mitsubishi Galant 6)

  • Home
  • Galant
  • 6 (1987-1998)
  • Power unit
  • Power and exhaust systems
  • Removal and installation the fuel pressure regulator
0
Contents: Removal ⤓ Installation ⤓
Warning! Remember that gasoline is highly flammable! When working with fuel system components, observe all accepted fire safety measures. Do not smoke! Do not approach the work area with an open flame or unprotected portable appliance! Do not service the system in rooms equipped with natural gas heating devices equipped with a pilot flame (such as water heaters and clothes dryers). Do not forget that gasoline is a carcinogen, i.e., a substance that promotes the development of cancer! Try to avoid fuel coming into contact with exposed areas of the body, use rubber protective gloves, and in case of accidental contact with fuel, wash your hands thoroughly with warm water and soap. Collect spilled fuel immediately and do not store rags soaked in fuel near open flames. Remember that the fuel system of models equipped with fuel injection is constantly under pressure. Before disconnecting fuel lines, relieve residual pressure in the system. Wear safety glasses when servicing fuel system components. Always keep a Class B fire extinguisher on hand!


Removal


1. Release the pressure in the fuel system (see Section Relieving pressure in the fuel system).
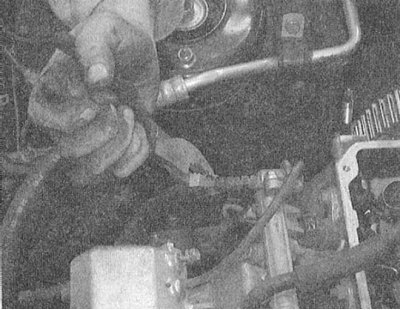


2. Disconnect the vacuum hose and fuel return line from the pressure regulator.
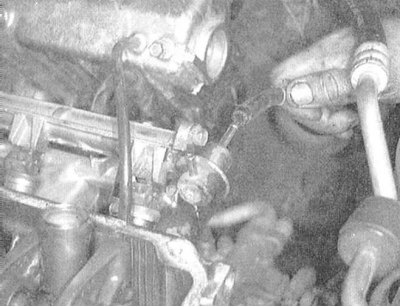


3. Remove the mounting bolts/lock ring and remove the regulator assembly from the fuel line.

Installation
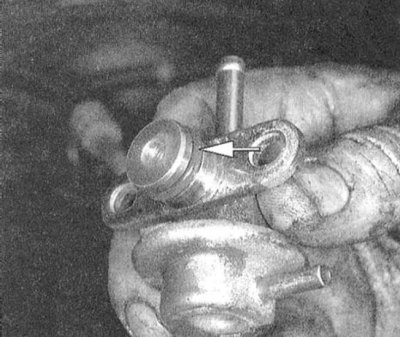


1. Replace the pressure regulator O-ring (before installing the new ring, lightly lubricate it with liquid machine oil).

2. Place the pressure regulator on the fuel rail assembly and check for free rotation. If there is any sign of binding, remove the regulator and check for twisted O-ring.


3. Once the regulator is properly installed, align the bolt holes, screw in the mounting bolts and tighten them to the required torque (11 Nm). If so equipped, secure the regulator using the locking ring.

4. Connect the return line and vacuum hose to the regulator.

5. Connect the negative cable to the battery. Pressurize the system and check the system for signs of developing leaks.
This article is available at: russian, bulgarian, belarusian, ukrainian, serbian, croatian, romanian, polish, slovak, hungarian
This article was reviewed by: Dmitry Vasiliev
Share with friends:
◀ Previous
Galant 6 and 7: Power and exhaust systems
Next ▶

Checking the proper functioning of the injectors
Checking the condition and replacing fuel lines and their fittings
Removal and installation of fuel lines and injection injectors
Removal and installation the throttle body
Relieving pressure in the fuel system
Removal and installation the fuel tank relief valve
Removal and installation the fuel tank
Fuel Tank Cleaning and Repair — General Information
Checking the fuel pump, measuring the fuel pressure
Removal and installation the fuel pump / fuel flow sensor
Similar materials for other Mitsubishi models

➤ Relieving pressure in the fuel system Mitsubishi Colt 4 and 5 (1991-2003)
➤ High pressure fuel pump (HPFP) Mitsubishi Lancer 3 and 5 (1984-1992)
➤ Pressure sensor in the high pressure fuel system Mitsubishi L200 4 (2005-2014, diesel)
➤ Checking the operation of the rear brake pressure regulator Mitsubishi Outlander 1 (2003-2008)
➤ Pressure regulator — removal and installation Mitsubishi Pajero 1 and 2 (1982-1999)
➤ Checking the fuel pressure regulator Mitsubishi Space Star (1998-2005)
Link in different formats to this article
Comments and feedback from visitors
No comments yet


Add up two numbers 18 + 46


Galant 6 and 7 (1987-1998) 
  • General information
  • Introduction to guide
  • User manual
  • Driving and operation
  • Maintenance
  • Power unit
  • Dismantling the engine
  • Engine overhaul
  • Cooling and heating
  • Power and exhaust systems
  • Engine electrical equipment
  • Engine management systems
  • Transmission
  • Mechanical gearbox
  • Automatic gearbox
  • Clutch
  • Drive shafts and transfer case
  • Chassis and running gear
  • Brake system
  • Car suspension
  • Steering
  • Body and interior
  • Exterior (external elements)
  • Interior (internal elements)
  • Doors, locks and windows
  • Electrical equipment
  • Equipment and devices
  • Wiring diagrams Galant
  • Wiring diagrams Mirage
  • Wiring diagrams Diamante
Galant 5 (1983-1989, petrol) 
  • General information
  • Troubleshooting
  • Maintenance
  • Power unit
  • Engine repair
  • Engine overhaul
  • Cooling and heating
  • Fuel and exhaust system
  • Engine electrical equipment
  • Reducing exhaust toxicity
  • Transmission
  • Manual gearbox
  • Automatic gearbox
  • Clutch and drive shafts
  • Chassis and running gear
  • Brake system
  • Car suspension
  • Steering
  • Body and interior
  • Exterior (external elements)
  • Interior (internal elements)
  • Doors, locks and windows
  • Electrical equipment
  • Equipment and devices
  • Electrical diagrams
MitsubishiMan.ru © 2018–2026 • Mobile version • Articles about Mitsubishi • Contacts • Sitemap: EN BG BY UA RS HR RO PL SK HU • Site search • Bookmark
Colt 2 and 3 (1983-1993) · Colt 4 and 5 (1991-2003) · Colt 5 (1995-2003) · Lancer 3 and 5 (1984-1992) · Lancer 9 (2000-2007) · Galant 5 (1983-1989) · Galant 6 and 7 (1987-1998) · L200 4 (2005-2014) · Outlander 1 (2003-2008) · Pajero 1 and 2 (1982-1999) · Pajero 4 (2006-2021) · Carisma (1995-2004) · Space Star (1998-2005) ·
This resource sets cookies 🍪 to avoid bothering you with repeated data entry.