English Русский
Български
Беларускі
Український
Српски
Hrvatski
Română
Polski
Slovenský
Magyar
Articles Bookmark Contacts Sitemap   
Company Audi Company Ford Company Hyundai Company Kia Company Mazda Company Mercedes-Benz Company Nissan
MitsubishiMan.ru


Home Colt Lancer Galant L200 Outlander Pajero Others
Galant 6 and 7 (1987-1998) Galant 5 (1983-1989, petrol)

Checking the proper functioning of the injectors (Mitsubishi Galant 6)

  • Home
  • Galant
  • 6 (1987-1998)
  • Power unit
  • Power and exhaust systems
  • Checking the proper functioning of the injectors
0
The simplest way to check the proper functioning of the fuel injection injectors is to listen to them - when the engine is running, the injectors should make a rhythmic clicking sound. The check can be made using a mechanical stethoscope, or by contact, using a screwdriver. The clicking sound emitted by the electromagnetic valve confirms the proper functioning of the injector working circuit and the power supply system control processor. Check each of the injectors in turn.

Caution: When performing maintenance procedures in the engine compartment with the engine running, exercise extreme caution - try not to touch moving components (drive belts, fan impeller, etc.) and do not allow hair or clothing to get caught in them.


Analysis of the test results


All injectors click properly


1. If all injectors click properly and, nevertheless, there are suspicions of malfunctions in the fuel system, continue diagnostics.

2. Check the pressure characteristic of the fuel pump (see below).

3. Check the ignition system. Disconnect (and reconnect) the high-voltage wires from each spark plug one by one with the engine idling, and try to locate the faulty cylinder based on the absence of a disruption in the stability of the revolutions.

4. Remove the fuel injector for the suspect cylinder and place it on a workbench (the fuel line assembly can be removed). To check the injection pattern, connect the fuel supply line to the injector and briefly apply 12 V DC to its terminals (grounded through the injector body): a cone-shaped jet of fuel should be ejected through the valve nozzle. A faulty injector must be replaced.


One or more injectors do not click
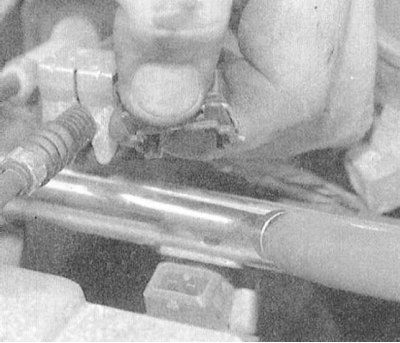


1. Prepare a special test lamp. Turn off the ignition and disconnect the wiring from the injector to be tested. Connect the test lamp to the contact connector of the injector wiring harness and start the engine: the lamp flashes to confirm that the control voltage is supplied to the injector correctly.


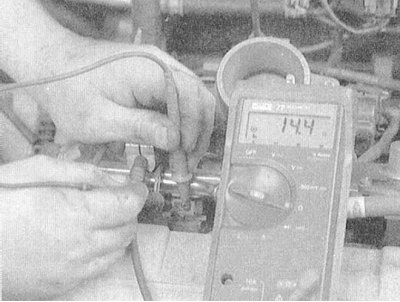
2. If no power supply faults are detected, measure the injector resistive resistance. Compare the measurement result with the Specifications (for engines with normal suction, the nominal value is within the range of 13÷16 Ohm, at 20°C, for turbocharged engines, the required range is 2÷3 Ohm [at the same temperature]).


3. If the test lamp shows signs of a control voltage supply failure, the condition of the corresponding electrical circuit should be checked. Disconnect the negative cable from the battery.

Warning! If the car stereo system is equipped with a security code, make sure you have the correct combination to activate the audio system before disconnecting the battery! Disconnect the test lamp from the injector. Also disconnect the wiring from the PCM. Check the condition of the wiring in the circuit section between the PCM and the injector: the resistive resistance between the corresponding connector contacts should be about 5 ohms. If the test results are negative, make the necessary restorative repairs to the wiring.


4. If the circuit is OK, then there is an internal PCM failure and the control module must be replaced.
This article is available at: russian, bulgarian, belarusian, ukrainian, serbian, croatian, romanian, polish, slovak, hungarian
This article was reviewed by: Dmitry Vasiliev
Share with friends:
◀ Previous
Galant 6 and 7: Power and exhaust systems
Next ▶

Checking the condition and replacing fuel lines and their fittings
Removal and installation of fuel lines and injection injectors
Removal and installation the throttle body
Relieving pressure in the fuel system
Power and exhaust system specifications
Removal and installation the fuel pressure regulator
Removal and installation the fuel tank relief valve
Removal and installation the fuel tank
Fuel Tank Cleaning and Repair — General Information
Checking the fuel pump, measuring the fuel pressure
Similar materials for other Mitsubishi models

➤ Checking the fuel pressure between the high pressure fuel… Mitsubishi Colt 4 and 5 (1991-2003)
➤ Checking the oil level Mitsubishi Lancer 3 and 5 (1984-1992)
➤ Checking and adjusting the tension of auxiliary drive belts Mitsubishi L200 4 (2005-2014, diesel)
➤ Removal, Checking and Installing the Oil Pan (2WD Models) Mitsubishi Outlander 1 (2003-2008)
➤ Drive Belts — Checking and Adjusting Tension Mitsubishi Pajero 1 and 2 (1982-1999)
➤ Checking fuel injectors Mitsubishi Space Star (1998-2005)
Link in different formats to this article
Comments and feedback from visitors
No comments yet


Add up two numbers 29 + 11


Galant 6 and 7 (1987-1998) 
  • General information
  • Introduction to guide
  • User manual
  • Driving and operation
  • Maintenance
  • Power unit
  • Dismantling the engine
  • Engine overhaul
  • Cooling and heating
  • Power and exhaust systems
  • Engine electrical equipment
  • Engine management systems
  • Transmission
  • Mechanical gearbox
  • Automatic gearbox
  • Clutch
  • Drive shafts and transfer case
  • Chassis and running gear
  • Brake system
  • Car suspension
  • Steering
  • Body and interior
  • Exterior (external elements)
  • Interior (internal elements)
  • Doors, locks and windows
  • Electrical equipment
  • Equipment and devices
  • Wiring diagrams Galant
  • Wiring diagrams Mirage
  • Wiring diagrams Diamante
Galant 5 (1983-1989, petrol) 
  • General information
  • Troubleshooting
  • Maintenance
  • Power unit
  • Engine repair
  • Engine overhaul
  • Cooling and heating
  • Fuel and exhaust system
  • Engine electrical equipment
  • Reducing exhaust toxicity
  • Transmission
  • Manual gearbox
  • Automatic gearbox
  • Clutch and drive shafts
  • Chassis and running gear
  • Brake system
  • Car suspension
  • Steering
  • Body and interior
  • Exterior (external elements)
  • Interior (internal elements)
  • Doors, locks and windows
  • Electrical equipment
  • Equipment and devices
  • Electrical diagrams
MitsubishiMan.ru © 2018–2026 • Mobile version • Articles about Mitsubishi • Contacts • Sitemap: EN BG BY UA RS HR RO PL SK HU • Site search • Bookmark
Colt 2 and 3 (1983-1993) · Colt 4 and 5 (1991-2003) · Colt 5 (1995-2003) · Lancer 3 and 5 (1984-1992) · Lancer 9 (2000-2007) · Galant 5 (1983-1989) · Galant 6 and 7 (1987-1998) · L200 4 (2005-2014) · Outlander 1 (2003-2008) · Pajero 1 and 2 (1982-1999) · Pajero 4 (2006-2021) · Carisma (1995-2004) · Space Star (1998-2005) ·
This resource sets cookies 🍪 to avoid bothering you with repeated data entry.