Removal and installation
- Parts are removed in the order of the numbers shown in the figure "Removing the side door trim and waterproof film".
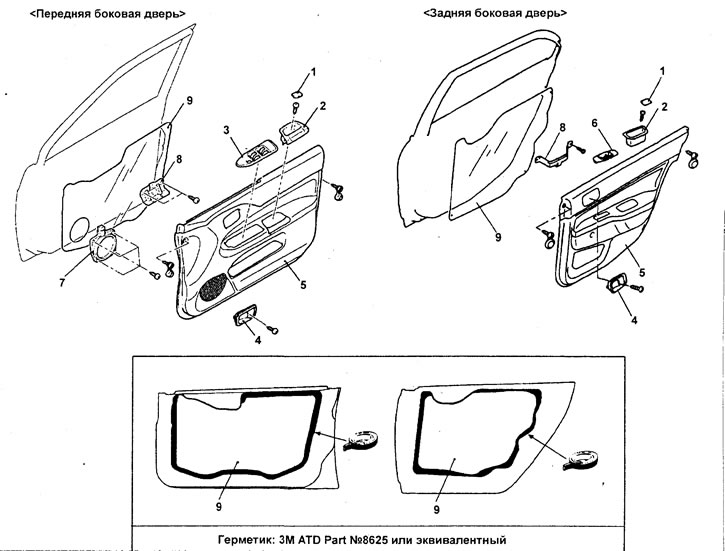
Removing the side door trim and waterproof film. 1 - cover; 2 - handle for closing the side door; 3 - main power window control panel assembly; 4 - internal handle for opening the side door; 5 - side door trim; 6 - power window control panel of the side door assembly; 7 - speaker; 8 - bracket for fastening the power window control panel; 9 - waterproof film.
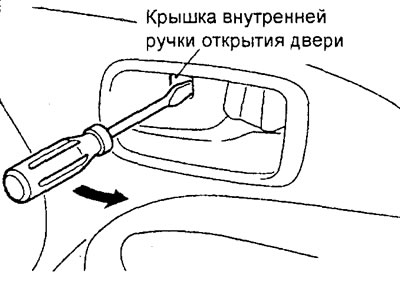
− When removing the parts, pay attention to the operation of removing the inner handle for opening the side door:
A) Using a special tool, open the cover of the inner side door opening handle and use a flat screwdriver to remove the screw securing the inner side door opening handle.
b) Install the special tool in the place indicated in the figure and release the upper latch of the handle.
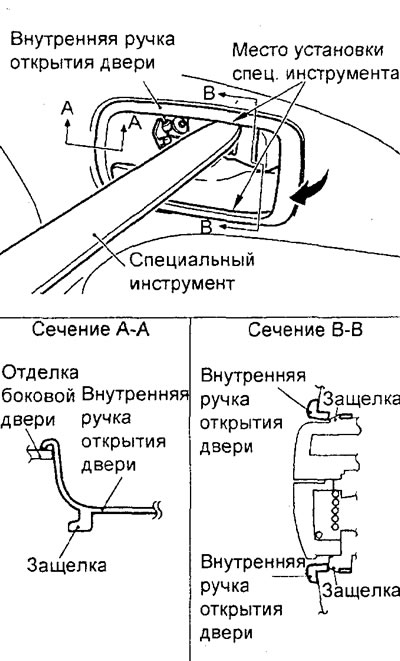
V) Detach the bottom latch in the same way as the top latch.
G) Using the special tool, remove the inner handle for opening the side door in the direction indicated by the arrow in the figure.
− Installation of parts is carried out in the reverse order of removal.
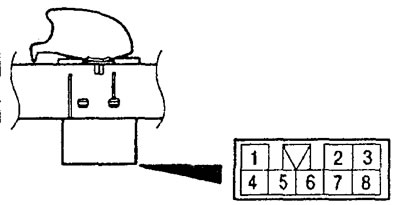
Checking the power window switch
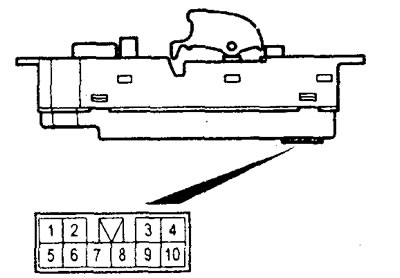
1. Check the condition of the circuit between the terminals of the connector at various positions of the main switch according to the table below.
Table of check of the main switch of a window regulator.
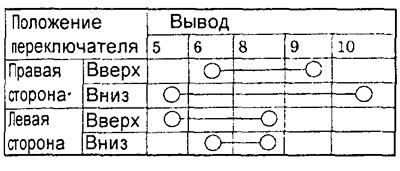
2. (Sedan) Check the auxiliary power window switch in its various positions according to the table below.
Window Auxiliary Switch Test Chart.
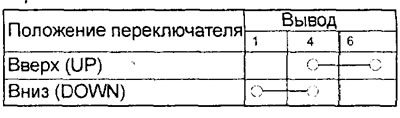

3. (station wagon) Checking the auxiliary power window switch.
A) Check that the circuit is closed between the terminals "2" And "6" connector when the switch is in the position "UP".'
b) Check that the circuit is closed between the terminals "2" And "3" connector when the switch is in the position "DOWN".