
Removing
− Before starting to remove parts, carry out the following operations:
- A) Remove the windshield wipers.
- b) Remove the front pillar trim
- V) Remove the ceiling trim.
- Parts are removed in the order of the numbers shown in the figure "Removing the windshield".
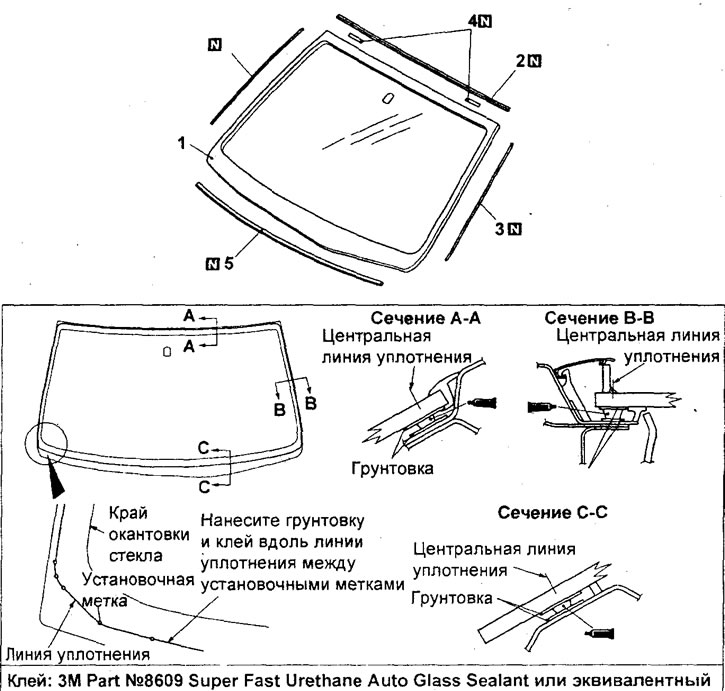
Removing the windshield.1 - windshield, 2 - upper windshield molding, 3 - windshield side molding, 4 - stopper, 5 - lining.
− When removing parts, pay attention to the windshield removal operation:
- A) To protect the body paintwork from scratches and damage, cover the body surfaces around the windshield with a fabric protective tape.
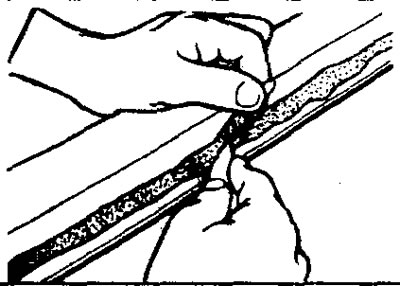
- b) Cut off the windshield molding with a knife.
- V) Using a sharp thin drill, drill a hole in the adhesive layer.
G) Pass a steel string through this hole.
d) Using a steel string like a hacksaw, saw through a layer of glue around the entire perimeter of the glass.
Attention: do not let the steel string touch the edge of the windshield.
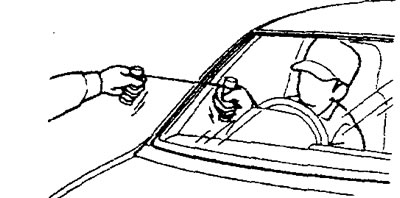
e) Put alignment marks on the opening of the body and windshield.
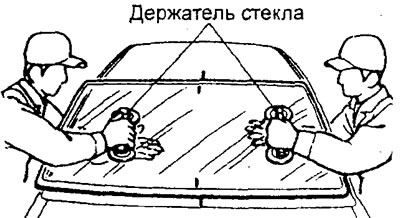
and) Using the special tool, remove the windshield.
h) Using a knife, remove the remnants of the old glue around the entire perimeter of the body opening to a thickness of no more than 2 mm.
And) Sand the edges of the body opening flanging to remove sharp burrs.
Attention:
- Be careful not to remove any more old adhesive than necessary.
- Be careful not to damage the painted surfaces of the body with a knife; in case of damage, touch up with paint from the repair kit or treat with an anti-corrosion compound.
To) When installing a used windshield, completely clean the surface of the windshield from the remnants of the old adhesive and wash it with isopropyl alcohol.
l) In the same way, clean the surfaces of the body opening.
Attention: Dry the cleaned surfaces for 3 minutes or more before proceeding with subsequent operations. Do not touch cleaned surfaces.
Installation
− Installation of parts is carried out in the reverse order of removal.
* When installing parts, pay attention to the installation operation of the windshield, moldings, stopper and lining.
A) When replacing the windshield, temporarily attach it to the opening of the body and put alignment marks on the glass and body.
b) Clear (degrease) with isopropyl alcohol on the inside edge of the windshield and the flare of the body opening.
V) Wet the sponge in the primer and apply the primer in an even layer on the glass and body opening in the places indicated in the figure "Removing the windshield".
G) After applying the primer, dry the surface for 3 to 30 minutes.
Attention:
- Gaunt strengthens the adhesive joint, so it must be applied evenly in a thin layer around the entire perimeter. However, keep in mind that too thick a layer of primer will weaken the adhesive bond.
- Do not touch primed surfaces.
d) Install the glass overlay and make sure that the overlay fits snugly against the inner surface of the glass and that there are no bends. Install the stopper and glass trim on the windshield as shown "The location of the windshield stoppers and pads".

The location of the glass clamps and overlays.
e) Install the windshield moldings to the windshield.
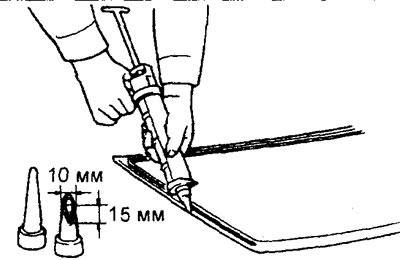
and) Within 30 minutes of applying the primer, fill the container of the caulking gun with glue and apply a layer of glue evenly around the entire perimeter of the glass.
Note: For easier application of the adhesive, cut the tip of the tube tip into a letter shape "V".
h) After applying the adhesive, align the alignment marks on the glass and the opening of the body (lightly press the glass evenly around the entire perimeter for complete adhesion).
And) Use a spatula to remove excess glue that has been squeezed out and wipe the surface with isopropyl alcohol.
To) After completing this operation (after windshield installation) try not to move the car until the glue hardens.
l) After attaching the windshield to the car body, wait 30 minutes or more and then perform an adhesive leak test.
Attention:
- - Do not move the vehicle unless absolutely necessary. If it is necessary to move the car from a place, then this should be done carefully.
- - When checking the tightness of the adhesive joint, do not pinch the hose tip to create a strong jet of water.
− After completing the installation of the parts, perform the following operations:
A) Install ceiling trim.
b) Install the front pillar trim.
V) Install the windshield wipers.