



Contents: Removal the starter ⤓ Installing the starter ⤓ Disassembling the starter ⤓ Cleaning starter parts ⤓ Assembling the starter ⤓
Removal the starter
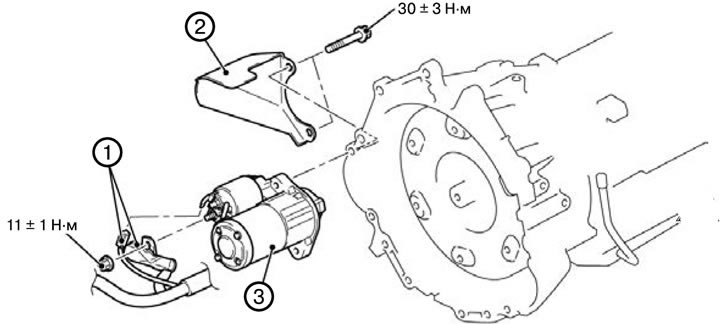
1. Disconnect the starter connector (1).
2. Remove the starter cover (2).
3. Remove the starter assembly (3).
Installing the starter
1. Install the starter assembly (3).
2. Install the starter cover (2).
3. Connect the starter connector (1).
Disassembling the starter
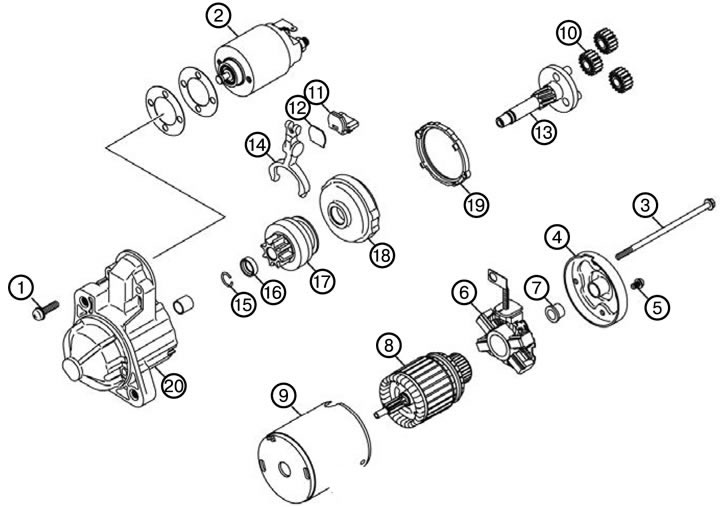
1. Remove the screw (1).
2. Remove the traction relay (2).
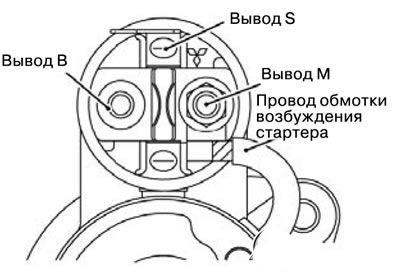
Note: First disconnect the starter excitation winding wire from terminal M of the traction relay.
3. Unscrew the screw (3).
4. Unscrew the screw (4).
5. Remove the rear bracket (5).
6. Remove the brush holder assembly (6).
7. Remove the rear bearing (7).
8. Remove the anchor (8).
Note: When removing the starter anchor, be careful not to lose the ball, which is used as a bearing.
9. Remove the pole with the starter winding assembly (9).
10. Remove satellites A (10).
11. Remove satellites B (11).
12. Remove the plate (12).
13. Remove the planetary gear (13).
14. Remove the drive lever (14).
15. Remove the spring ring (15).
Note: Using a suitable socket, push the snap ring towards the overrunning clutch.
The text of the article was obtained from the website (mitsubishiman)
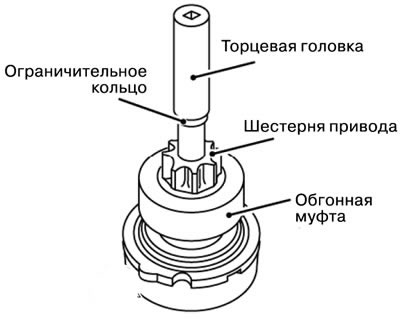
16. Remove the retaining ring (16).
Note: Use special pliers to remove the snap ring, and then remove the limit ring and overrunning clutch.
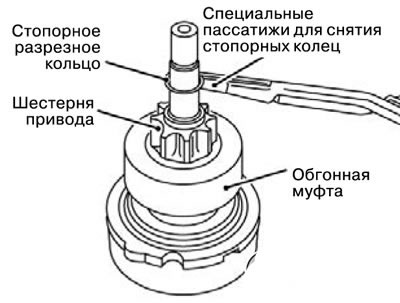
17. Remove the overrunning clutch (17).
18. Remove the internal gear (18).
19. Remove the carrier (19).
20. Remove the front cover (20).
Cleaning starter parts
1. Do not dip parts into cleaning solution (solvents). Immersion of the pole and field winding assembly, or the starter armature, in solvent will damage the wire insulation. Therefore, just wipe these parts with a clean cloth.
2. Do not immerse the starter drive unit in cleaning solution. Immersing the overrunning clutch in the solution will wash out the lubricant included in the clutch at the manufacturer.
3. It is permissible to clean the starter drive unit with a brush soaked in the solution, followed by wiping dry with a clean cloth.
Assembling the starter
1. Install the front cover (20).
2. Install the driver (19).
3. Install the internal gear (18).
4. Install the overrunning clutch (17).
5. Install the retaining ring (16).
Note: Using the appropriate special tool (suitable puller), place the stop ring on the spring ring.
6. Install the spring ring (15).
7. Install the drive lever (14).
8. Install the planetary gear (13).
9. Install the plate (12).
10. Install satellites B (11).
11. Install satellites A (10).
12. Install the pole with the starter winding assembly (9).
13. Install the anchor (8).
14. Install the rear bearing (7).
15. Install the brush holder assembly (6).
16. Install the rear bracket (5).
17. Tighten the screw (4).
18. Tighten the screw (3).
19. Install the traction relay (2).
20. Tighten the screw (1).