



Contents: Removal ⤓ Installation ⤓
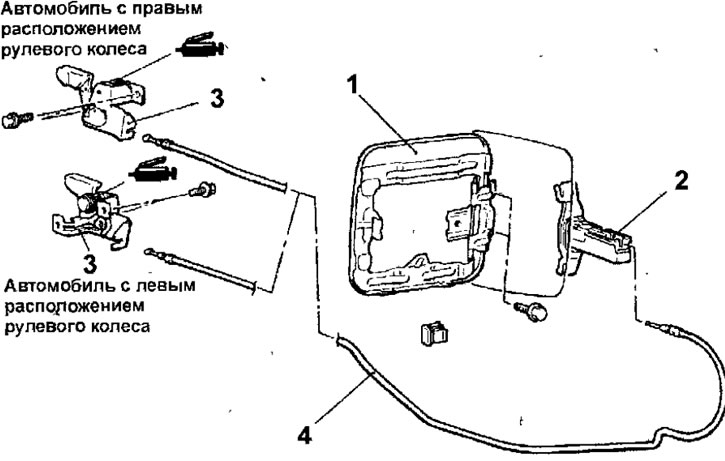
Fig. 17.6. Fuel tank filler flap: 1 - fuel tank filler flap assembly; 2 - fuel tank filler flap latch assembly; 3 - fuel tank filler flap opening handle; 4 - hatch lock drive cable
Removal
- Remove the driver's seat.
- Remove the rear seat.
- Remove the driver's side lower B-pillar trim, front and rear door sill trims, and left rear side trim.
- Open the hatch, unscrew the 2 bolts and remove the fuel tank filler flap assembly.
- Remove the fuel filler flap latch and disconnect the cable from it.
- Remove the bolts, disconnect the cable and remove the fuel filler flap release handle.
- Remove the hatch lock drive cable.
Installation
- Installation is carried out in the reverse order of removal, taking into account the following.
- Lubricate the moving parts of the fuel filler flap latch and install the latch (Fig. 17.7).
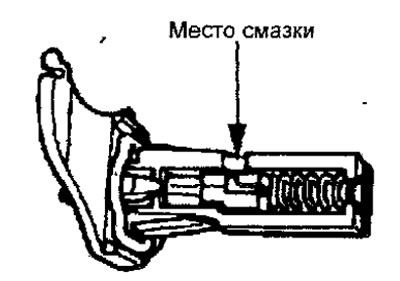
Fig. 17.7. Lubrication point for the fuel tank filler flap latch
- Install the fuel filler door assembly and temporarily secure with bolts.
- Close the hatch and check its position relative to the adjacent surfaces. Adjust the position of the hatch so that when the hatch is closed it is at the same level with the body panel. To adjust, loosen the hatch mounting bolts and, moving the hatch, adjust its position (Fig. 17.8).
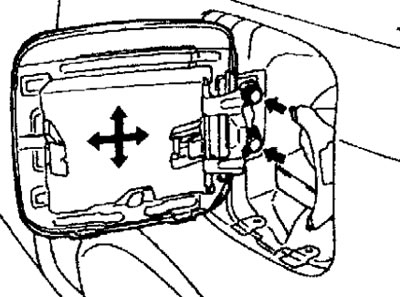
Fig. 17.8. Location of bolts and directions of movement for adjusting the position of the fuel tank filler flap
- Install the driver side lower B-pillar trim, front and rear door sill trims, and left rear side trim.
- Install the rear seat.
- Install the driver's seat.