
Disassembly
- Remove clutch master cylinder
Warning: Do not disassemble the hydraulic clutch master cylinder piston as it cannot be reassembled.
- Remove the piston retaining ring (pic. 11.12).
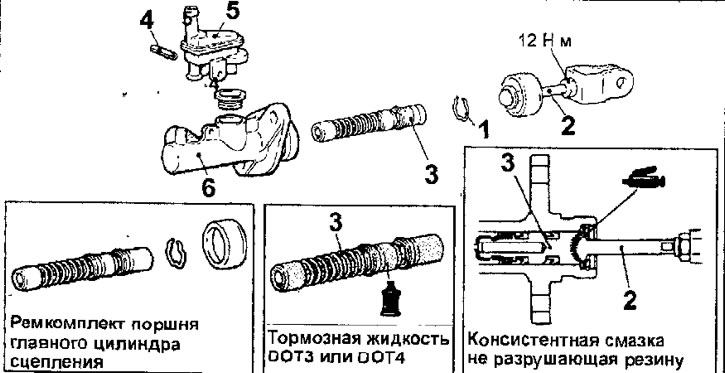
Pic. 11.12. Clutch Master Cylinder: 1 - piston retaining ring; 2 - pusher assembly; 3 - piston assembly: 4 - spring pin; 5 - clutch hydraulic reservoir; 6 - clutch master cylinder housing
- Remove pusher assembly.
- Remove the piston assembly.
- Remove the spring pin and remove the clutch fluid reservoir.
Examination
- Check the piston for scratches. If there are scratches on the piston, check for scratches on the cylinder walls.
- Check the inside of the cylinder for scratches or uneven wear and replace if necessary.
Installation
- Installation is carried out in the reverse order of removal.
- Install the pusher so that the dimension shown in Figure 11.13 is maintained. This will make it easier to adjust the clutch pedal position.
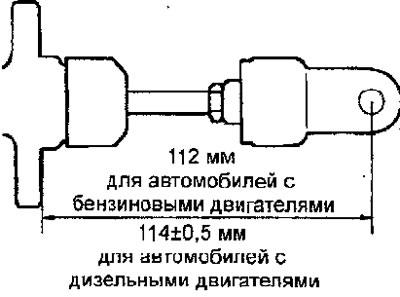
Pic. 11.13. Correct installation of the pusher on the hydraulic clutch
- Fill with fluid and bleed the hydraulic clutch actuator.
- Adjust the position of the clutch pedal.