
Drums and pads (on the inserts - lubrication points with 3M ATD 8634 sealant (in the center) and SAE J310 NLGI N1 grease)
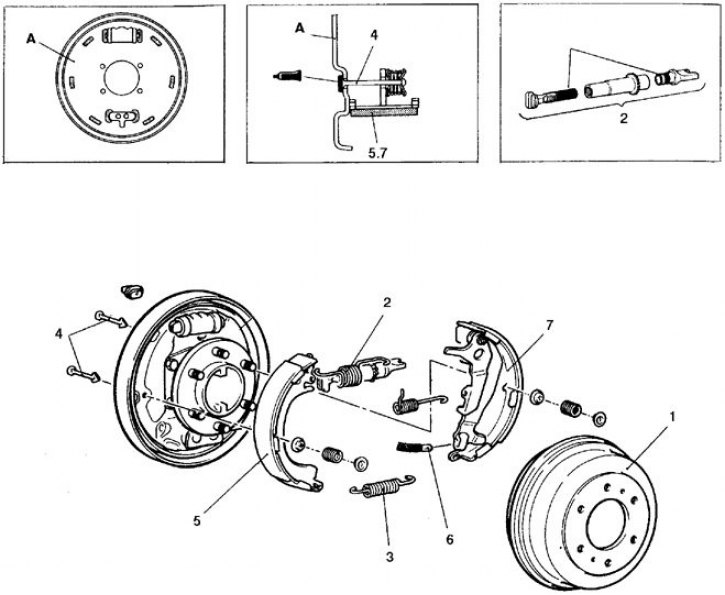
1. Drum; 2. Spring and regulator; 3. Coupling spring; 4. Clamping spring pins; 5. Block; 6. Handbrake cable tip; 7. Shoe and lever
Removal and installation
1. Raise the rear of the vehicle.
2. Remove wheels.
3. Remove the drum by pulling it towards you.
4. If the drum cannot be removed, bring the pads together, to do this, remove the plug in the brake shield, disconnect the regulator lever through the hole in the shield, and rotate the regulator sprocket.
5. On parts of cars, the drum can be removed by evenly screwing M8x1.25 bolts into special threaded holes.
6. Before installing the drum, set the initial clearance between the pads and the drum (see subsection 11.13.2).
Examination
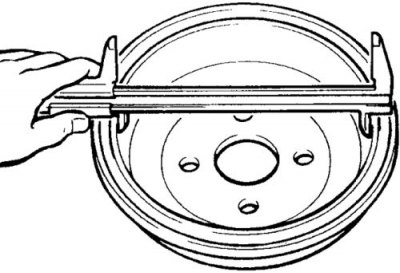
1. Check the inner diameter of the drum.
2. Check out-of-roundness, compare with normative data.
3. The manufacturer provides for the maximum increase in the diameter of the drum after grinding (due to wear and uneven wear), If this diameter is exceeded after grinding, replace the drum.
4. Replace the drum if cracks are found on the outer and inner surfaces, as well as near the holes for the nuts.