



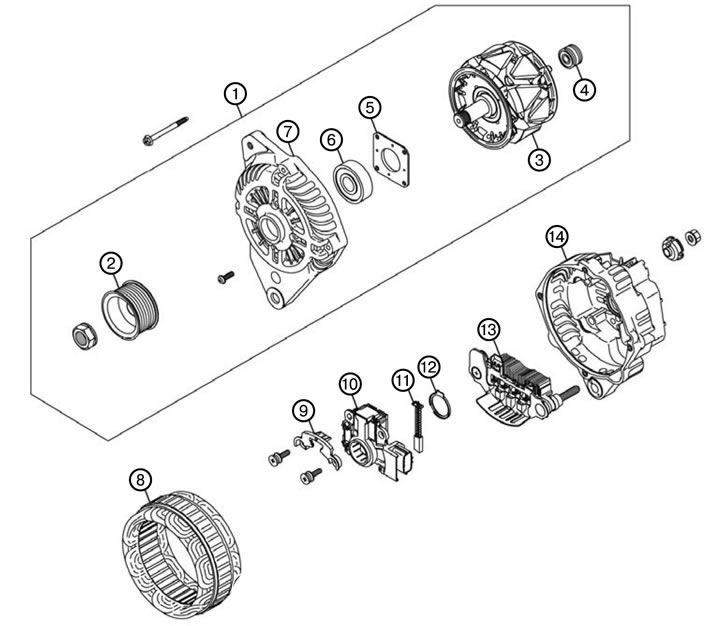
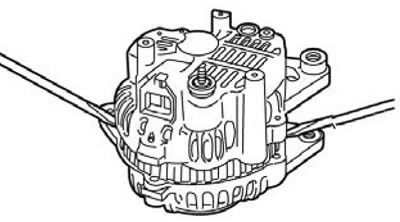
1. Remove the front bracket assembly (1).
Caution: To avoid damaging the stator winding, do not insert the screwdriver too deeply into the gap.
Note: Insert a flat-head screwdriver into the gap between the front bracket and the stator core (or similar tool), and, using a screwdriver as a lever, carefully separate the front bracket from the stator.
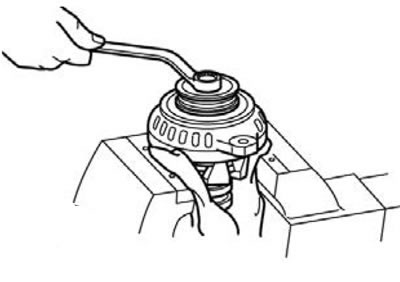
2. Remove the generator pulley (2).
Note: Position the rotor so that the pulley is on top, clamp the rotor in a bench vice and remove the pulley.
Attention: In order not to damage the generator rotor, this operation must be performed carefully and accurately.
3. Remove the rotor (3).
4. Remove the generator rear bearing (4).
5. Remove the bearing holder (5).
6. Remove the front generator bearing (6).
7. Remove the front bracket (7).
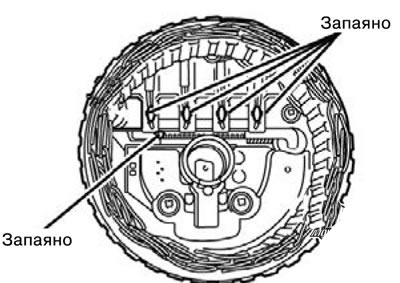
8. Remove the stator (8).
Note: Before removing the stator, first unsolder the stator current-carrying wires, which are soldered to the main diodes of the rectifier unit.
Note: Before removing the rectifier unit from the voltage regulator assembly, first unsolder the soldered parts of the rectifier unit and release the contacts.
Attention. Do not allow the diode to heat up for a long time with a soldering iron.
Caution: Do not apply excessive force to the current-carrying wires of the diodes.
9. Remove the plate (9).
10. Remove the voltage regulator assembly (10).
11. Remove the generator brush (11).
12. Remove the dust ring (12).
13. Remove the rectifier unit (13).
14. Remove the rear generator bracket (14).