



Removal
To remove, follow these steps in sequence.
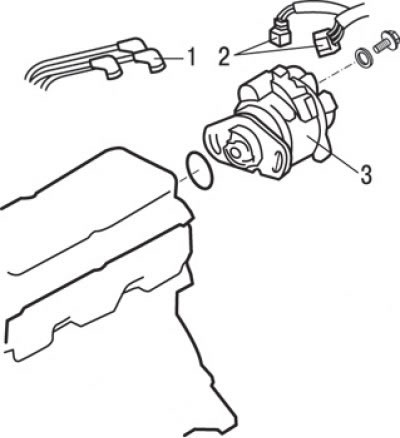
Fig. 9.32. Ignition distributor for vehicles with SOHC engines: 1 – high-voltage wire tip; 2 – ignition distributor connector; 3 – ignition distributor
1. Disconnect high-voltage wires 1 (Fig. 9.32).
Caution: When removing wires, be sure to hold the wire tip, not the wire itself.
2. Disconnect the electrical connector of the ignition distributor 2.
3. Loosen the screws and remove the ignition distributor 3 and the sealing ring.
Installation
Installation is carried out in the reverse order of removal, taking into account the following.
1. Remove the upper timing belt cover.
Attention! The piston of the 1st cylinder will be at TDC in the compression stroke, when the timing marks on the camshaft pulley and the cylinder head are also aligned.
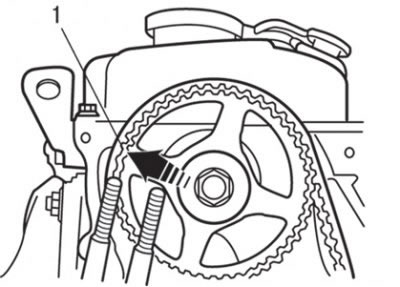
Fig. 9.33. Alignment of timing marks (1) on the camshaft pulley
2. Rotate the crankshaft clockwise until the timing marks are aligned (Fig. 9.33).
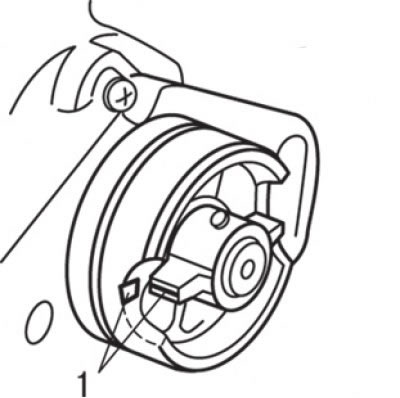
Fig. 9.34. Alignment of the timing marks (1) on the rotor and the distributor housing
3. Align the timing marks on the rotor and distributor housing and install the distributor on the engine (Fig. 9.34).
Disassembly
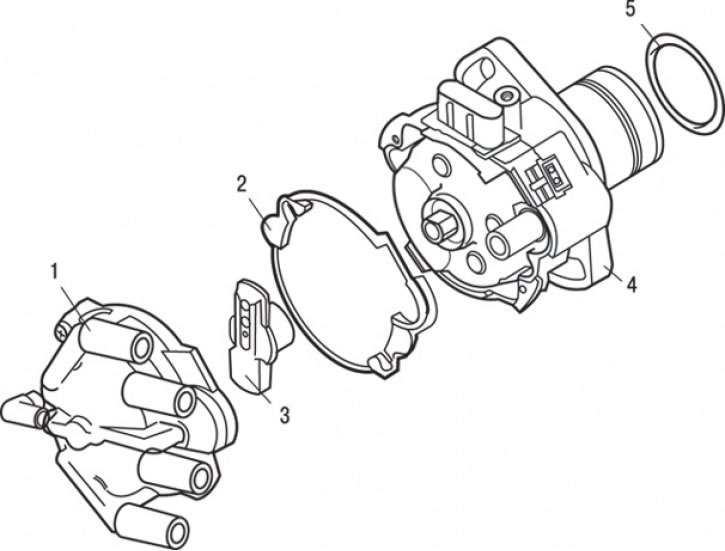
Fig. 9.35. Components of the ignition distributor for vehicles with SOHC engines: 1 – lid; 2 – rotor; 3 – sealing gasket; 4 – body; 5 – O-ring gasket
1. Loosen the screws and remove the distributor cap 1 (Fig. 9.35) and sealing gasket 3.
2. Pull and remove the distributor rotor 2.
3. Remove the O-ring 5.
Examination
1. Clean the ignition distributor parts with clean kerosene and dry them.
2. Check the condition of the breaker contacts. Check the distributor cap for corrosion and electrode burns. Check the smoothness of the carbon contact movement and the amount of its protrusion.
3. If the distributor rotor contact is burnt, replace the distributor rotor.
4. Make sure there are no cracks on the lid.
Assembly
Assembly is carried out in the reverse order of disassembly.