



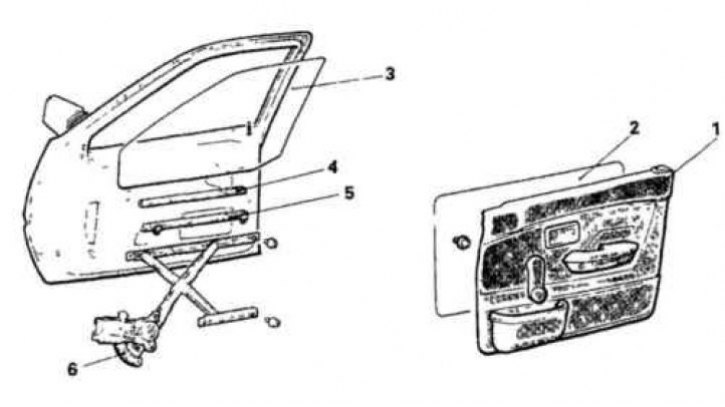
16.1a Fastening elements of the front door glass on early models
1. Trim panel; 2. Protective film; 3. Glass; 4. Gasket; 5. Guide; 6. Regulator
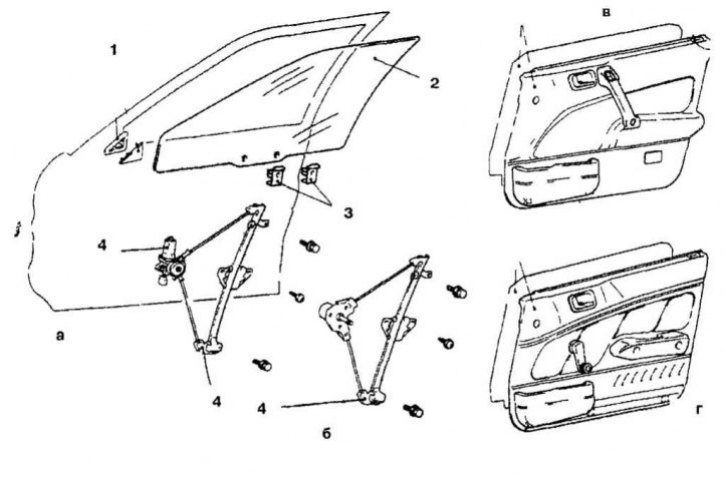
16.1b Fastening elements of the front door glass on late model years extract
a) Models with electric windows
1. Trim panel and protective film; 2. Glass; 3. Fastenings; 4. Regulator
b) Models with mechanical window lift
1. Trim panel and protective film; 2. Glass; 3. Fastenings; 4. Regulator
c) Models with electric windows
d) Models with mechanical glass lift
1. Remove the door trim panel and protective film (16.1a and 16.1b).
2. Lower the window.
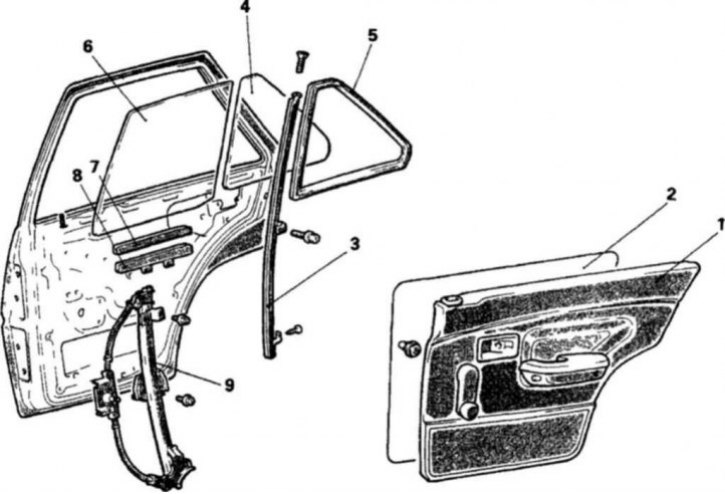
16.1v Fastening elements of the rear door glass of late models
1. Trim panel; 2. Protective film; 3. Dividing strip; 4. Fixed glass; 5. Compaction; 6. Glass; 7. Gasket; 8. Guide; 9. Regulator
3. On some models, it is also necessary to unscrew the fastening screws on the rear door, remove the guides and the rear triangular glass (16.1v).
4. On early models, mark around the glass guide mounting bolts and remove them.
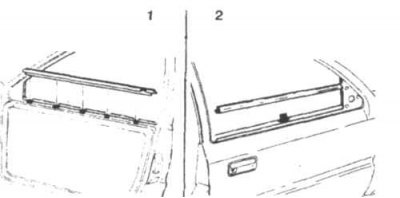
16.5a On the front doors of some models it is necessary to remove the decorative strips before removing the glass
1. From the inside; 2. From the outside
(Original version of the article on the website: MitsubishiMan.ru)
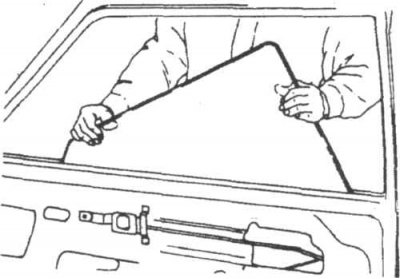
16.5b Tilt the glass as shown in the picture when removing the glass from the door
5. On some models, it is necessary to remove the decorative trims on the top of the door on the front door (16.5a). Remove the glass from the door (16.5b).
6. If necessary, loosen the regulator mounting bolts and remove the regulator.
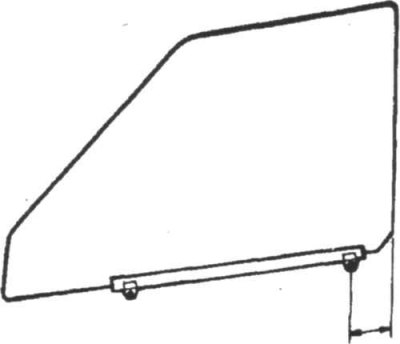
16.7 Measure the distance between the rear edge of the glass and the hole on the glass guide before removing the glass from the guide
7. Installation is carried out in the reverse order of removal (16.7).
8. If it is necessary to adjust the position of the glass, unscrew the fastening screws.