



2. Remove the glass.
Latch
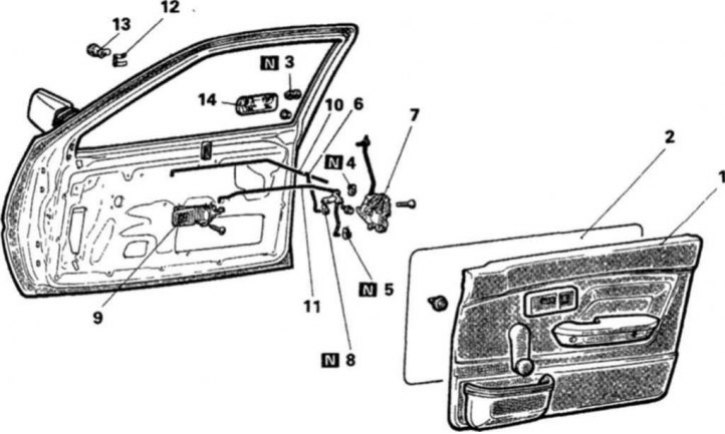
15.3a Door lock elements for models with lifting external handle
1. Trim panel; 3. Plastic coating 3. Connector; 4. Clamp; 5. Clamp; 6. External handle pull; 7. Castle; 8. Clamp; 9. Inner handle; 10. Inner latch rod; 11. Inner handle pull; 12. Lock drum mounting clamp; 13. Castle drum; 14. External handle
3. Disconnect the safety rod and the inner handle rod from the latch (15.3a and 15.3b).
4. Unscrew the three mounting screws and remove the lock.
5. Installation is carried out in the reverse order of removal.
Castle drum
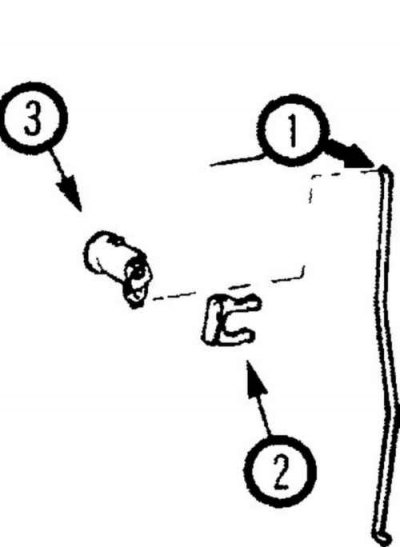
15.6 Disconnect the lock drum rod (1) from the lock drum, then use pliers to remove the retaining clip (2) from the lock drum (3)
6. Disconnect the lock drum rod from the drum (15.6).
7. Using pliers, remove the retaining clip and remove the lock drum from the door (15.6).
8. Installation is carried out in the reverse order of removal.
Inner handle
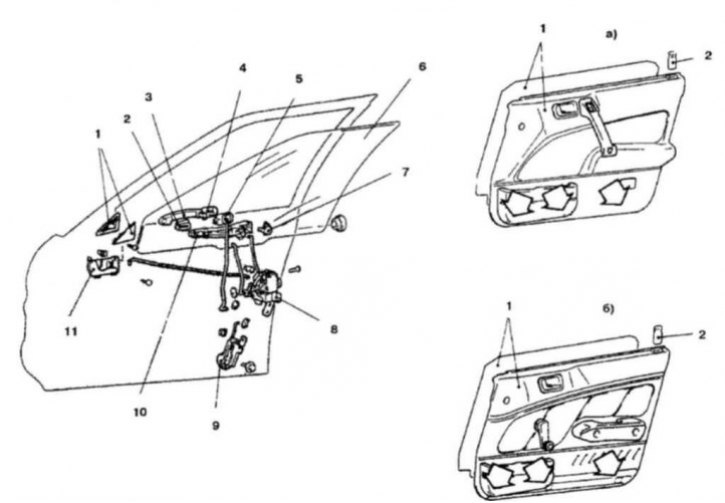
15.3b Elements of a door lock with a conventional external handle
1. Casing; 2. Gasket; 3. External door handle; 4. Casing; 5. Gasket; 6. Glass; 7. Fastening; 8. Castle; 9. Door lock drive; 10. Foundation; 11. Inner handle
a) Models with electric windows
1. Trim panel and protective film; 2. Button
b) Models with mechanical windows
1. Trim panel and protective film; 2. Button
9. Unscrew the mounting screws (15.3a and 15.3b).
10. Remove the handle from the door.
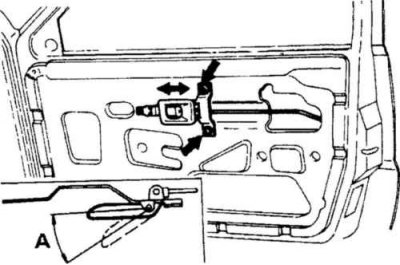
15.11a On 1988 and 1989 Precis models, before tightening the screws, adjust the position of the handle so that it rises to 48° (distance A)
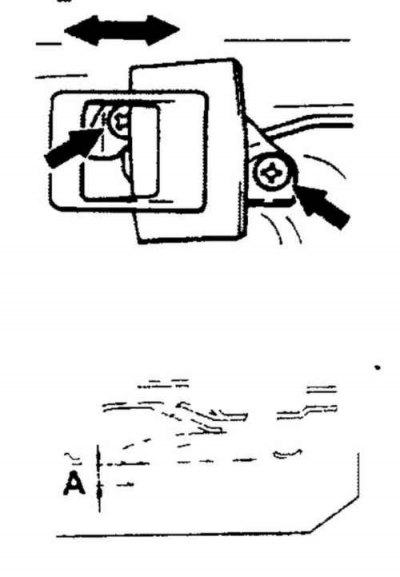
15.11b Loosen the screws and move the handle, if necessary, to adjust the free play
11. Installation is carried out in the reverse order of removal. Adjust the handle stroke before tightening the fastening screws (15.11a and 15.11b).
External handle
12. Disconnect the connecting rods from the handle.
13 Unscrew the fastening nuts from the inside of the door and remove the handle.
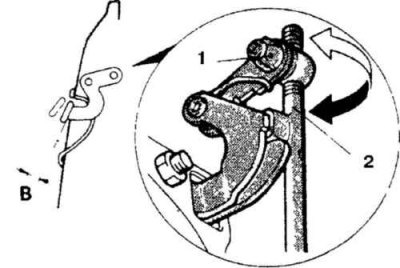
15.14 Disconnect the rod for adjusting the free play of the outer handle
1. Clamp; 2. External handle pull
14. Installation is carried out in the reverse order of removal. Check and adjust the free play of the handle, if necessary (15.14).