



Front axle gearbox
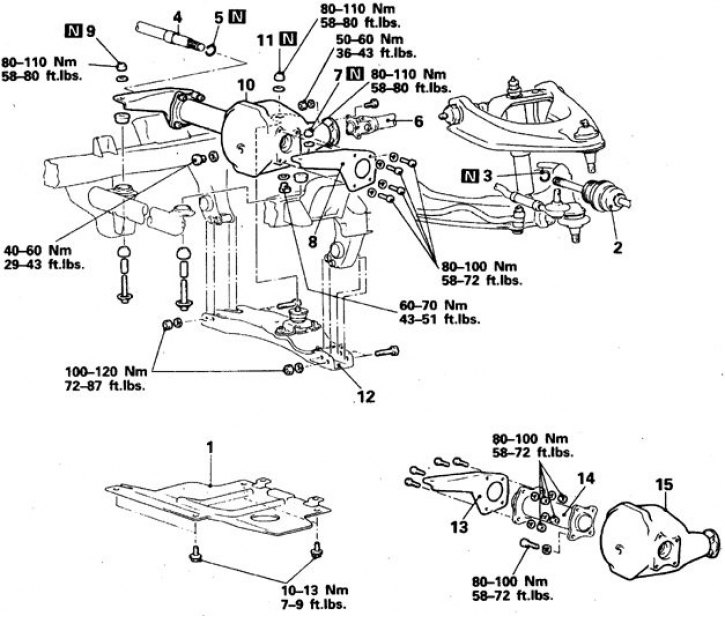
1. Shield; 2. Outer axle shaft; 3, 5. Spring ring; 4. Inner axle shaft; 6. Cardan shaft; 7, 9, 11. Self-tightening nut; 8, 13. Brackets; 10, 15. Reducer; 12. Crossbar; 14. Axle housing
Removal and installation
1. Raise the front of the vehicle.
2. Remove the lower shield and drain the oil from the gearbox.
The source of the article is available at MitsubishiMan
3. Remove the hub assembly with the knuckle and outer axle shafts.
4. Remove the inner axle shaft and front propeller shaft.
5. Support the gearbox housing with a trolley jack.
6. Remove the brackets, marking the location of the bolts and nuts to be removed.
7. Replace the self-tightening nuts during assembly.
8. Remove the crossbar, taking into account the significant weight of this part.
9. Lower and remove the gearbox.
10. Installation is carried out in reverse order.
11. Tighten the connections to the required torques, tighten the crossmember nuts and bolts to a torque of 100–120 N·m.
12. Replace the axle shaft spring rings.
13. When assembling, align the marks made during disassembly and tighten the bolts back into place.