



Contents: Rear axle with springs ⤓ Rear axle with springs and drum…⤓ Rear axle with springs and disc…⤓ Bridge with springs ⤓ Bridge with springs ⤓
Rear axle with springs
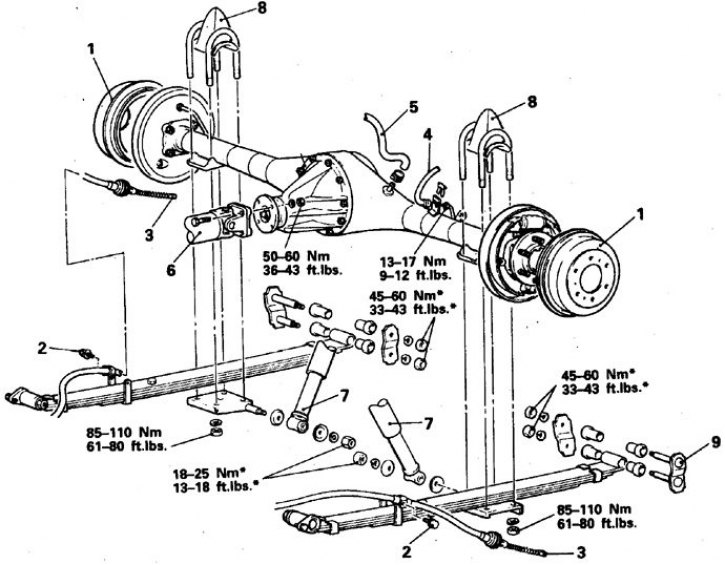
1. Drums; 2. Handbrake cable mounting bolts; 3. Handbrake cable tip; 4. Brake hose; 5. Breather hose; 6. Cardan shaft; 7. Shock absorber; 8. Step ladders and buffer; 9. Rear axle
Rear axle with springs and drum brakes
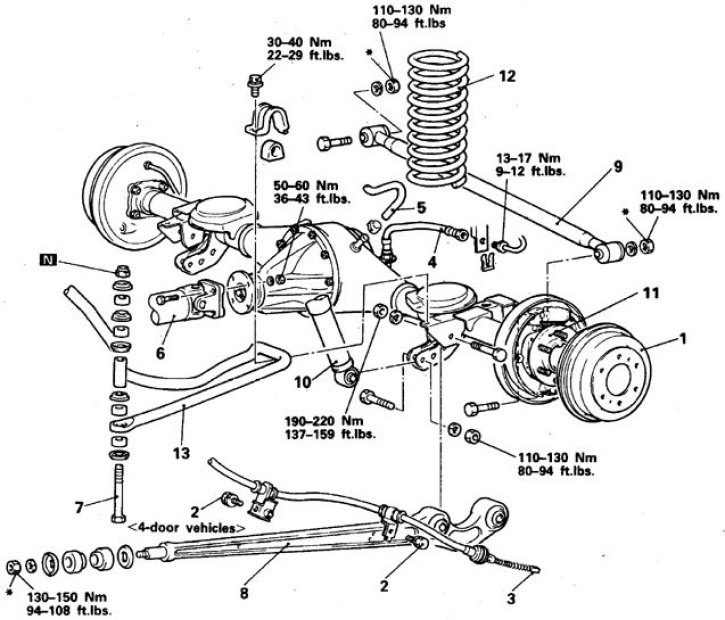
N – parts must be replaced; 1. Drums; 2. Handbrake cable mounting bolts; 3. Handbrake cable tip; 4. Brake hose; 5. Breather hose; 6. Cardan shaft; 7. Anti-roll bar bolt; 8. Longitudinal bar; 9. Crossbar; 10. Lower shock absorber mount; 11. Rear axle; 12. Spring; 13. Anti-roll bar
Rear axle with springs and disc brakes
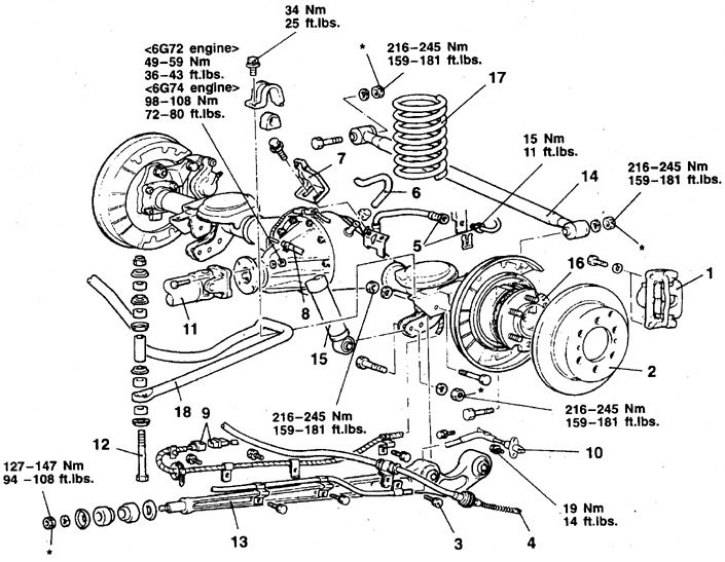
N – parts must be replaced; 1. Support; 2. Brake disc; 3. Handbrake cable mounting bolt (or speed sensor); 4. Handbrake cable tip; 5. Brake hose; 6. Breather hose; 7. Bracket of the metering valve spring; 8. Locking differential hose; 9. Connector; 10. Speed sensor; 11. Cardan shaft; 12. Anti-roll bar mounting bolt; 13. Longitudinal bar; 14. Crossbar; 15. Lower shock absorber mount; 16. Rear axle; 17. Spring; 18. Anti-roll bar
* – this connection is finally tightened after the car is lowered
Bridge with springs
1. Raise the vehicle and place it on stands, resting them against the frame boxes.
2. Drain the oil from the gearbox.
3. Remove the wheels and drums.
4. Disconnect the handbrake cable and remove the cable shield.
5. Disconnect the brake hydraulic hose at the tee.
(The original can be found on the website: «mitsubishiman.ru»)
6. Disconnect the breather hose.
7. On some vehicles, remove the metering valve spring bracket.
8. Apply orientation marks and disconnect the rear propeller shaft.
9. Raise the rear axle by the middle part of the beam (or for beam pipes) and disconnect the shock absorbers.
10. Unscrew the nuts and remove the stirrups with buffers.
11. Unscrew the nuts, remove the rear lugs and lower the rear parts of the springs.
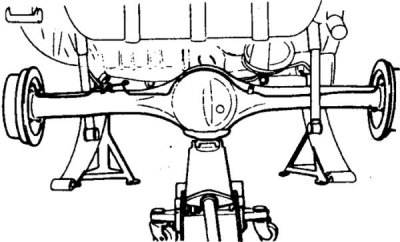
12. Working together, lower the bridge and remove it from under the car.
13. Installation is carried out in reverse order.
14. Check the condition of the rubber bushings of the spring earring, replace if necessary.
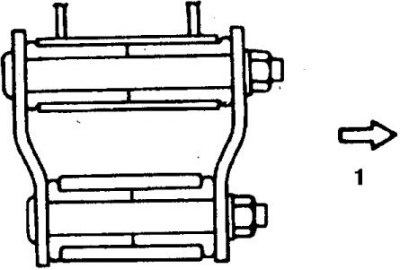
15. Correctly orient the spring earring during assembly (1 – towards the gearbox).
16. Tighten the nuts completely after lowering the vehicle. Tighten nuts and bolts to the required torques.
17. Remove air from the brake hydraulic system.
Bridge with springs
1. Raise the vehicle and place it on stands, resting them against the frame boxes.
2. Drain the oil from the gearbox.
3. Remove the wheels.
4. Remove the drums (or the caliper and brake disc, move the caliper to the side and secure it).
5. Disconnect the handbrake cable.
6. Disconnect the brake hydraulic hose at the tee.
7. Disconnect the breather hose.
8. Remove the brake metering valve bracket.
9. On vehicles with a limited-slip differential, disconnect the hose and wiring connector.
10. On vehicles with ABS, disconnect the speed sensor.
11. Apply orientation marks to the flanges and disconnect the rear propeller shaft.
12. Loosen the anti-roll bar bolt nuts, remove the anti-roll bar rods and bushings.
13. Raise the rear axle by the middle part of the beam and disconnect the longitudinal and transverse rods.
14. Disconnect the lower shock absorber mounts.
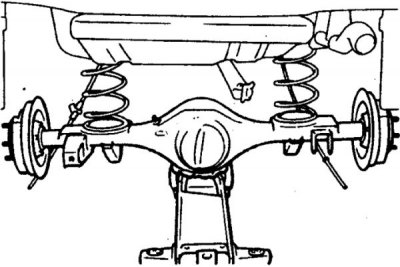
15. Lower the bridge, remove the stabilizer and springs.
16. Installation is carried out in reverse order.
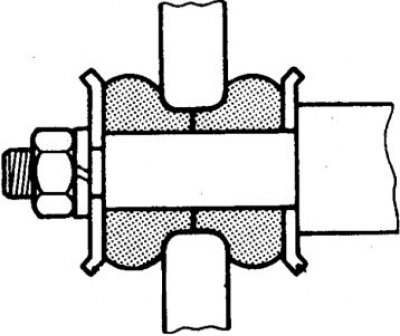
17. Install the disc washers onto the rear axle rod bushings in the correct order.
18. Tighten the nuts and bolts to the following torques: rear longitudinal rod mount 122 N·m. (drum brakes), 216–245 N·m. (disc brakes), tighten the front nuts finally after lowering the vehicle to a torque of 150 Nm, tighten the crossbar nuts after lowering the vehicle to a torque of 122 Nm. (for drum brakes) and 230 Nm. (disc brakes).
19. Tighten the rear wheel nuts fully before lowering the vehicle.
20. For other tightening torques, see the figure Rear axle with springs and drum brakes, Rear axle with springs and disc brakes.
21. Remove air from the brake hydraulic system.