



Contents: Removal ⤓ Wishbone suspension ⤓ Torsion bar suspension ⤓ Overhaul (for wishbone suspension…⤓ Installation (all models) ⤓
Removal
1. Raise the vehicle and remove the rear wheels.
2. Disconnect the brake pipes from the wheels, cylinders or calipers.
3. Remove the brake drums or discs.
4. Remove the brake pipe fasteners and disconnect them from the brake hoses. Close the ends of the pipes and hoses.
5. Remove the brake shields from the rear axle. Remove the handbrake cables from the suspension arms.
6. Remove the rear section of the exhaust system.
Wishbone suspension
7. Remove the suspension springs.
8. Install jacks in the center of the rear axle or on the sides.
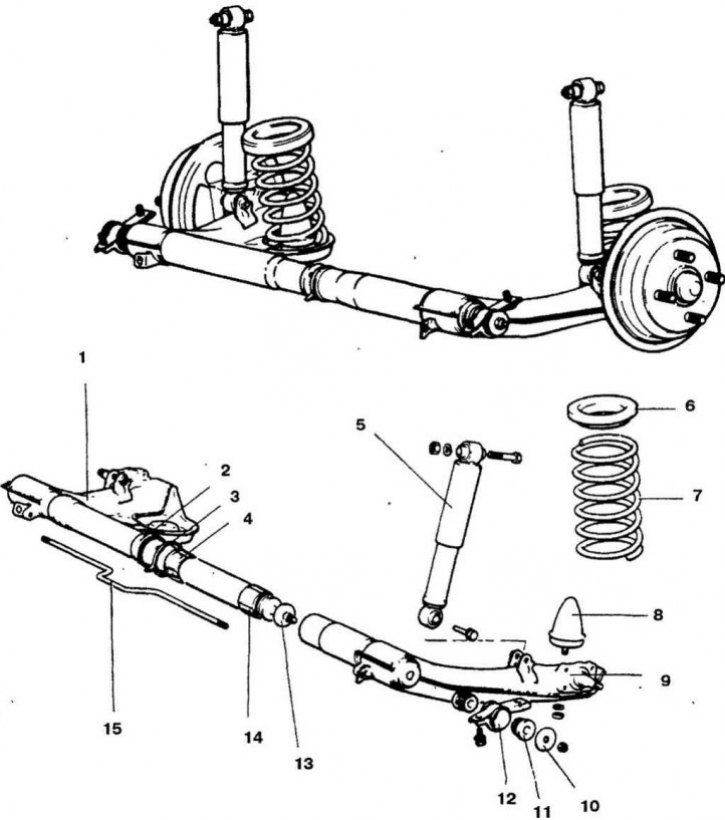
14.9a Elements of the rear suspension using longitudinal suspension arms
1. Right suspension arm; 2. Anther; 3. Clamp; 4. Bushing A; 5. Shock absorber; 6. Upper spring seat; 7. Spring; 8. Rubber stop; 9. Left suspension arm; 10. Washer; 11. Rubber bushing; 12. Fastening; 13. Rubber stop; 14. Bushing B; 15. Anti-roll bar
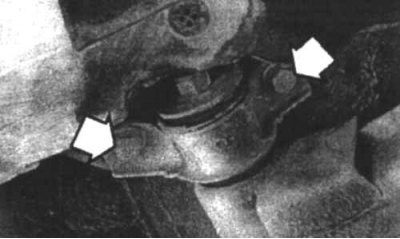
14.9b The suspension cross member is attached to the body using two pairs of bolts (indicated by arrows)
9. Unscrew the bolts securing the cross member to the body (14.9a and 14.9b) and remove the cross member and suspension arms.
Torsion bar suspension
10. Remove the cross rod.
11. Unscrew the lower shock absorber mounting bolts and nuts.
12. Install jacks in the center of the rear axle or on the sides.
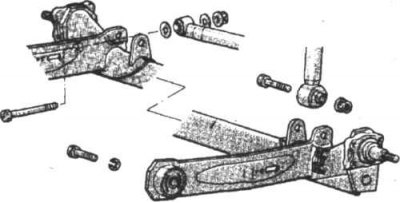
14.13 Elements of the torsion bar rear suspension
13. Unscrew the axle mounting bolts (14.13) and remove the rear axle.
Overhaul (for wishbone suspension only)
14. During overhaul, you can remove the suspension arms for repair or replacement and replace the bushings.
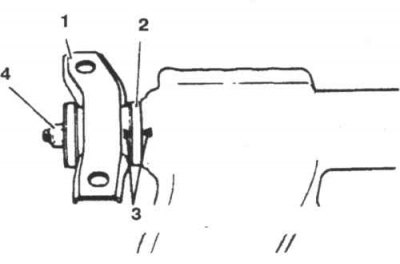
14.15 Make alignment marks on the crossmember and suspension arms before removing them
1. Crossbar; 2. Rubber bushing; 3. Installation marks; 4. Nut
15. Make alignment marks on the crossmember and levers (14.15).
16. Remove the nuts securing the control arm to the crossmember and remove the arms. Inspect the bushings for wear, cracks or damage. Replace them if necessary, lubricating them with soapy water to facilitate installation.
17. If the vehicle is equipped with a rear anti-roll bar, make alignment marks on the anti-roll bar rod.
18. Remove the boot clamp and move the suspension arms apart.
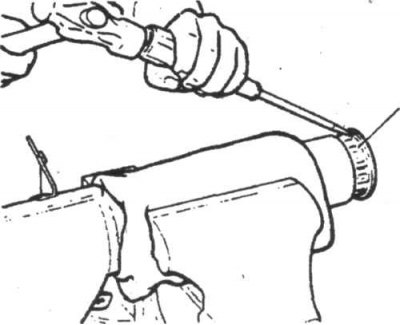
14.19 Remove the bushing by tapping around its circumference to prevent it from getting stuck in the tube
1. Bushing
19. Clamp the right suspension arm in a vice, remove the rubber stop and knock out the bushing (14.19).
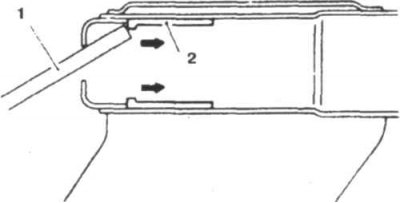
14.20 Using a hammer and punch, knock out bushing B from the suspension arm
1. Punching; 2. Bushing
20. Clamp the left lever in a vice and knock out the bushing (14.20).
21. Lubricate the new bushings and spring seats with grease and install them in place.
22. Lubricate the surface of the right suspension arm and install the rubber stop.
23. Install the anti-roll bar if necessary.
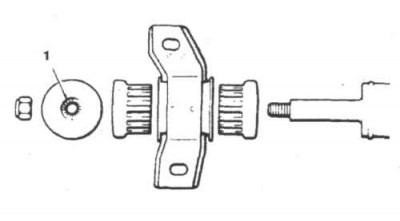
14.24 The fasteners must be installed as follows:
1. Teeth towards the sleeve
24. Install the crossmember halves onto the arms. Do not fully tighten the mounting nuts yet (14.24).
25. Install the boot, fill it with grease and tighten the clamp.
Installation (all models)
26. Installation is carried out in the reverse order of removal.
27. Bleed the brake system.