



Contents: Removal ⤓ Trailing arm suspension ⤓ Torsion beam suspension ⤓ Overhaul (only Olya suspension with…⤓ Installation (all models) ⤓
Removal
1. Loosen the nuts securing both rear wheels, lift the rear of the vehicle and place it on supports. The supports should be installed directly under the support points, and not under the rear suspension unit. Block the front wheels.
2. Disconnect the brake hydraulic lines from the rear wheel cylinders or brake mechanisms. If necessary, refer to Chapter 9.
3. Remove the rear brake drums or discs (see Chapter 9).
4. Unscrew the brake line clamps from the back of the suspension arms or torsion beam, then disconnect the lines from the flexible hoses on the brackets. After removing the brake lines, plug their ends to prevent contamination from entering the brake system.
5. Disconnect the brake shields from the rear axle by removing the hub assembly (disc brakes) and unscrewing the bolts (see Chapter 9). Disconnect the parking brake cables from the suspension arms and move the brake assemblies.
Note: If the hub assembly (disc brake) does not come off, use a special wheel and hub puller.
6. Remove the rear part of the exhaust system (see Chapter 4 if necessary).
Trailing arm suspension
7. Remove the coil springs (see section 12).
8. Support the rear axle with a jack, placing it under the center of the unit, where the two suspension arms intersect. If you have two jacks, support the unit on both sides at the mounting points.
9. Unscrew the mounting collars from the floor panel. Slowly lower the axle assembly, making sure all fasteners are released.
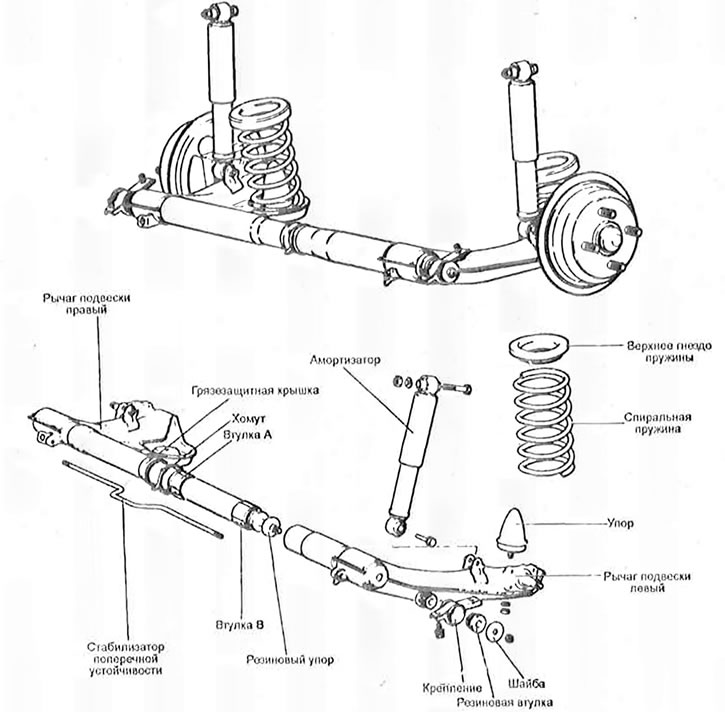
14.9a. Exploded view of the rear suspension with trailing arms
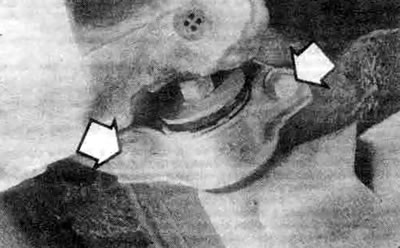
14.9b. The rear pillar mounting collars are secured to the floor panel with two bolts (shown by arrows)
Torsion beam suspension
10. Remove the cross rod (see section 11).
11. Unscrew the lower shock absorber mounting bolt and nut (see section 12).
12. Support the rear axle with a jack, placing it under the center of the unit. If you have two jacks, support the unit on both sides at the mounting points.
13. Loosen the torsion beam mounting bolts and slowly lower the torsion beam assembly.
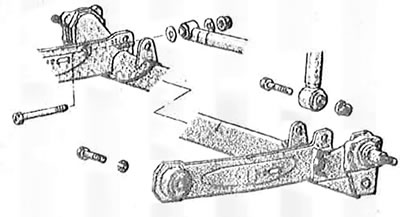
14.13. Exploded view of the rear suspension with a torsion beam
Overhaul (only Olya suspension with trailing arms)
14. The rear axle assembly consists of two separate suspension arms that can be removed for maintenance. The arms contain bushings that must be replaced if worn.
(The original was published on the website: «mitsubishiman.ru»)
15. Using a sharp tool or paint, make alignment marks on the collars and suspension arms.
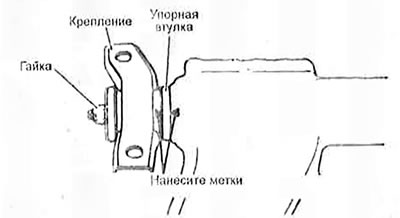
14.15. Before disconnecting the collars and suspension arms, apply alignment marks to them
16. Unscrew the fastening nuts of the collars to the suspension arms, then remove the collars from the arms. Check the rubber bushings on each collar for wear, cracks, and damage. If the bushings need to be replaced, knock them out with a hammer, then install new ones, again using a hammer (wet the bushings with soapy water before installing).
17. If the vehicle is equipped with a rear anti-roll bar, mark the position of the anti-roll bar in relation to its brackets (see section 10).
18. Remove the dust cap clamp and separate the levers.
19. Secure the right suspension arm in a vice, wrap it in a rag, remove the rubber stop, then knock the bushing out of the end of the tube.
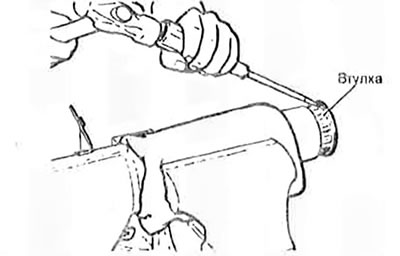
14.19. To facilitate removal, tap along the perimeter of the outer edge of the bushing
20. Secure the left suspension arm in a vice and knock the bushing out of the tube.
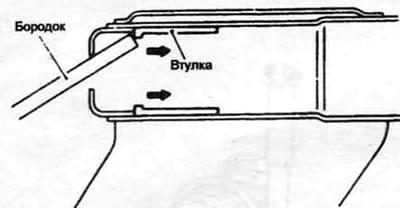
14.20. Using a hammer and punch, remove bushing B from the left suspension arm
21. Lubricate the new bushings and their seats with chassis grease, then install them using a drift. If you don't have a drift, use a large socket wrench or a length of pipe.
22. Apply chassis grease to the surface of the right suspension arm. Install the rubber stop.
23. Connect the right and left control arms together and install the stabilizer bar, if applicable. Align the marks on the stabilizer bar with the marks on the brackets.
24. Install the mounting collars onto the control arms (align the marks made in step 11). Make sure the collars and washers are installed correctly. Do not fully tighten the collar nuts.
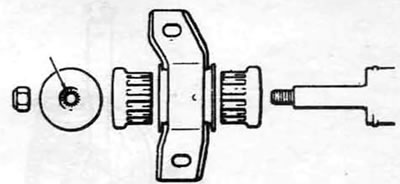
14.24. During installation, the clip must be installed as shown in this illustration
25. Apply grease to the dust cap and edges, tighten the clamp.
Installation (all models)
26. Install the axle in the reverse order. Tighten the collar mounting bolts to the floor panel to the torque specified in the specifications in this Chapter. Lower the vehicle to the ground and tighten the collar nuts to the torque specified in specifications of this Chapter.
27. Bleed the brake system (see Chapter 9).