



Contents: Adjusting the fog lights ⤓ Replacing lamps ⤓
Adjusting the fog lights
- Determine the center of the fog light empirically (Fig. 19.87).
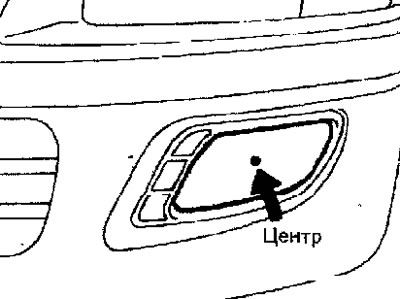
Fig. 19.87. Determining the center of the fog lights
- Place the vehicle at a distance of 5 m from the centers of the headlights to the screen (see fig. 19.77).
- Adjust the tire pressure to the required level. The vehicle must be in running order with a full fuel tank, a tool kit, and a spare tire.
- Only a driver weighing 75 kg should be in the car.
- Clean the headlight lenses.
- Start the engine and increase the crankshaft speed to 2000 min⁻¹.
- Make sure that the area of greatest illumination is located in accordance with the area highlighted in Figure 19.88.
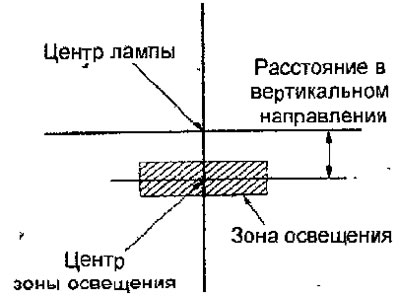
Fig. 19.88. Location of the headlight illumination zone on the screen
Nominal values:
- in the vertical plane: 100 mm below the horizontal line
- in the horizontal plane: a line parallel to the vehicle's axis
Note. The headlight does not have horizontal adjustment. If the light deviates from the nominal position, check the correct mounting of the headlight or defects affecting the installation.
- If necessary, adjust the headlights by turning the adjusting screw (Fig. 19.89).
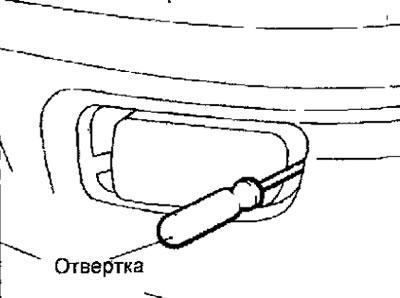
Fig. 19.89. Adjusting the fog light in the vertical plane
Replacing lamps
- Disconnect the cable from the negative battery terminal.
- Use a screwdriver to remove the screw securing the fog light trim (Fig. 19.90). Using a flat-head screwdriver, carefully pry up and remove the fog light trim.
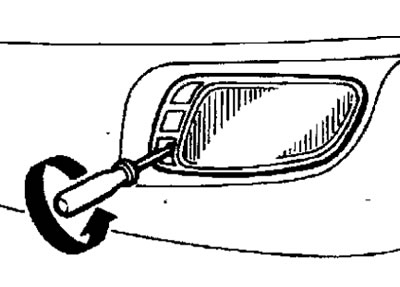
Fig. 19.90. Unscrewing the screw securing the fog lamp trim
- Disconnect the connector attached to the fog light bracket.
- Remove the fog light.
- Turn the protective cover counterclockwise (Fig. 19 91).
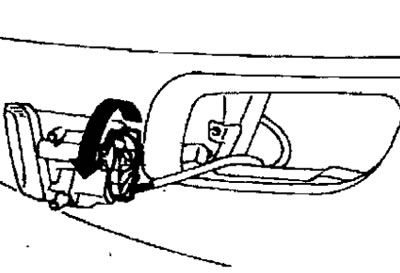
Fig. 19.91. Direction of rotation when removing the cover from the fog lamp
- Compress the spring clips of the lamp mount, move them to the side and remove the lamp from the fog lamp (Fig. 19.92). Do not touch the surface of the halogen lamp with your hands or dirty gloves.
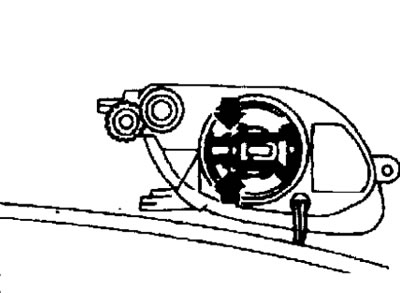
Fig. 19.92. Directions of compression of spring clips when removing fog lamp bulb
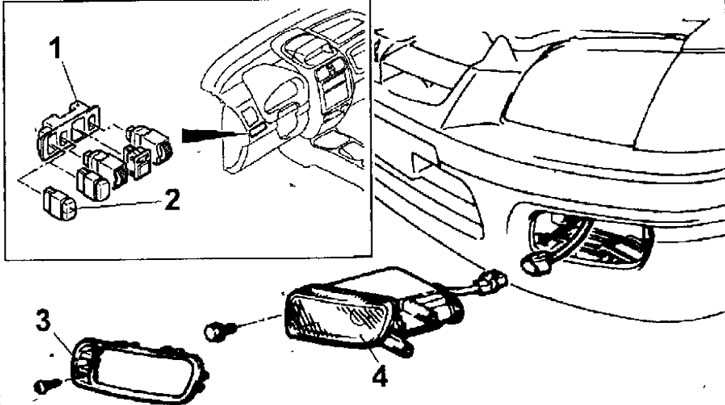
Fig. 19.93. Fog lights: 1 - decorative trim for switches; 2 - fog light switch; 3 - fog lamp trim; 4 - fog light
Warning: If the surface of the lamp is dirty, wipe it with alcohol or solvent and dry it well before installing it in the headlight.
- Checking the fog light switch
- Disconnect the cable from the negative battery terminal.
- To remove the headlight range control switch, use a screwdriver to lever off the switch trim, then disconnect the connector, squeeze the latches and remove the fog light switch.
- Check the conductivity between the contacts in different positions of the fog light switch (Fig. 19.94).
(The text of the article was obtained from the website: MITSUBISHIMAN.ru)
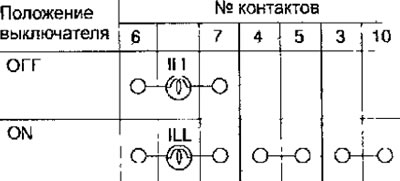
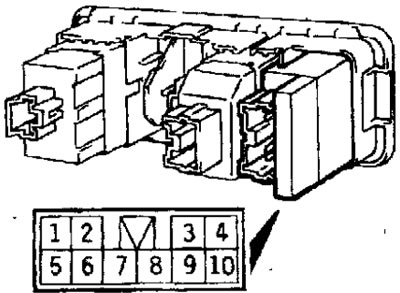
Fig. 19.94. Fog light switch connector pin location