



Radio
Removal
- Disconnect the cable from the negative battery terminal.
- Remove the lower center panel and disconnect the connector from the hazard warning light switch.
- Remove the screws and remove the radio with the bracket (Fig. 19.104). Disconnect the electrical connectors from the radio.
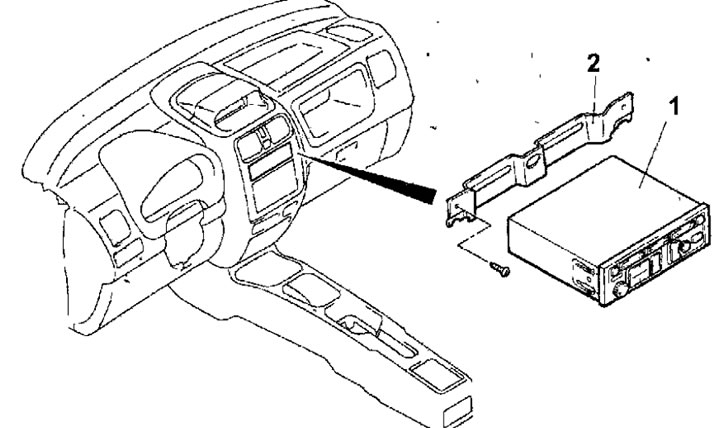
Fig. 19.104. Radio receiver: 1 - radio receiver; 2 - bracket
Installation
- Installation is carried out in the reverse order of removal.
Speakers
Removal
- Disconnect the cable from the negative terminal of the battery.
- Remove the front or rear door trim (see section "Body").
- Remove the screws and remove the speaker from the door (Fig. 19.105).
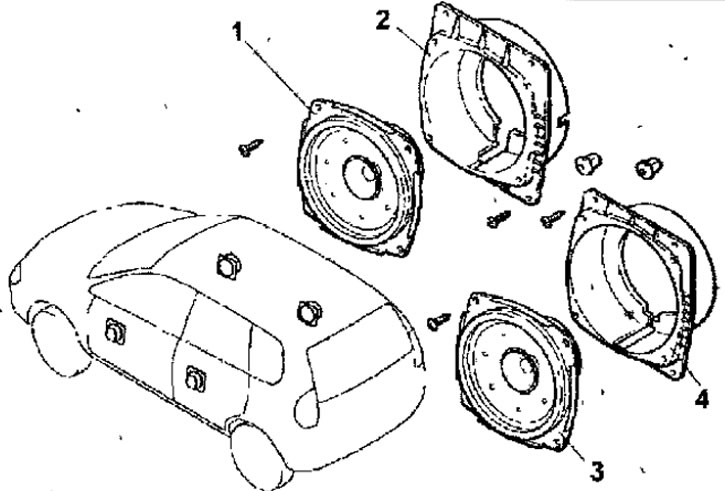
Fig. 19.105. Speakers: 1 - front door speaker; 2 - speaker casing; 3 - rear door speaker; 4 - speaker casing
- Disconnect the connector from the speaker.
- Use an ohmmeter to check the resistance of the speaker's voice coil.
- If the speaker makes a clicking sound when you connect the ohmmeter, it is good.
Installation
- Installation is carried out in the reverse order of removal.
Antenna
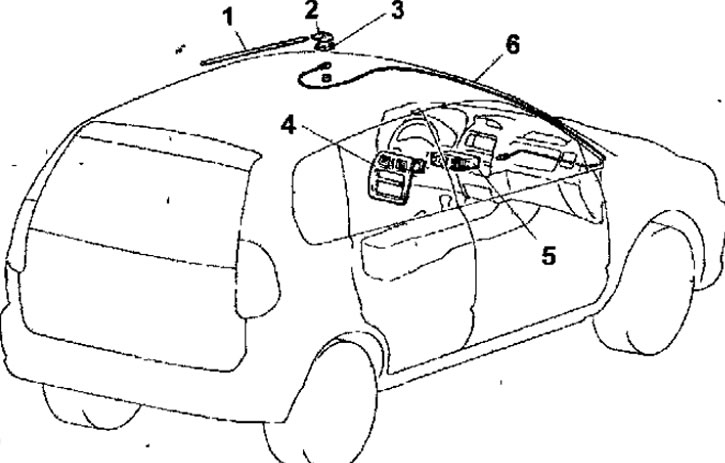
Fig. 19.106. Antenna: 1 - antenna rod; 2 - antenna base; 3 - antenna support; 4 - lower central panel; 5 - radio receiver; 6 - antenna wire
Removal
- Disconnect the cable from the negative terminal of the battery.
- Unscrew and remove the antenna rod.
- Remove the headlining.
- Unscrew the nut and remove the antenna base.
- Remove the lower center panel (see section "Body").
- Remove the radio.
- Remove the upper and lower A-pillar trims on the front passenger side.
- Remove the antenna wire.
Installation
- Installation is carried out in the reverse order of removal.