



Examination
- Start the engine and let it run at 2000 rpm.
- Turn on the rear window defroster. Connect the negative probe of the voltmeter to the vehicle ground. Connect the voltmeter probe to the center of each conductive strip of the rear window defroster in turn (Fig. 19.107). The voltmeter should show a voltage of about 6 V.
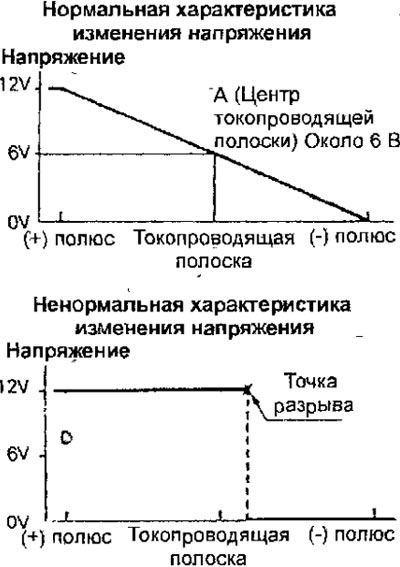
Fig. 19.107. Checking the rear window defroster
- If the voltmeter shows a voltage of 12 V at point A, then the heater's conductive strip has a break on the side between the voltmeter connection point and the side of the heater connected to ground.
- If the voltmeter shows voltage below 0 V; this means that the heater's conductive strip has a break on the side between the voltmeter connection point and the side of the heater connected to the positive terminal of the battery.
- To determine the break point, move the probe along the heater's conductive strip in the appropriate direction. The point where the voltage shown by the voltmeter changes abruptly is the break point.
Checking the rear window defroster relay
- Remove the rear window heater relay (Fig. 19 108).
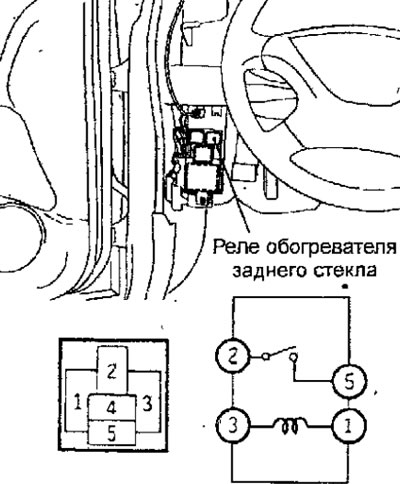
Fig. 19.108. Location of rear window heater relay and relay connector contacts
- Check the conductivity between the relay contacts.
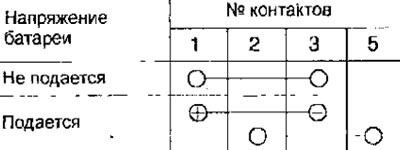
- If the conductivity differs from the required value, replace the relay.
Checking the rear window defroster switch
- Using an ohmmeter, measure the resistance between the contacts of the heating and air conditioning control unit connector (Fig. 19.109).
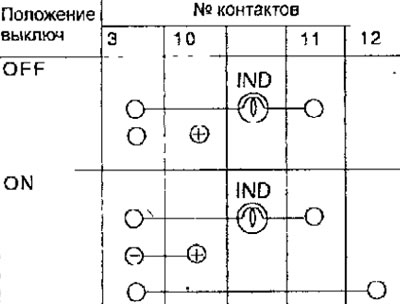
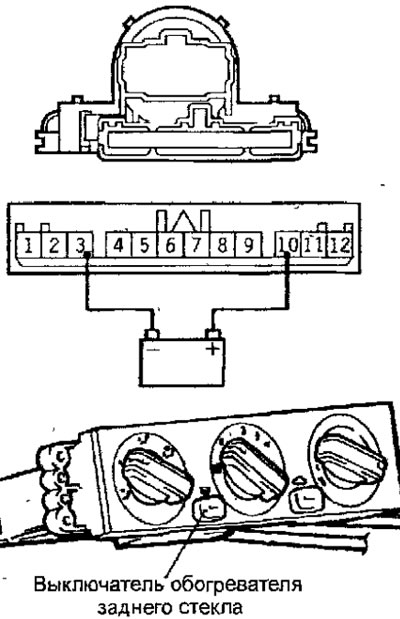
Fig. 19.109. Location of contacts of the connector of the heating and air conditioning control unit
- If the conductivity is different from the required value, replace the switch.
Note: Turn on the rear window defogger switch, then check for continuity between pins 3 and 12 of the connector 9-13 minutes after turning off the switch.