



Contents: Removal ⤓ Installation ⤓
Removal
1. Raise the vehicle and remove the front wheel.
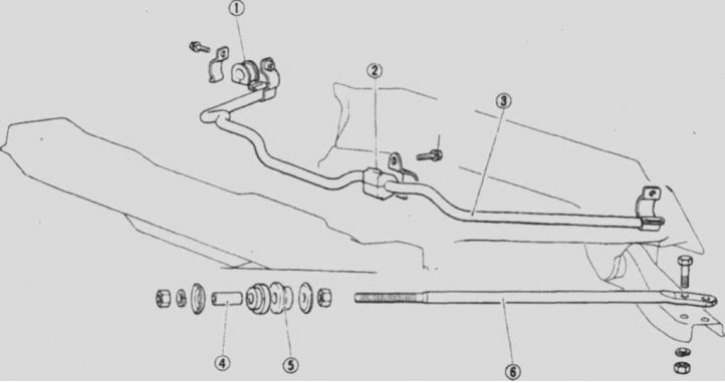
2.6a Anti-roll bar elements and struts (Precis)
1. Bushing; 2. Bushing; 3. Anti-roll bar; 4. Bushing; 5. Bushing; 6. Spacer
2. Remove the clamp securing the anti-roll bar to the strut (2.6a).
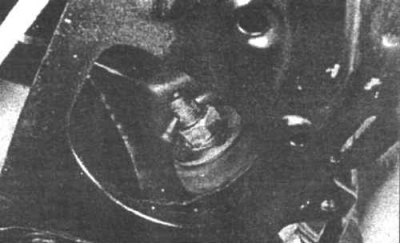
3.3a To remove the spacer, unscrew the large nut and remove the washer and bushing...
3. Unscrew the nut securing the anti-roll bar to the front suspension crossmember and the two bolts and nuts securing the other end of the strut to the suspension arm (3.3a and 3.3b).
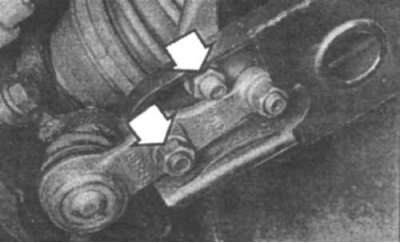
3.3b...then unscrew the two bolts and nuts (indicated by arrows) securing the strut to the suspension arm
4. Remove the large washer and rubber bushing from the strut, then remove the strut from the crossmember.
5. Check the strut for cracks and deformation. If the strut is bent more than 3 mm, replace it. Inspect the bushings for signs of wear, cracks and other damage and replace them if necessary.
Installation
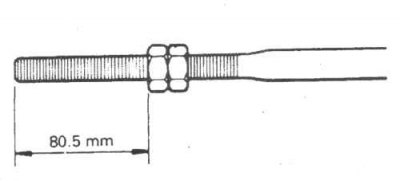
3.6 Tighten the inner locknuts on the spacer to a distance of 80.5 mm from the end of the spacer
The text of the article was taken from the website [mitsubishiman.ru]
6. Before installing the spacer, tighten the internal locknuts onto the spacer (3.6).
7. Install the inner washer and bushings onto the strut and insert the strut into the crossmember. Install the two bolts and nuts securing the strut to the control arm and tighten them to the specified torque.
8. Install the outer bushing, washer and nut onto the spacer.
9. Install the clamp and bolt securing the stabilizer bar to the strut. Lower the vehicle to the ground and tighten the bolt.
10. Tighten the outer nut on the spacer to the required torque.
11. Check the front wheel alignment.