



Note: To avoid scalding, hoses should only be removed after the engine has cooled down.
Removal
- Hoses and tubes provide connections between the elements of the engine cooling system.
- Drain the coolant from the cooling system.
- Remove the upper engine cover.
- Remove the air filter.
- Before removing the coolant outlet pipe, remove the intake manifold.
- The sequence for removing the hoses and tubes of the cooling system is shown in Figures 5.22 and 5.23.
- Mark the radiator hose clamps and hoses, then loosen the clamps and disconnect the upper and lower hoses from the radiator.
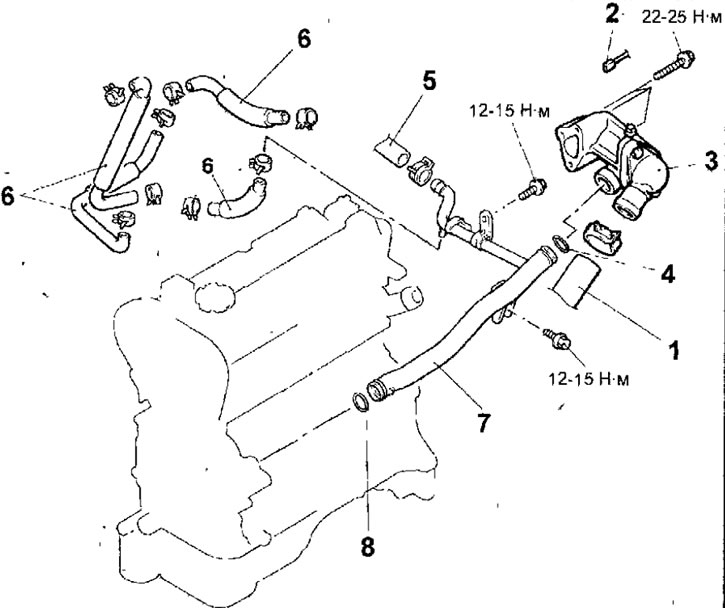
Fig. 5.22. Hoses and tubes of the 4G9 engine cooling system:1 - lower radiator hose; 2 - coolant temperature sensor connector; 3 - thermostat; 4 - sealing ring; 5 - heater hoses; 6 - cooling system hose; 7 - cooling system outlet pipe; 8 - sealing ring
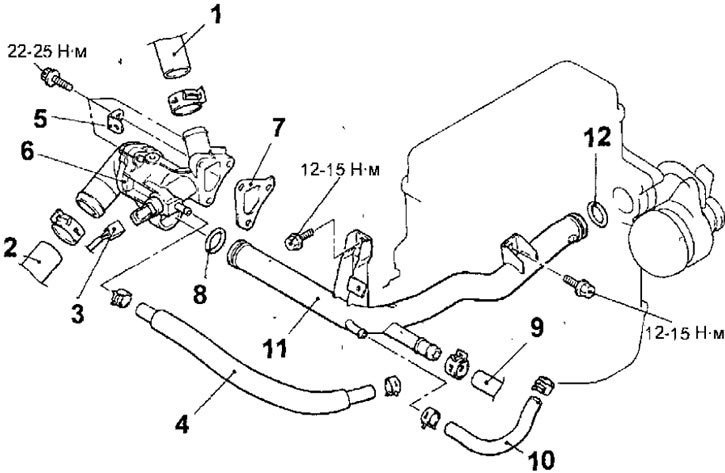
Fig. 5.23. Hoses and tubes of the 4G1 engine cooling system: 1 - Upper radiator hose; 2 - lower radiator hose; 3 - wiring harness connector; 4 - cooling system hose; 5 - clamp; 6 - thermostat; 7 - gasket; 8 - sealing ring; 9 - heater hoses; 10 - cooling system hose; 11 - Cooling system outlet pipe; 12- sealing ring
Examination
- Check the cooling system tubes and hoses for cracks, damage, abrasions and internal plugs.
Installation
- Installation is carried out in the reverse order of removal, taking into account the following.
- Place the hoses on the fittings so that their ends reach the protrusions on the fittings.
- Secure the hose with a clamp, aligning the marks on the hose and clamp.
- Clean the mating surface of the thermostat housing.
- Apply a 3.0 mm bead of sealant to the mating surface of the thermostat housing (Fig. 5.24).
Sealant: Mitsubishi Genuine Part # MD970389
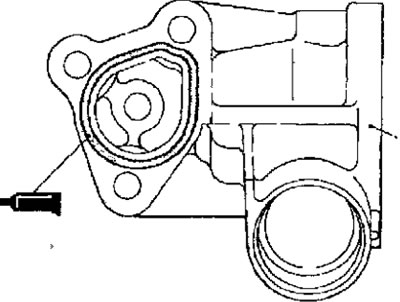
Fig. 5.24. Places where sealant is applied to the mating surface of the thermostat housing
- Install a new O-ring into the groove on the front end of the coolant pipe and wet the O-ring with coolant. Insert the end of the pipe into the coolant outlet (Fig. 5.25). Do not allow engine oil or grease to come into contact with the O-ring surface.
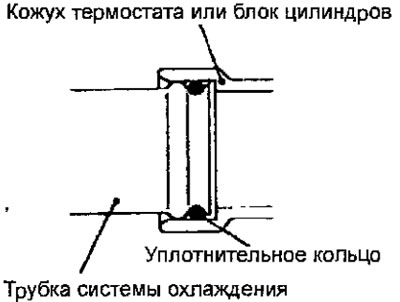
Fig. 5.25. Installing the sealing ring on the cooling system pipe
- Fill the cooling system with coolant.
- Start the engine and check for leaks in the cooling system.
- Check the coolant level.