
Warning. Do not remove the radiator cap when the engine is hot, as escaping vapors can cause severe burns. Close the radiator cap with a thick rag and slowly unscrew the cap until the escaping steam hisses. After the steam stops coming out, slowly unscrew and remove the cap from the radiator.
Removing
- Disconnect the wire from the negative battery terminal.
- Drain the coolant from the cooling system.
- Turn out bolts and remove an adjusting lath of the generator (pic. 5.17).
- Turn out bolts and remove the water pump.
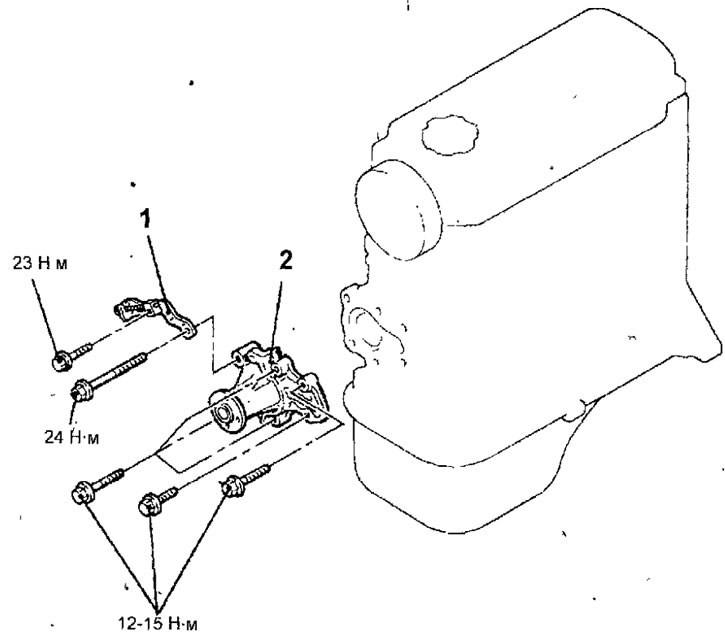
Pic. 5.17. 4G1 engine water pump: 1 - adjusting bar of the generator; 2 - water pump
Examination
- Check each part for cracks, damage or wear and replace the pump assembly if necessary.
- Rotate the water pump shaft and check for smooth rotation and no noise.
- Check for coolant leaks from the pump. If there is a leak, the pump seal is faulty. If necessary, replace the water pump.
Installation
- Installation is carried out in the reverse order of removal, taking into account the following.
- Clean the mating surfaces of the water pump and cylinder block.
- Apply a 3.0mm sealant to the mating surface of the water pump (pic. 5.18).
Sealant: Mitsubishi Genuine Part No. MD970389
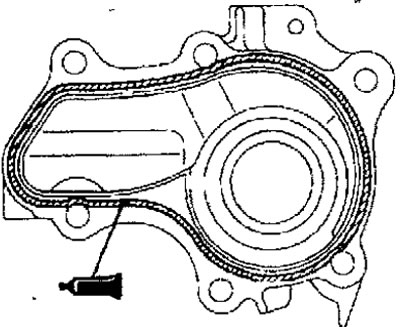
Pic. 5.18. Places for applying sealant to the mating surface of the water pump
Install the water pump and secure with bolts, while not forgetting that the water pump bolts are of different lengths (pic. 5.19).
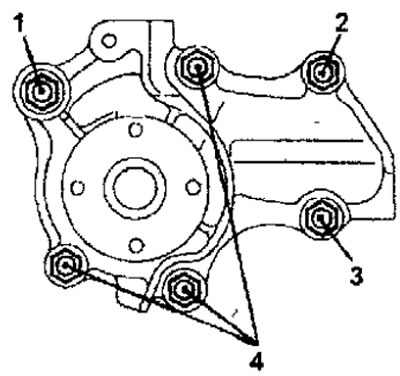
Pic. 5.19. The location of the water pump mounting bolts for vehicles with gasoline engines: 1 - bolt, 8x50; 2 - bolt, 8x25; 3 - bolt, 8x14; 4 - bolt, 8x30
- Install the alternator adjusting bar and secure with bolts, tightening them to the required torque.
- Install the timing belt drive of the gas distribution mechanism.
- Fill the cooling system with the required amount of the required coolant.
- Connect the wire to the negative battery terminal.
- Start the engine and check for leaks from the cooling system.
- Check coolant level.