



Contents: Replacement ⤓ Installing cables ⤓ Ventilation and heating cable ⤓ Air recirculation system cable ⤓ Temperature control cable ⤓
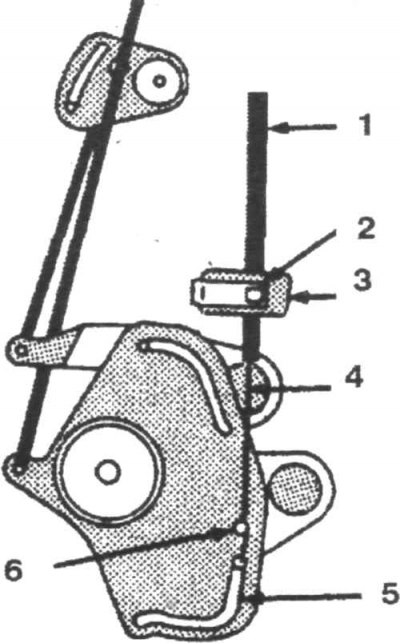
12.4a Control cable fasteners.
1. Tube; 2. Clamp; 3. Bushing; 4.Cable; 5. Emphasis; 6. Rear window heating system operating mode selection pin
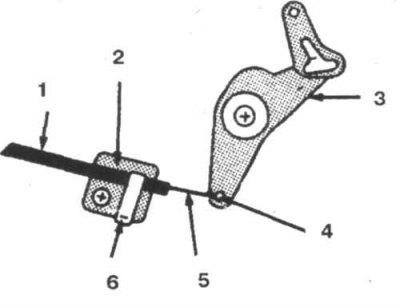
12.4b Air recirculation cable fasteners
1. Tube; 2. Cable mounting bracket; 3. Air recirculation system lever; 4. Air conditioning system operating mode selection pin; 5. Cable; 6. Clamp
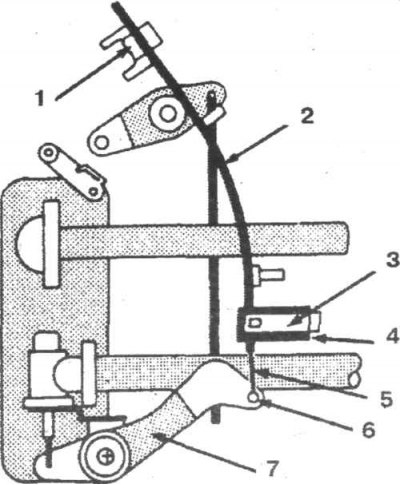
12.4v Temperature cable fastening parts
1. Tube bracket; 2. Tube; 3. Clamp; 4. Cable mounting bushing; 5. Cable; 6. Heating and cooling system operating mode selection pin; 7. Water supply lever
Replacement
1. Disconnect the negative battery cable.
2. Remove the instrument panel trim panel.
3. Remove the glove box and console covers.
4. Remove the clamps from the cables, disconnect the cables from the control lever stud and separate them.
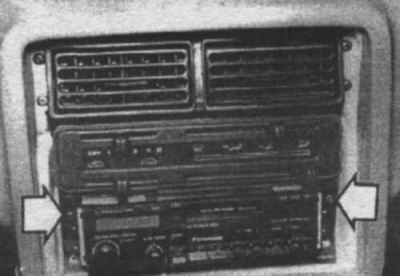
12.5 Screws for fastening the air conditioning and heating system control unit (indicated by arrows).
5. Loosen the fastening screws of the air conditioning and heating system control unit (12.5).
6. Disconnect the instruments from the panel.
7. Installation is carried out in the reverse order of removal.
Installing cables
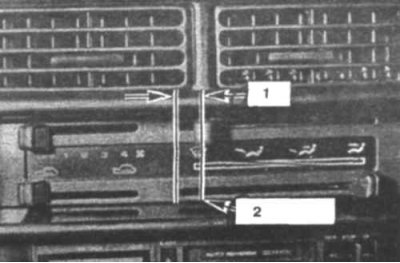
12.8 To replace the cable, set the system lever to heating mode.
1. 8 mm; 2. Standard position of the lever
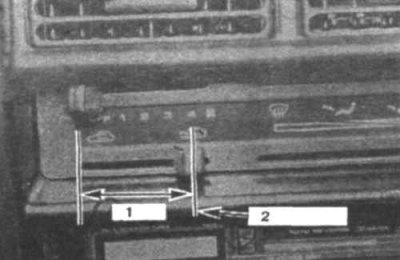
12.9 To replace the cable, set the air recirculation system lever to the fan off mode.
1. 53 mm; 2. Standard position of the lever
This procedure is shown in Figures 12.8, 12.9 and 12.10.
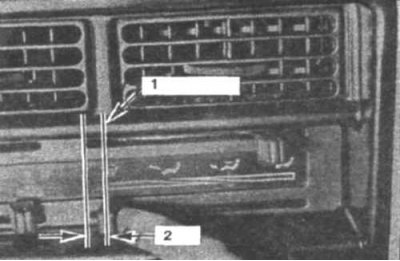
12.10 To replace the cable, set the temperature lever to the extreme left position
1. Standard position of the lever; 2. 8 mm
Ventilation and heating cable
8. Turn on the heating system (12.8). Set the lever to the minimum heating level, attach the cable to the lever and replace the clamp.
Air recirculation system cable
9. Turn off the fan (12.9). Set the lever to the minimum ventilation level, attach the cable to the lever and replace the clamp.
Temperature control cable
10. Set the heating system lever to the left position, set the water valve lever to the maximum level, attach the cable to the lever and replace the clamp (12.10).
The material was borrowed from the website [mitsubishiman.ru]