



Contents: Engines with volumes of 1.2 / 1.3 /…⤓ Option with built-in ignition coil ⤓ Engines with volumes of 1.2 / 1.3 /…⤓ Engines with volumes of 1.3 / 1.5 l…⤓ 16-valve engines with volumes of…⤓
On engines with a mechanical interrupter ignition system, the ignition timing should be checked, and possibly adjusted, after adjusting the breakaway contacts and as part of maintenance.
On engines with transistor ignition, the ignition timing is usually not knocked down. However, it should be checked as part of maintenance. The ignition timing should be set after loosening the ignition distributor.
On engines with a distributorless ignition system, setting the ignition timing is not required.
To make it easier to check the ignition timing, it is recommended to apply markings with white paint on the crankshaft pulley and on the timing belt cover.
To check and set the ignition timing, you will need an engine speed meter and a stroboscope.
On engines with a mechanical interrupter ignition system, the closing angle is set, see the corresponding section.
Warm up the engine to operating temperature (coolant temperature 80°-90°C). Turn off the engine.
Turn off all electrical consumers.
Set the gearbox to neutral, apply the handbrake. With an automatic transmission, set the lever to position "P".
Engines with volumes of 1.2 / 1.3 / 1.5 l
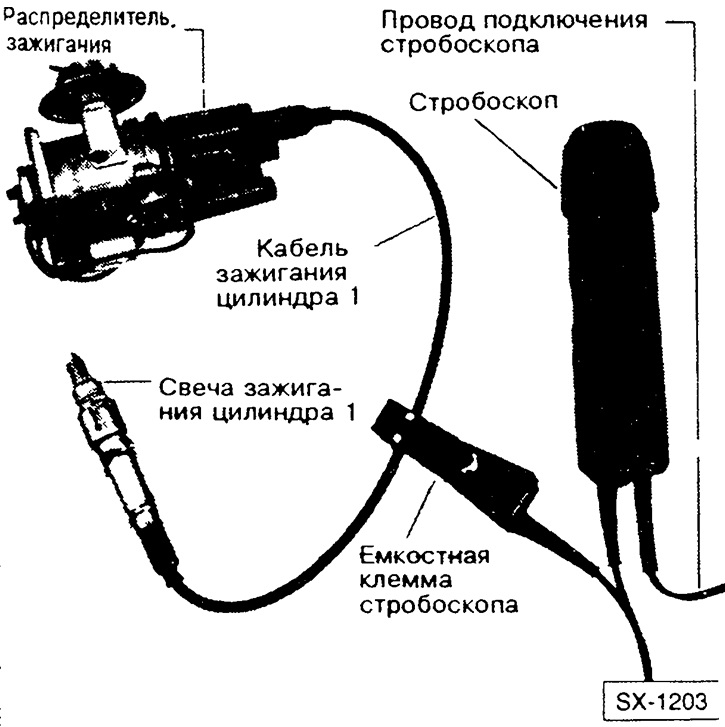
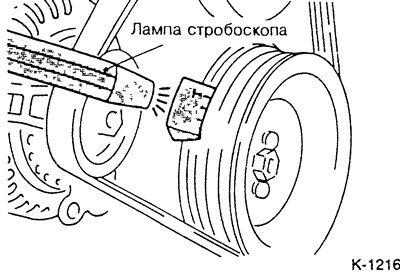
Connect the engine speed meter and stroboscope in accordance with the manufacturer's operating instructions.
Option with built-in ignition coil
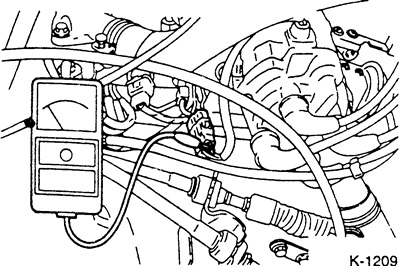
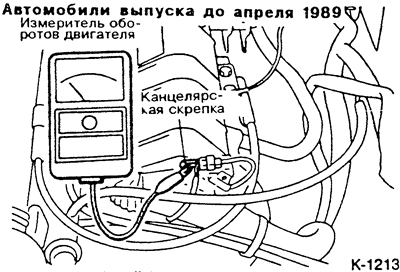
If the vehicle is equipped with an ignition coil integrated into the ignition distributor and a tachometer is not installed, the RPM signal can be read as shown in the figure.
Start the engine and let it idle.
On engines with an FBC carburetor, press the gas pedal once to engage fast idle mode.
Check if the speed is within 700-900 rpm, otherwise adjust the speed.
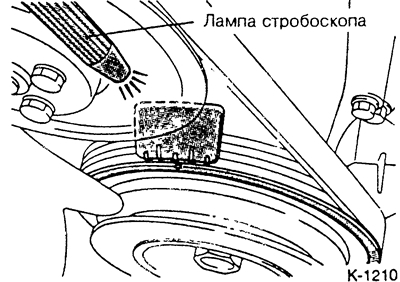
Aim the stroboscope lamp at the TDC mark on the crankshaft pulley.
The ignition timing is set correctly if, when illuminated by the stroboscope lamp, the mark on the crankshaft pulley is opposite the required mark on the toothed belt casing. The required ignition timing values are contained in the table in paragraph 5.2.
Engines with volumes of 1.2 / 1.3 / 1.5 l produced from January 1984 to August 1990.
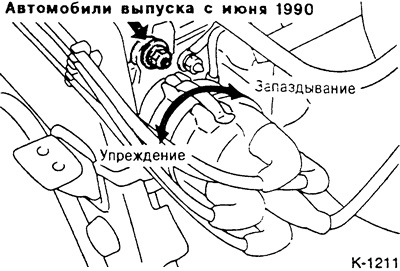
Engines with volumes of 1.3 / 1.5 l produced from September 1990 to March 1992.
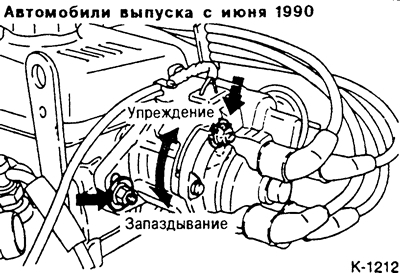
If the ignition timing marks do not match, loosen the distributor clamp nut(s) and adjust the ignition timing by turning the distributor.
Tighten the ignition distributor fastening to 10 Nm.
Disconnect the measuring instruments with the ignition off.
At the service station, the inertial and vacuum correction of the ignition timing at various engine speeds is additionally checked. But this is only required if there are any malfunctions in the ignition system.
Check idle speed, adjust if necessary, see item. 7.4/8.4.
16-valve engines with volumes of 1.6/1.8 l
On vehicles with power steering, set the steering wheel to the "straight ahead" position.
 |  |
Connect the engine speed meter and stroboscope according to the manufacturer's operating instructions.
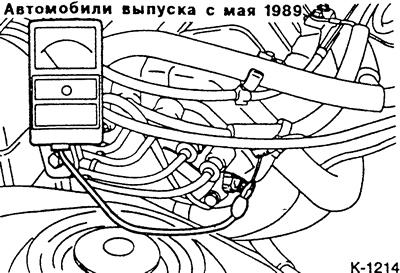
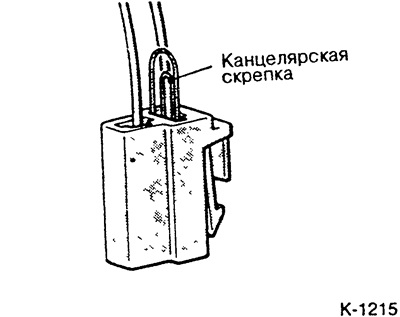
Attention: Insert a paper clip into the diagnostic connector as shown in Figure K-1215, and connect the engine speed meter as shown in Figures K-1213 and K-1214.
Note: On engines manufactured from May 1989 to March 1992, the engine speed meter only shows half the true value. Therefore, to obtain the true engine speed, the reading must be multiplied by 2.
Check the idle speed. If it is outside the range of 850±100 rpm, check the idle speed controller.
Turn off the ignition.
Remove the plug from the terminal to set the ignition timing.
Connect the ignition timing terminal to ground via the auxiliary wire, ensuring good contact.
Start the engine and let it idle.
Check the ignition timing setting and compare with the required ignition angle value, see p. 5.2.
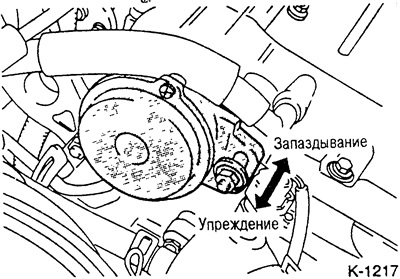
If the ignition timing is outside the tolerance, loosen the crankshaft position sensor mounting nut. Set the ignition timing by turning the sensor as shown in the figure.
Tighten the fastening nut.
Turn off the ignition.
Disconnect the auxiliary wire. Put the plug on the ignition installation connector.
Check the ignition timing again and compare with the reference value.
Note: The ignition timing may vary within ±7°. If the test is performed at high altitude (above 1000 m above sea level), another 5° may be added to the reference value.