



General information
The ignition advance angle is the angle by which the crankshaft rotates between the moments of ignition of the mixture in each successive cylinder. The measurement is made relative to the TDC of the end of the compression stroke of the corresponding piston, the result is expressed in angles before or after TDC
Ideally, the air-fuel mixture in the combustion chamber of the cylinder should be ignited at the moment the piston passes the TDC position at the end of the compression stroke. In this case, the explosively increasing pressure in the cylinder will push the piston down, thereby causing the rotation of the engine crankshaft. Due to the fact that spark formation between the spark plug electrodes/ignition of the mixture takes some time (fractions of a second), ignition should be performed slightly before the piston reaches the TDC position, otherwise the maximum pressure pushing the piston will not be achieved, which will lead to a decrease in the torque developed by the engine.
If the ignition timing is set at 10° before TDC, the air-fuel mixture in each cylinder will ignite at the moment when the corresponding piston reaches the corresponding position (10° before TDC at the end of its compression stroke). This is only true when the engine is idling. Maximum engine efficiency/fuel economy can be achieved if the combustion process in the cylinders is completed within 23° after TDC of the corresponding piston.
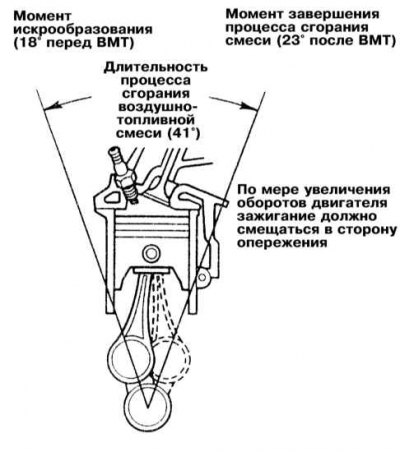 | 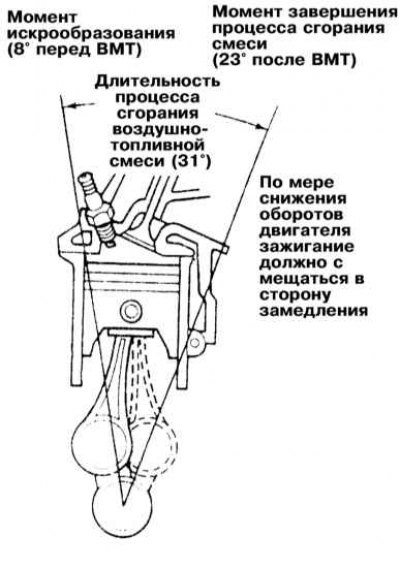 |
As the engine speed increases, the pistons begin to move faster, and the spark plugs must ignite the air-fuel mixture so that its combustion occurs even slightly before the moment when the corresponding piston reaches the TDC position. If the ignition is set too early, the increasing pressure in the cylinder will prevent the piston from moving upward, which leads to the occurrence of a characteristic knock, colloquially called detonation. Too late ignition, as already mentioned above, leads to a noticeable decrease in the efficiency of the engine.
There are special installation marks on the rim of the crankshaft pulley and the timing cover. The mark on the pulley corresponds to the TDC position of the end of the compression stroke of the piston of the first cylinder, to the spark plug wire of which the stroboscope should be connected when checking/adjusting the ignition timing (make sure that the stroboscope connection wiring does not touch the blades of the cooling system fan!). In this case, the flashes of the lamp will occur synchronously with the moments of spark formation between the electrodes of this spark plug. By directing the stroboscope beam at the rim of the pulley, you can easily determine the position of the piston of the first cylinder at the moment the mixture begins to ignite - the mark on the rim of the pulley will "freeze" opposite the corresponding division of the scale fixed to the timing cover. During the ignition timing adjustment, it is necessary to achieve compliance with the regulatory requirements for this car model (see below).
Checking and adjusting
Models produced between 1990 and 1996.
1. Set the parking brake, start the engine and warm it up to normal operating temperature. Switch off all on-board electrical consumers, set the front wheels of the car to the straight-ahead position. Engage neutral gear (models with manual transmission)/move the selector lever to position "P" (models with automatic transmission).
2. Make sure the idle speed is set correctly.
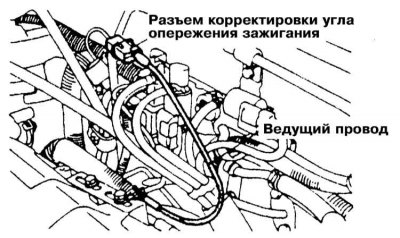
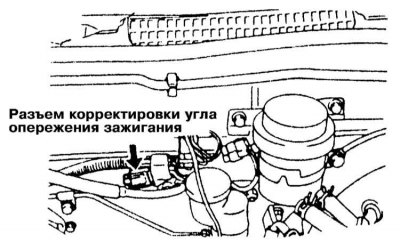
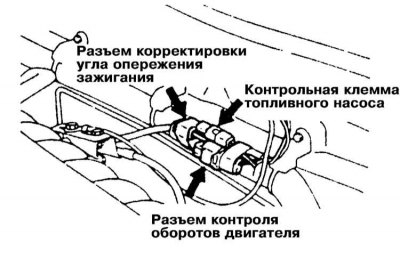
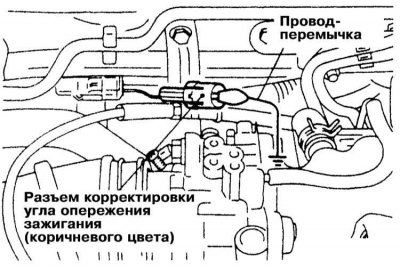
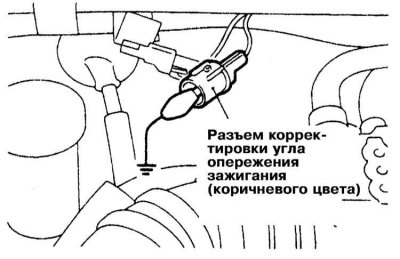
3. Turn off the engine, remove the splash guard from the ignition timing adjustment connector. Using a jumper wire, ground the connector terminal to ground.
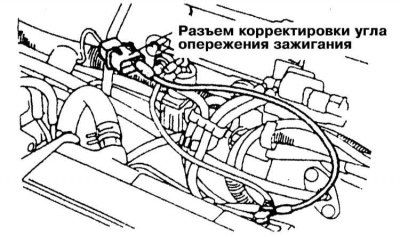 |  |
 |  |
 | 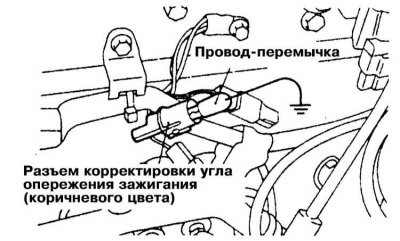 |
4. Connect the tachometer, connect the stroboscope to the high-voltage wire of the spark plug of the first cylinder. Start the engine and leave it running at idle speed.
5. Direct the stroboscope beam at the timing scale attached next to the crankshaft pulley.
6. Loosen the distributor/crankshaft angle sensor clamp nut.
7. Rotate the distributor/sensor housing to achieve the required setting value for the ignition timing angle, then tighten the fasteners and stop the engine.
8. Remove the jumper wire and install the splash guard on the connector.
9. Start the engine and repeat the test, this time without grounding the connector - the reading should move approximately 5° upwards from the base setting. The ECU may be able to adjust the ignition timing for a particular combination of input parameters.
10. Turn off the engine, disconnect the stroboscope and tachometer.
Models produced in 1997-2000.
On these models, the ignition timing is set and adjusted automatically under the control of the electronic control module (ECM). The check can be performed using a special diagnostic reader (scanner).