
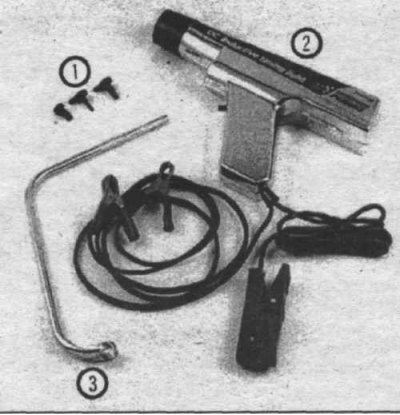
37.1 Tools required for checking and adjusting ignition timing
1. Plugs; 2. Stroboscope; 3. Special shaped wrench
1. Special equipment is required to check and adjust the ignition timing (37.1).
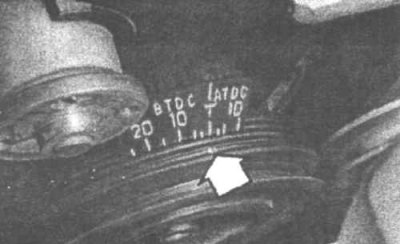
37.2 The ignition timing marks are located on the front side of the engine (drive belt removed for clarity) - align the notch on the pulley with the corresponding mark on the ruler
2. Use chalk or paint to mark the position of the notch on the pulley (37.2).
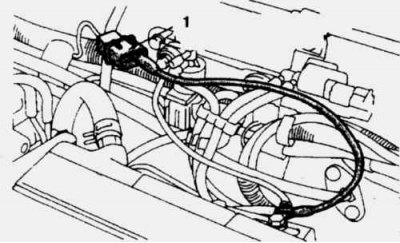
37.3 Models with fuel injection should have a connector similar to the one shown in the figure in the engine compartment. Ground the connector terminal.
1. Connection socket required to adjust the ignition timing
3. Connect a stroboscope. On models with fuel injection, ground the adjusting connector (37.3).
4. Wait until the idle speed stabilizes, then point the strobe beam at the ignition timing bar.
5. The mark on the pulley must be stationary. If it is aligned with the indicated mark on the ruler, then the ignition timing is correct.
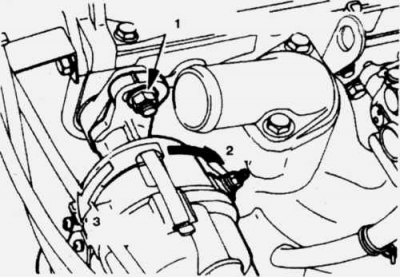
37.6 After unscrewing the adjusting nut, turn the distributor (or crankshaft position sensor) for adjusting the ignition timing
1. Distributor mounting nut; 2. Reducing the ignition timing; 3. Increasing the ignition timing
6. If the marks are not aligned, adjustment is required. Unscrew the mounting nut of the distributor and the crankshaft position sensor (37.6) and turn the distributor or sensor very slowly to align the marks.
7. Tighten the nut and check the ignition timing.
8. Turn off the engine and disconnect the stroboscope.