English Русский
Български
Беларускі
Український
Српски
Hrvatski
Română
Polski
Slovenský
Magyar
Articles Bookmark Contacts Sitemap   
Company Audi Company Ford Company Hyundai Company Kia Company Mazda Company Mercedes-Benz Company Nissan
MitsubishiMan.ru


Home Colt Lancer Galant L200 Outlander Pajero Others
Galant 6 and 7 (1987-1998) Galant 5 (1983-1989, petrol)

Removal, checking and installation the release bearing and clutch release fork (Mitsubishi Galant 6)

  • Home
  • Galant
  • 6 (1987-1998)
  • Transmission
  • Clutch
  • Removal, checking and installation the release bearing and clutch release fork
0
Contents: Removal ⤓ Examination ⤓ Installation ⤓
Remember that dust generated during wear of the clutch slave disk friction linings may contain asbestos, which is harmful to health. Do not blow off dust with compressed air and try not to inhale it. Do not use petroleum-based solvents to wipe clutch components - use only special brake cleaners or pure methyl alcohol. Place used rags in a hermetically sealed container before disposal.

Removal


1. Remove the clutch slave cylinder assembly (see Section Removal and installation the clutch slave cylinder).

2. Remove the gearbox (see Chapter Manual gearbox).

3. Remove the clutch release lever holder from the spherical joint ball pin.
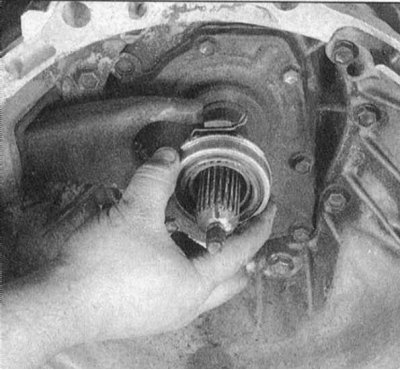


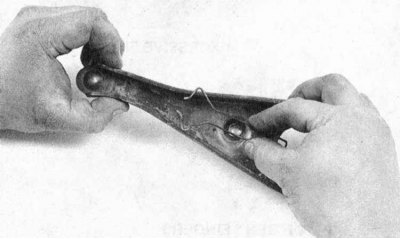
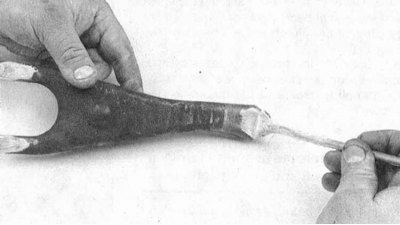
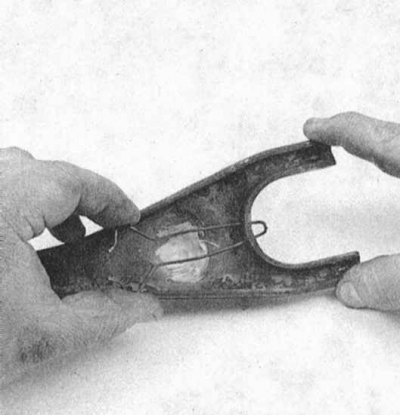
4. Try to remember how the release lever pins are secured to the release bearing with a spring clip. Remove the bearing from the lever assembly, then from the gearbox input shaft journal. Remove the clutch release lever. Assess the condition of the lever's rubber protective boot, and replace the boot if necessary. Assess the condition of the lever's wire holder, and replace it if necessary. Check the clutch release lever for cracks and signs of deformation.


Examination


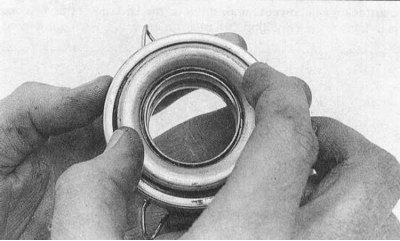
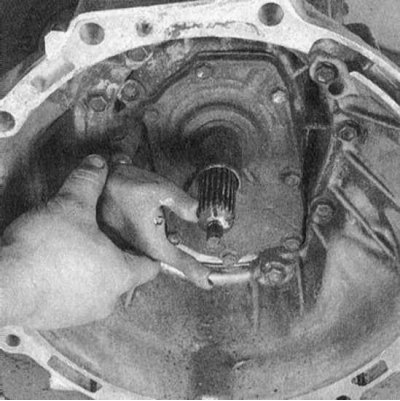
Holding the bearing by the outer race, press the inner race with two fingers and rotate it. The bearing should rotate freely and silently, otherwise it must be replaced. Wipe the bearing with a clean rag and inspect it for signs of wear, cracks and other mechanical damage. Typically, the release bearing is replaced every time the clutch components are serviced. Never wash the bearing in solvent to avoid compromising the tightness of its assembly.

Installation


1. Lubricate the contact surfaces of the clutch release lever with high-melting grease. If necessary, seat a new spring retainer in place. Pack grease into the inner groove of the release bearing. Also lubricate the bearing retainer on the primary shaft journal.
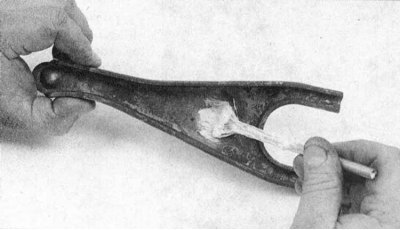


2. Install the release bearing onto the release lever assembly, making sure the components are securely fastened.

3. Lubricate the surface of the ball pin of the spherical support of the lever with high-melting grease, pass the lever through the dust cover, seat the bearing on the shaft journal, then snap the lever onto the support pin. Check the freedom of movement of the bearing on the shaft journal.
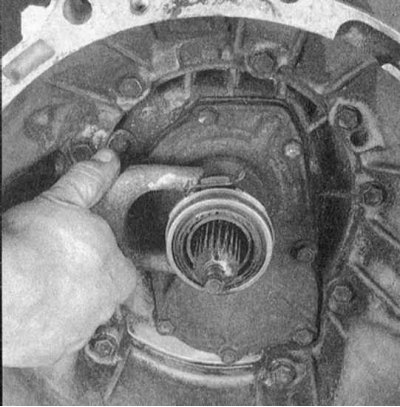

4. Lightly lubricate the surface of the release bearing that contacts the petals of the diaphragm spring of the pressure plate with high-temperature grease.

5. Further installation is carried out in the reverse order of dismantling the components. Make sure that the transmission-to-engine mounting bolts are tightened to the required torque (see Specifications in Chapter Manual gearbox).
This article is available at: russian, bulgarian, belarusian, ukrainian, serbian, croatian, romanian, polish, slovak, hungarian
This article was reviewed by: Dmitry Vasiliev
Share with friends:
◀ Previous
Galant 6 and 7: Clutch
Next ▶

Removal, inspection and installation of clutch assembly components
Clutch — General information and component condition check
Clutch and transmission line specifications
Checking the condition and replacing the guide bearing
Adjusting the clutch pedal
Clutch cable adjustment, cable assembly removal and installation (Mirage models)
Removal and installation the clutch master cylinder
Removal and installation the clutch slave cylinder
Similar materials for other Mitsubishi models

➤ Release Bearing, Clutch Release Fork and Fork Axle —… Mitsubishi Colt 2 and 3 (1983-1993)
➤ Removal and installation the release bearing Mitsubishi Lancer 3 and 5 (1984-1992)
➤ Removal and installation the clutch release fork Mitsubishi L200 4 (2005-2014, diesel)
➤ Checking the level of working fluid in the clutch hydraulic… Mitsubishi Outlander 1 (2003-2008)
➤ Clutch release sensor (vehicles with manual transmission) Mitsubishi Pajero 1 and 2 (1982-1999)
➤ Checking the clutch release sensor Mitsubishi Carisma (1995-2004)
Link in different formats to this article
Comments and feedback from visitors
No comments yet


Add up two numbers 28 + 38


Galant 6 and 7 (1987-1998) 
  • General information
  • Introduction to guide
  • User manual
  • Driving and operation
  • Maintenance
  • Power unit
  • Dismantling the engine
  • Engine overhaul
  • Cooling and heating
  • Power and exhaust systems
  • Engine electrical equipment
  • Engine management systems
  • Transmission
  • Mechanical gearbox
  • Automatic gearbox
  • Clutch
  • Drive shafts and transfer case
  • Chassis and running gear
  • Brake system
  • Car suspension
  • Steering
  • Body and interior
  • Exterior (external elements)
  • Interior (internal elements)
  • Doors, locks and windows
  • Electrical equipment
  • Equipment and devices
  • Wiring diagrams Galant
  • Wiring diagrams Mirage
  • Wiring diagrams Diamante
Galant 5 (1983-1989, petrol) 
  • General information
  • Troubleshooting
  • Maintenance
  • Power unit
  • Engine repair
  • Engine overhaul
  • Cooling and heating
  • Fuel and exhaust system
  • Engine electrical equipment
  • Reducing exhaust toxicity
  • Transmission
  • Manual gearbox
  • Automatic gearbox
  • Clutch and drive shafts
  • Chassis and running gear
  • Brake system
  • Car suspension
  • Steering
  • Body and interior
  • Exterior (external elements)
  • Interior (internal elements)
  • Doors, locks and windows
  • Electrical equipment
  • Equipment and devices
  • Electrical diagrams
MitsubishiMan.ru © 2018–2026 • Mobile version • Articles about Mitsubishi • Contacts • Sitemap: EN BG BY UA RS HR RO PL SK HU • Site search • Bookmark
Colt 2 and 3 (1983-1993) · Colt 4 and 5 (1991-2003) · Colt 5 (1995-2003) · Lancer 3 and 5 (1984-1992) · Lancer 9 (2000-2007) · Galant 5 (1983-1989) · Galant 6 and 7 (1987-1998) · L200 4 (2005-2014) · Outlander 1 (2003-2008) · Pajero 1 and 2 (1982-1999) · Pajero 4 (2006-2021) · Carisma (1995-2004) · Space Star (1998-2005) ·
This resource sets cookies 🍪 to avoid bothering you with repeated data entry.