
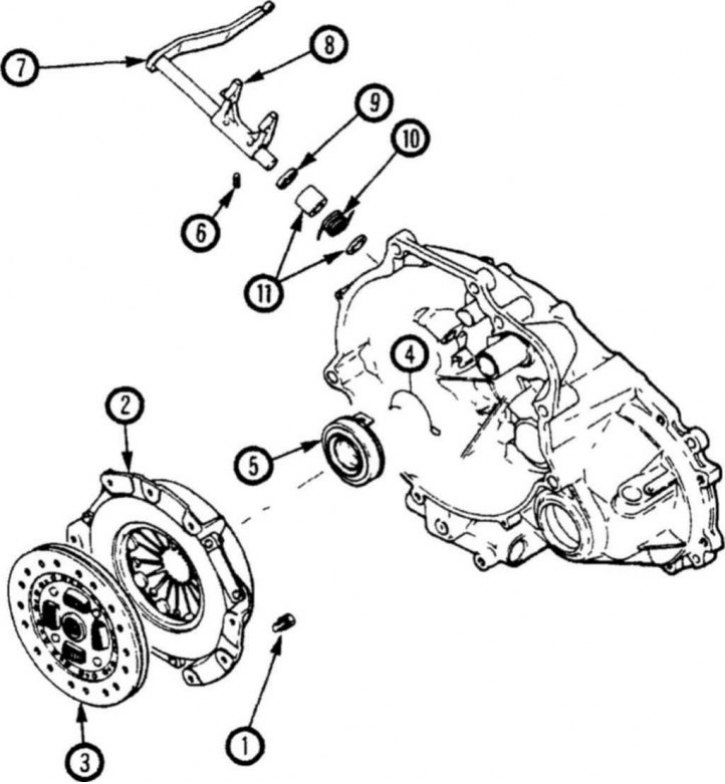
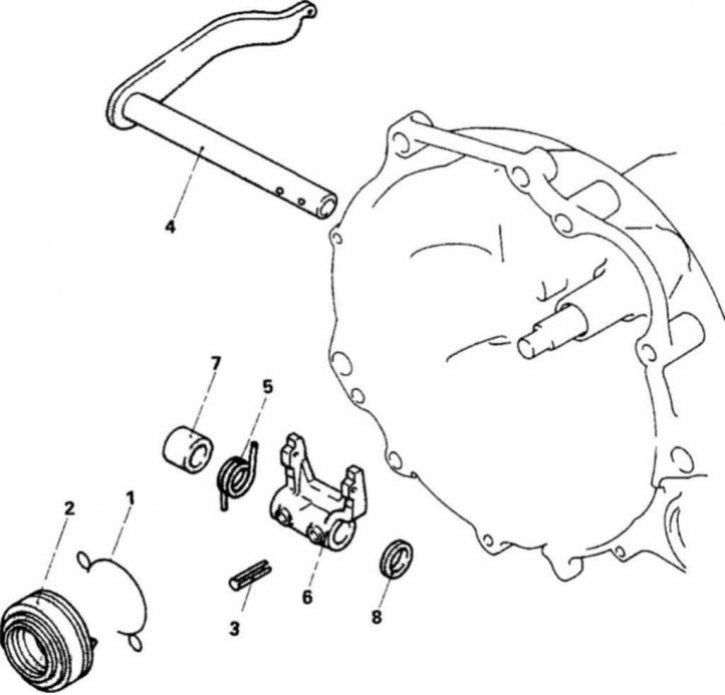
2.1 Clutch elements - models with a mechanical clutch release
1. Bolts for fastening the pressure plate to the flywheel; 2. Pressure plate; 3. Driven disk; 4. Mounting clip release bearing; 5. Release bearing; 6. Spring pin; 7. Axis of the clutch release fork; 8. Clutch release fork; 9. Oil seal; 10. Return spring; 11. Washers
2. Using pliers, remove the release bearing retaining clip from the fork (2.1).
3. Get the bearing from a casing. Be careful not to lose the mounting spring.
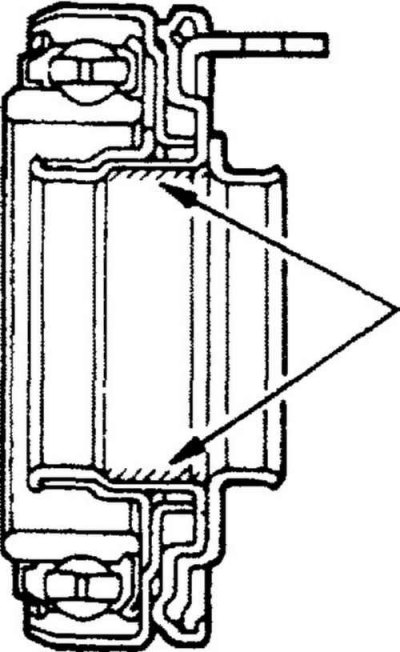
4. Check the bearing and if it rotates poorly or noisy, it must be replaced.
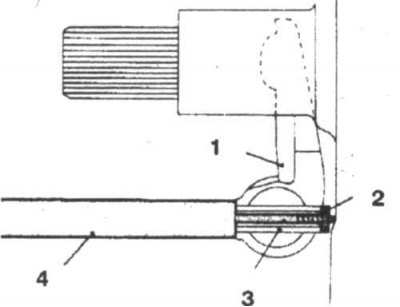
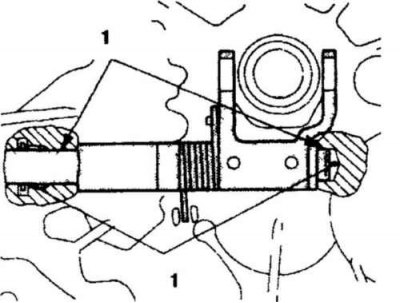
Clutch release fork mounted on axle
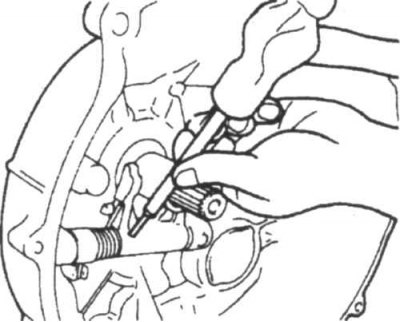
4.5a If there is enough space, knock out the spring pins with a punch and a hammer
4.5b If there is not enough space, remove the pin with a puller - the figure shows a Mitsubishi puller (MD998807)
1. Clutch release fork; 2. Nut; 3. Spring pin; 4.MD99B807
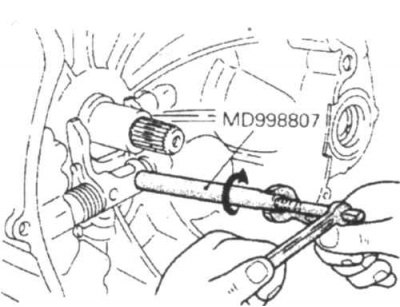
4.5c After installing the puller, turn the head clockwise to remove the pin
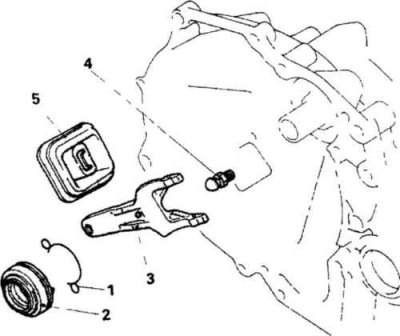
4.5g Release fork and release bearing elements
1. Mounting clip; 2. Release bearing; 3. Spring pin; 4. Axis; 5. Return spring; 6. Clutch release fork; 7. Washer; 8. Washer
5. Inspect fork ends for excessive wear. To replace the fork, knock out or remove the spring pin with a puller (4.5a, 4.5b, 4.5c and 4.5d) and remove the fork, spring and washers.
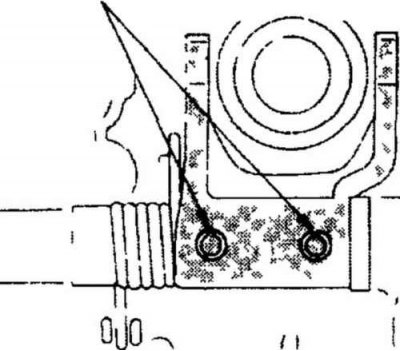
4.6a Lubricate the indicated areas with high temperature grease
1. Lubrication
4.6b Install spring pins cut up
1. Cut
6. Lubricate the release fork shaft seat with high temperature grease (4.6a), slide the axle out of the way and install the washers, spring and yoke. Install new spring pins (4.6b).
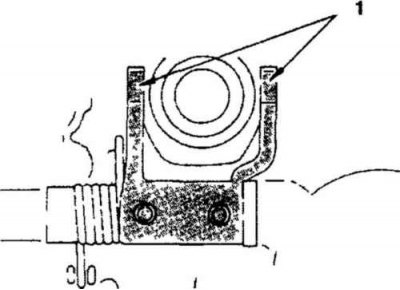
4.7a Lubricate the indicated areas with high temperature grease
1. Lubrication
4.7b Lubricate the inner groove of the release bearing with high temperature grease
7. Lubricate the ends of the clutch release fork with high temperature grease (4.7a). Also lubricate the inner surface of the release bearing (4.7b) and install it on the fork.
8. Install the bearing retaining clip.
9. Install the gearbox on the vehicle.
Ball joint release fork
4.10 Fastening elements of the clutch release fork with ball joint
1. Mounting clip; 2. Release bearing; 3. Clutch release fork; 4. Ball joint; 5. Plug cover
10. Inspect fork ends for excessive wear and replace fork if necessary (4.10).
11. Lubricate the contact surfaces before installing the plug.
12. Installation is carried out in the reverse order of removal.